Category Archives: Blog

How to Clean Wooden Cabinet Doors: A Friendly Guide

How to Clean Wooden Cabinet Doors: A Friendly Guide

Keeping your wooden cabinet doors clean and well-maintained not only adds to the aesthetic appeal of your home but also ensures their longevity. However, with daily use, cabinet doors can accumulate grease, grime, and dirt, making them look dull and dirty. Cleaning wooden cabinet doors might seem like a daunting task, but with the right tools and techniques, it can be a breeze.

One of the most important things to keep in mind when cleaning wooden cabinet doors is to avoid using harsh chemicals or abrasive materials that can damage the surface of the wood. Instead, opt for gentle cleaning solutions that are safe for wood and effective in removing dirt and grime. In this article, we will explore some simple yet effective ways to clean your wooden cabinet doors using natural and safe cleaning solutions that won’t harm your cabinets. So, let’s get started and give your cabinet doors the TLC they deserve!

Understanding the Material

how-to-clean-wooden-cabinet-doors-a-friendly-guide-2

When it comes to cleaning wooden cabinet doors, it’s important to understand the material you’re working with. Different types of wood and finishes require different cleaning methods to avoid damage. In this section, you’ll learn about the types of wood commonly used for cabinets and the finishes that protect them.

Types of Wood

Wooden cabinets can be made from a variety of wood types, each with its own unique characteristics. Here are some of the most common types of wood used for cabinet doors:

Wood Type Characteristics
Oak Durable, heavy, and strong with prominent grain patterns
Maple Hard and heavy with a fine, uniform grain pattern
Cherry Moderately hard with a smooth, even grain pattern and reddish-brown color
Pine Soft and lightweight with a prominent grain pattern and pale color
Birch Hard and heavy with a fine, uniform grain pattern and light color

Finish of the Wood

Wooden cabinet doors are typically finished with a protective coating that helps preserve the wood and enhance its appearance. Here are some of the most common finishes used for cabinet doors:

  • Varnish: A clear, hard finish that provides excellent protection against moisture and wear.
  • Lacquer: A clear, hard finish that dries quickly and provides a high-gloss appearance.
  • Wax: A natural finish that provides a soft, low-luster appearance and some protection against moisture.
  • Oil: A penetrating finish that enhances the natural beauty of the wood and provides some protection against moisture.

It’s important to be aware of the finish on your cabinets when choosing a cleaning method. Some finishes are more sensitive to moisture and harsh chemicals than others, and using the wrong cleaning method can cause damage to the wood or finish.

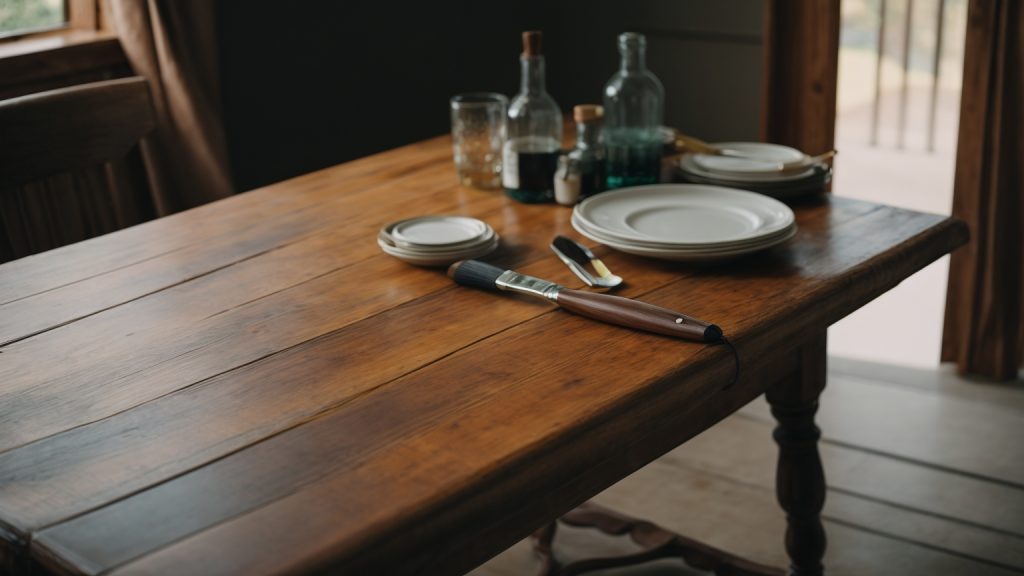
Gathering Cleaning Supplies

Before you start cleaning your wooden cabinet doors, it’s important to gather all the necessary cleaning supplies. Here are the essential cleaning products and additional cleaning tools you’ll need:

Essential Cleaning Products

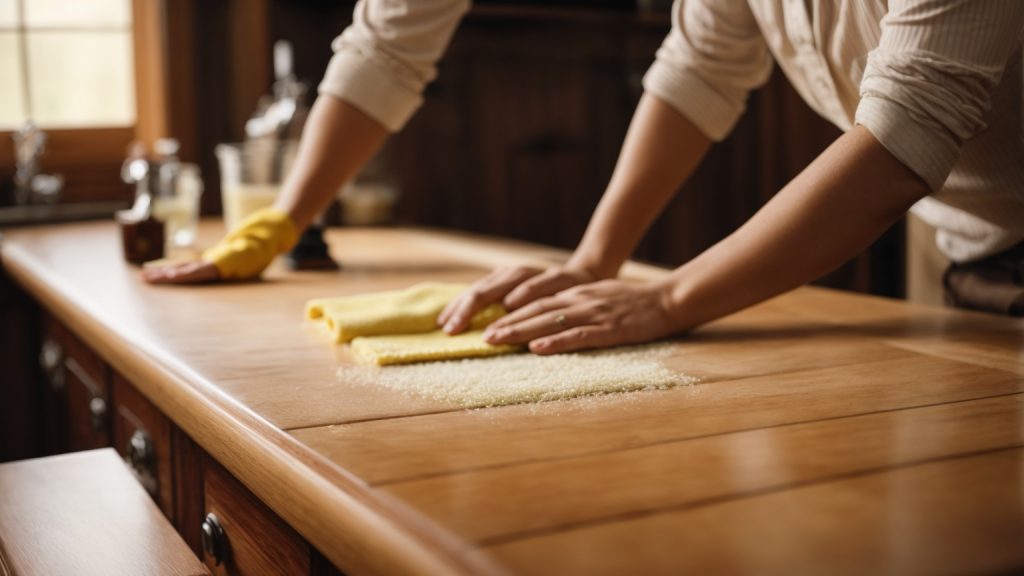
  1. Gentle soap solution: Mix a few drops of mild dish soap with warm water in a bucket or spray bottle. This solution will help remove dirt and grime without damaging the wood finish.
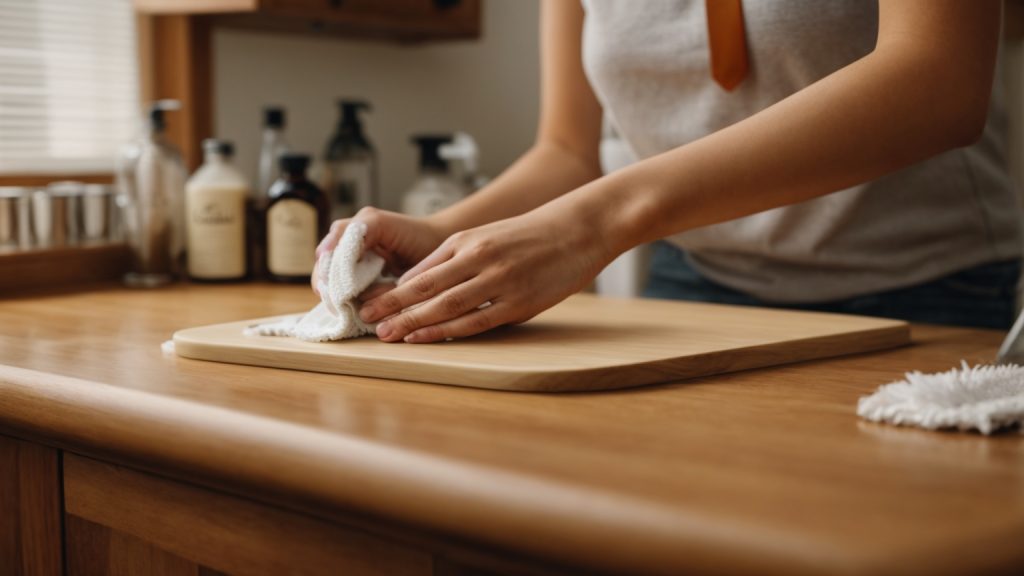
  2. Microfiber cloths or sponge: These are gentle on the wood surface and won’t scratch or leave lint behind. Use them to wipe down the cabinet doors and remove any soap residue.
  3. Water: You’ll need plenty of clean water to rinse the soap solution off the cabinet doors.
  4. Wood polish or conditioner (optional): If you want to give your wooden cabinet doors an extra shine, apply a small amount of wood polish or conditioner after cleaning. This will also help protect the wood from future damage.

Additional Cleaning Tools

  1. Vacuum cleaner with crevice tool: Use a vacuum cleaner with a crevice tool attachment to remove any dust or debris from the corners and edges of the cabinet doors.
  2. Oil soap solution: If your wooden cabinet doors have a glossy finish, you can use an oil soap solution like Murphy’s Oil to clean them. This will help remove any grease or grime buildup.
  3. Soft-bristled brush: Use a soft-bristled brush to gently scrub away any tough stains or grime on the cabinet doors.

By gathering these essential cleaning products and additional cleaning tools, you’ll be ready to clean your wooden cabinet doors with ease.

Pre-Cleaning Steps

Before you start cleaning your wooden cabinet doors, there are a few pre-cleaning steps that you should follow to ensure that you don’t damage the wood or the finish.

Dusting the Cabinet Doors

The first step is to dust the cabinet doors. Dust and dirt can accumulate on the surface of the doors, making it difficult to clean them properly. Use a soft cloth or a feather duster to remove the dust from the doors. Make sure that you dust the entire surface of the doors, including the corners and the edges.

Removing Surface Stains

If there are any surface stains on the cabinet doors, you should remove them before you start cleaning. You can use a mild detergent or a cleaner specifically designed for wooden surfaces to remove the stains. Apply the cleaner to a soft cloth and gently rub the stained area. Be careful not to use too much pressure, as this can damage the wood or the finish.

If the stains are particularly stubborn, you can use a mixture of baking soda and water to create a paste. Apply the paste to the stained area and let it sit for a few minutes. Then, use a soft cloth to wipe away the paste. Rinse the area with water and dry it thoroughly.

By following these pre-cleaning steps, you can ensure that your wooden cabinet doors are ready for a deep clean.

Deep Cleaning Process

When it comes to deep cleaning your wooden cabinet doors, you want to make sure you’re using the right cleaning solution and technique. Here’s a step-by-step guide on how to deep clean your wooden cabinet doors.

Applying the Cleaning Solution

First, you’ll want to apply the cleaning solution to the wooden cabinet doors. You can make your own solution by mixing equal parts of warm water and vinegar or use a commercial wood cleaner. Apply the solution onto a microfiber cloth or sponge and wipe down the doors, making sure to get into all the crevices and corners.

Scrubbing the Doors

After applying the cleaning solution, you’ll want to scrub the doors to remove any built-up grime and dirt. Use a soft-bristled brush or sponge to scrub the doors in a circular motion. Be sure not to scrub too hard, as this can damage the wood’s finish.

If you have any stubborn stains or marks, you can use baking soda mixed with water to create a paste. Apply the paste to the stain and let it sit for a few minutes before scrubbing it away.

Rinsing and Drying

Once you’ve finished scrubbing the doors, it’s time to rinse them off. Use a clean, damp cloth to wipe away any remaining cleaning solution or baking soda paste. Make sure to rinse thoroughly to avoid leaving any residue behind.

Finally, dry the doors with a clean, dry cloth. Make sure to remove all moisture to prevent any water damage to the wood. You may also want to apply a wood conditioner or polish to restore the wood’s shine and protect it from future damage.

By following these simple steps, you can deep clean your wooden cabinet doors and keep them looking their best for years to come.

maintaining-wooden-cabinet-doors


To keep your wooden cabinet doors looking their best, it’s important to establish a regular cleaning schedule and use protective products. Follow these simple steps to maintain your wooden cabinet doors.

Regular Cleaning Schedule

Regular cleaning is essential to keep wooden cabinet doors looking their best. Here are some tips to help you establish a regular cleaning schedule:

  • Dust your cabinet doors regularly with a soft, lint-free cloth to prevent the buildup of dust and dirt.
  • Clean your cabinet doors with a gentle soap solution and a damp cloth once a week. Mix a 50/50 solution of vinegar and warm water and pour it into a spray bottle. Mist on cabinets, let sit for a minute or two and then wipe clean with a soft cloth. Add a few drops of liquid dishwashing detergent to the vinegar and water solution to clean extremely grimy cabinets.
  • Dry your cabinet doors thoroughly after cleaning to prevent water damage.
  • Avoid using abrasive cleaners or scrubbers, as they can scratch the surface of the wood.

Using Protective Products

Using protective products can help to keep your wooden cabinet doors looking their best for longer. Here are some tips to help you choose the right protective products:

  • Apply a wood polish or conditioner to your cabinet doors every few months to help protect the wood and keep it looking its best. Use a soft cloth to apply the polish or conditioner, and follow the manufacturer’s instructions carefully.
  • Consider using a furniture wax to protect your cabinet doors from scratches and other damage. Furniture wax can also help to restore the natural shine of the wood.
  • Avoid using silicone-based products on your wooden cabinet doors, as they can cause buildup and discoloration over time.

By following these simple tips, you can keep your wooden cabinet doors looking their best for years to come.

Common Mistakes to Avoid

When it comes to cleaning your wooden cabinet doors, there are a few common mistakes that you should avoid to ensure that your cabinets stay in great condition for years to come. Here are some of the most important things to keep in mind:

Using Harsh Chemicals

One of the biggest mistakes that people make when cleaning their wooden cabinets is using harsh chemicals. While these chemicals may be effective at removing dirt and grime, they can also damage the finish of your cabinets over time. Instead, opt for a gentle cleaning solution that won’t harm the wood. You can make your own solution by mixing warm water with a mild dish soap or vinegar.

Neglecting Regular Dusting

Another mistake that people often make is neglecting to dust their cabinets regularly. Dust can accumulate quickly on wooden surfaces, and if left unchecked, it can scratch the finish and make your cabinets look dull. To avoid this, make sure to dust your cabinets at least once a week with a soft, dry cloth. You can also use a microfiber cloth or a feather duster to remove dust and cobwebs from hard-to-reach areas.

Over-saturating the Wood

Finally, it’s important to avoid over-saturating the wood when cleaning your cabinets. Too much moisture can cause the wood to warp or swell, which can damage the finish and make your cabinets look uneven. To avoid this, make sure to wring out your cleaning cloth or sponge thoroughly before wiping down your cabinets. You can also use a dry cloth to buff the wood after cleaning to remove any excess moisture.

By avoiding these common mistakes, you can keep your wooden cabinet doors looking great for years to come. Remember to use gentle cleaning solutions, dust your cabinets regularly, and avoid over-saturating the wood to ensure that your cabinets stay in top condition.

How to Build Wooden Shutters: A Beginner's Guide

How to Build Wooden Shutters: A Beginner's Guide

Are you looking for a way to add some charm to your home’s exterior? Wooden shutters can be a great addition to any home, providing both aesthetic appeal and functionality. With a little bit of effort and some basic woodworking skills, you can build your own custom shutters that perfectly fit your windows and match your home’s style.

Before you get started, it’s important to consider the purpose of your shutters. Are you looking to add some privacy to your home? Do you want to protect your windows during storms? Or are you simply looking to enhance your home’s curb appeal? Understanding your goals will help you choose the right materials and design for your shutters. Once you have a plan in place, building your own wooden shutters can be a fun and rewarding project.

Understanding the Basics of Wooden Shutters

how-to-build-wooden-shutters-a-beginners-guide-2

If you’re looking for a way to add some charm and character to your home’s exterior, wooden shutters are a great option. They’re not only functional but also aesthetically pleasing. Before you start building your own wooden shutters, it’s important to understand some basic concepts.

Types of Wooden Shutters

There are several types of wooden shutters, including:

  • Louvered shutters: These have angled slats that allow air and light to pass through.
  • Raised panel shutters: These have a solid panel that’s raised above the frame.
  • Board and batten shutters: These are made of vertical boards held together by horizontal battens.

Materials

The most common materials for wooden shutters are cedar and redwood. These woods are durable and naturally resistant to rot and insects. Other types of wood, such as pine or fir, can also be used but may not last as long.

Sizing

To determine the size of your shutters, measure the height and width of your windows. The shutters should be slightly larger than the window opening to ensure proper coverage. Keep in mind that shutters that are too small will look out of proportion, while shutters that are too large may overpower the window.

Hardware

Shutters are typically mounted to the house using hinges. You’ll need to choose the appropriate size and style of hinge based on the weight of your shutters. You may also want to consider adding decorative hardware, such as shutter dogs or holdbacks, to add some extra flair.

By understanding these basic concepts, you’ll be well on your way to building your own wooden shutters.

Choosing the Right Wood

When it comes to building wooden shutters, choosing the right wood is crucial. The type of wood you choose will affect the durability, appearance, and overall quality of your shutters. Here are some factors to consider when selecting the right wood for your shutters:

Durability

Wooden shutters are exposed to the elements, so it’s important to choose a wood that can withstand moisture, sunlight, and temperature changes. Cedar and redwood are popular choices because they are naturally resistant to decay and insect damage. Pine is also a good option for indoor and outdoor shutters since it’s durable and easily workable.

Appearance

The type of wood you choose will also affect the appearance of your shutters. Cedar has a warm, reddish-brown color and a distinctive grain pattern that can add character to your shutters. Redwood is also known for its natural beauty, with a rich, reddish hue that can complement a variety of home styles. If you prefer a more rustic look, elm wood shutters can give you a natural, weathered appearance.

Workability

Some woods are easier to work with than others, which can affect the installation process and the final look of your shutters. Pine is a soft wood that is easy to cut, sand, and finish, making it a popular choice for DIY shutter builders. Cedar and redwood are also workable, but they are harder and denser than pine, which can make them more difficult to shape and sand.

Cost

The cost of the wood will also be a factor in your decision. Cedar and redwood are more expensive than pine, but they are also more durable and have a more attractive appearance. If you’re on a budget, pine can be a good option since it’s affordable and readily available.

Overall, choosing the right wood for your shutters will depend on your personal preferences, budget, and the specific needs of your project. Consider the factors above and do your research to find the best wood for your shutters.

Gathering Your Tools

Before you start building your wooden shutters, it’s important to gather all the necessary tools. Here are the tools you will need to build your shutters:

Measuring Tools

To ensure that your shutters fit perfectly, you’ll need to use measuring tools. Here are the measuring tools you’ll need:

  • Tape measure
  • Speed square
  • Pencil

The tape measure will help you measure the dimensions of your windows, while the speed square will help you ensure that your cuts are straight and accurate. Don’t forget to use a pencil to mark your measurements.

Cutting Tools

Once you’ve measured your windows, it’s time to start cutting your wood. Here are the cutting tools you’ll need:

  • Circular saw
  • Jigsaw
  • Miter saw
  • Table saw

The circular saw is great for making long cuts, while the jigsaw is better for curved cuts. The miter saw and table saw will help you make precise cuts at different angles.

Finishing Tools

After you’ve cut your wood, you’ll need to finish your shutters. Here are the finishing tools you’ll need:

  • Sandpaper
  • Paint or stain
  • Paintbrush or roller
  • Screwdriver

Sandpaper will help you smooth out any rough edges, while paint or stain will help protect your wood from the elements. A paintbrush or roller will help you apply the paint or stain evenly. Finally, a screwdriver will help you attach your shutters to your windows.

By gathering these tools before you start building your shutters, you’ll be well-prepared to create a beautiful and functional addition to your home’s exterior.

Creating Your Design

Before you start building your wooden shutters, you need to create a design that fits your windows and complements your home’s exterior. Here are some steps to help you create your design:

Step 1: Measure Your Windows

Measure the height and width of your windows to determine the size of your shutters. Make sure to measure each window individually, as they may not all be the same size.

Step 2: Choose Your Louver Size and Type

Decide on the size and type of louvers you want for your shutters. Louvers are the horizontal slats that allow you to adjust the amount of light and air that enters your home. Rockler Woodworking and Hardware offers a free design wizard that can help you choose the right louvers for your shutters.

Step 3: Choose Your Material

Choose the type of wood you want to use for your shutters. Cedar, redwood, and cypress are popular choices because they are durable and weather-resistant.

Step 4: Decide on the Style

Decide on the style of your shutters. Board and batten shutters are a classic style that features vertical boards and horizontal battens. Plantation shutters have wider louvers and a more modern look.

Step 5: Create Your Design

Sketch out your design on paper or use a design software program to create a digital design. Make sure to include all the necessary measurements and details, such as the size and placement of the louvers and the number of boards and battens.

By following these steps, you can create a custom design that fits your windows and enhances the look of your home.

Measuring and Cutting the Wood

measuring-and-cutting-the-wood

Before you start building your wooden shutters, you need to measure and cut the wood to the appropriate size. Here are the steps to follow:

  1. Measure the Window: Measure the height and width of the window where you plan to install the shutters. Make sure to measure both the inside and outside of the window frame. This will ensure that the shutters fit properly and look balanced.
  2. Choose the Wood: Choose the type of wood you want to use for your shutters. Cedar, redwood, and cypress are popular choices because they are durable and weather-resistant. You can also use pine or poplar if you plan to paint the shutters.
  3. Cut the Wood: Use a saw to cut the wood to the appropriate size. The width of each board should be between 4 and 6 inches, depending on the size of your window. The length of each board should be equal to the height of the window.
  4. Sand the Edges: Use sandpaper to smooth the edges of each board. This will prevent splinters and make the shutters look more polished.
  5. Drill Holes: Use a drill to make holes for the hinges and screws. Make sure the holes are evenly spaced and aligned with the hinges.
  6. Paint or Stain: If you plan to paint or stain the shutters, do it before you install them. This will make it easier to cover all the surfaces and edges.

By following these steps, you can measure and cut the wood for your wooden shutters with ease.

Assembling the Shutter

Now that you have cut all the pieces of your wooden shutter, it is time to assemble them. Follow these steps to assemble your shutter:

  1. Lay out the vertical boards: Place the two outer vertical boards on a flat surface, facing up. Then, place the remaining vertical boards between them, evenly spaced.
  2. Attach the horizontal boards: Place the top and bottom horizontal boards on top of the vertical boards, lining them up with the edges. Then, attach them using wood glue and screws. Make sure to pre-drill the holes to avoid splitting the wood.
  3. Add the middle horizontal board: Measure and mark the center of the shutter. Then, attach the middle horizontal board using wood glue and screws.
  4. Sand and finish: Once the shutter is assembled, sand it down to remove any rough edges or splinters. Then, apply a finish of your choice, such as paint or stain, to protect the wood from the elements.
  5. Install the shutter: Finally, it’s time to install the shutter. Hold the shutter up to the window and mark the location of the hinges. Attach the hinges to the shutter and then to the window frame. Make sure to use screws that are long enough to secure the hinges to the frame.

By following these steps, you can assemble a beautiful and functional wooden shutter for your home. Remember to take your time and be careful when handling the wood and tools. Good luck!

Finishing the Shutter

Once you have built your wooden shutters, it’s time to finish them. This step is crucial to ensure the longevity of your shutters and to give them a polished look. In this section, we’ll cover the two main steps for finishing your shutters: sanding and painting or staining.

Sanding

Before painting or staining your shutters, you need to sand them down. This will remove any rough spots or splinters and create a smooth surface for the paint or stain to adhere to. Start with a coarse grit sandpaper, such as 80-grit, and work your way up to a finer grit, such as 220-grit. Sand in the direction of the wood grain to avoid scratches.

Once you’re done sanding, wipe down the shutters with a damp cloth to remove any dust or debris. Let them dry completely before moving on to the next step.

Painting or Staining

Now that your shutters are sanded and clean, it’s time to apply your finish. You have two options: painting or staining.

Painting

If you choose to paint your shutters, start by applying a primer to help the paint adhere better. Once the primer is dry, apply your paint in thin, even coats. Use a brush or a roller, depending on the size of your shutters. Allow each coat to dry completely before applying the next one.

Staining

If you prefer the natural look of wood, you can choose to stain your shutters. Start by applying a wood conditioner to help the stain absorb evenly. Once the conditioner is dry, apply your stain with a brush or a rag, following the direction of the wood grain. Wipe off any excess stain with a clean rag. Allow the stain to dry completely before applying a sealer to protect the wood.

No matter which finish you choose, be sure to follow the manufacturer’s instructions and apply multiple coats if necessary. This will ensure your shutters are protected from the elements and look great for years to come.

Installing the Shutter

Once you have built your wooden shutters, it’s time to install them. Here are the steps to follow:

  1. Hold the shutter up to the window and mark the placement of the hinges on both the shutter and the window frame. Use a level to ensure the shutter is straight.
  2. Pre-drill holes for the screws in both the shutter and the window frame where you marked the hinge placement.
  3. Attach the hinges to the shutter using screws, making sure they are flush with the wood.
  4. Hold the shutter up to the window again and attach the hinges to the window frame using screws. Make sure the shutter swings open and closed smoothly.
  5. Install any additional hardware, such as a latch or pull, according to the manufacturer’s instructions.

It’s important to note that shutters are typically mounted purely for aesthetics and do not actually open and close. However, if you have functional shutters, make sure they cover the entire window when closed to function properly.

With these simple steps, you can install your wooden shutters and add a touch of charm to your home’s exterior.

How to Make a Wooden Signpost: A Step-by-Step Guide

How to Make a Wooden Signpost: A Step-by-Step Guide

Are you looking for a cost-effective way to display your real estate signs? Look no further than creating your own wooden signposts. Not only is it a budget-friendly option, but it’s also a convenient way to have full control over the design and placement of your signs.

To get started, you’ll need some basic woodworking tools and materials, including wood planks, screws, a saw, and a drill. Once you have everything you need, it’s just a matter of cutting the wood to the desired length and shape, drilling holes for the screws, and assembling the pieces together. With a little practice, you’ll be able to create custom signposts that perfectly fit your needs.

Whether you’re a real estate agent looking to save money on signposts or just someone who wants to add a personal touch to their outdoor signage, making your own wooden signposts is a fun and rewarding DIY project. With the right tools and a bit of creativity, you can create beautiful and functional signposts that will last for years to come.

Choosing the Right Wood

how-to-make-a-wooden-signpost

When it comes to making a wooden signpost, choosing the right type of wood is crucial. Not all woods are created equal, and some are better suited for outdoor use than others. In this section, we’ll take a look at the different types of wood you can use for your signpost and what to look for in terms of wood quality.

Types of Wood

There are several types of wood that are commonly used for signposts, and each has its own unique characteristics. Here are some of the most popular options:

  • Cedar: Cedar is a popular choice for outdoor signs because it is naturally resistant to rot and decay. It also has a beautiful grain pattern and is lightweight, making it easy to work with.
  • Redwood: Like cedar, redwood is naturally resistant to rot and decay. It is also very durable and has a distinctive reddish-brown color.
  • Pine: Pine is a softwood that is easy to work with and relatively inexpensive. However, it is not as durable as cedar or redwood and may not hold up as well over time.
  • Oak: Oak is a hardwood that is very strong and durable. It is also quite heavy, which can make it difficult to work with.

Wood Quality

Regardless of the type of wood you choose, it’s important to select high-quality wood for your signpost. Here are some things to look for:

  • Straightness: Look for boards that are straight and free of knots or other defects.
  • Density: The denser the wood, the stronger and more durable it will be.
  • Moisture content: Make sure the wood is dry before you start working with it. Wet wood can warp or split as it dries, which can ruin your signpost.
  • Treatment: If you plan to use your signpost outdoors, consider using pressure-treated wood. This type of wood has been treated with chemicals that make it resistant to rot and decay.

By choosing the right type of wood and paying attention to wood quality, you can create a beautiful and durable signpost that will last for years to come.

Tools and Materials Needed

Essential Tools

To make a wooden signpost, you will need a few essential tools. These include:

Tool Purpose
Saw To cut the wood to the desired size
Drill To make holes for screws
Screwdriver To attach the post to the base
Sandpaper To smooth out rough edges
Paintbrush To apply paint or stain

Additional Materials

In addition to the essential tools, you will also need some additional materials. These include:

  • Wood: Choose a sturdy and durable type of wood, such as cedar or redwood. The wood should be at least 4 inches wide and 6 feet tall.
  • Post Cap: A decorative piece that goes on top of the post to give it a finished look.
  • Base: A sturdy base to anchor the post and keep it upright. You can use a pre-made base or make one yourself.
  • Screws: To attach the post to the base.
  • Wood Glue: To attach the post cap to the top of the post.
  • Paint or Stain: To protect the wood from the elements and add color or texture to the finished signpost.

With these tools and materials, you can create a beautiful and functional wooden signpost that will add charm and character to your home or business.

Designing Your Signpost

designing-your-signpost

Before you start building your wooden signpost, it’s important to design it properly. This will ensure that the signpost looks good and serves its intended purpose. In this section, we’ll go over some important design considerations for your signpost.

Sketching the Design

The first thing you’ll want to do is sketch out your design. This will help you visualize what your signpost will look like and make any necessary adjustments before you start building. When sketching your design, consider the following:

  • What message do you want your signpost to convey?
  • What kind of style do you want your signpost to have?
  • What kind of graphics or images do you want to include?

Once you have a rough sketch of your design, you can start refining it and making any necessary adjustments.

Choosing the Right Size

The size of your signpost will depend on a few factors, including the location where it will be installed and the message you want to convey. Here are some things to consider when choosing the right size for your signpost:

  • Make sure your signpost is visible from a distance.
  • Consider the height of the signpost and the angle at which it will be viewed.
  • Make sure your signpost is proportional to the surrounding environment.

It’s important to choose the right size for your signpost to ensure that it is effective and serves its intended purpose.

By taking the time to properly design your signpost, you’ll ensure that it looks good and serves its intended purpose. Consider sketching your design and choosing the right size to make sure your signpost is effective and visible.

Preparing the Wood

Before you can start making your wooden signpost, it’s important to properly prepare the wood. This involves cutting it to size and sanding it to create a smooth surface for painting or staining. Here are the steps you need to follow:

Cutting the Wood

The first step is to choose a piece of wood that is the right size for your signpost. If you can’t find a block in the right size, choose a piece that is slightly larger, as you can always cut it to size later. Soft wood like pine, beech, or spruce generally makes for good wooden signs.

Once you have your wood, use a saw to cut it to the desired size. Make sure to measure carefully and use a straight edge to ensure a straight cut. If you don’t have a saw, you can often have the wood cut to size for you at a hardware or craft store.

Sanding the Wood

After cutting the wood, the next step is to sand it to create a smooth surface for painting or staining. Sanding is a wood surface preparation step which is very likely to be overlooked. Many tend to believe that bare wood is naturally ready-to-go. However, it’s a crucial step to ensure the quality and uniformity of finished wood signs for home.

Start by using coarse-grit sandpaper to remove any rough spots or imperfections on the surface of the wood. Then, switch to a finer-grit sandpaper to create a smooth surface. Make sure to sand in the direction of the wood grain to avoid creating scratches or marks on the surface.

Once you have sanded the wood, wipe it down with a damp cloth to remove any dust or debris. You can also use a tack cloth to ensure that the surface is completely clean before painting or staining.

By following these steps, you can prepare your wood for making a beautiful and professional-looking wooden signpost.

Creating the Signpost

If you want to make your own wooden signpost, there are a few steps you’ll need to follow. First, you’ll need to decide on the design you want to carve into the wood. Then, you’ll need to gather the necessary materials and tools. Finally, you’ll need to assemble the signpost.

Carving the Design

The first step in creating your signpost is to carve the design into the wood. You can use a variety of tools for this, including chisels, knives, and even a Dremel. If you’re not comfortable with carving, you can also use stencils or decals to create the design.

Before you start carving, make sure the wood is smooth and free of any knots or imperfections. You can use sandpaper to smooth out the surface if needed. Then, sketch out your design on the wood using a pencil. Once you’re happy with the design, start carving.

Take your time and be careful not to remove too much wood at once. You can always go back and make adjustments later. Once you’re finished carving, use sandpaper to smooth out any rough edges.

Assembling the Signpost

Once you’ve carved the design into the wood, it’s time to assemble the signpost. You’ll need a few additional materials for this, including a wooden post, screws, and a bracket.

Start by attaching the bracket to the post using screws. Then, attach the sign to the bracket using more screws. Make sure the sign is level and secure before tightening the screws.

Finally, you’ll need to install the signpost in the ground. Dig a hole deep enough for the post and fill it with concrete. Once the concrete has dried, insert the post and pack soil around it to secure it in place.

With these steps, you can create your own wooden signpost that’s perfect for your home or business.

Finishing Touches

Once you have assembled your wooden signpost, it’s time to add the finishing touches. This is where you can really make your signpost stand out and showcase your personal style. In this section, we will cover two important aspects of finishing touches: painting the signpost and applying the finish.

Painting the Signpost

Painting your signpost is a great way to add color and personality. Here are some tips to help you get started:

  • Choose the right paint: Look for a high-quality outdoor paint that is designed to withstand the elements. Acrylic and latex paints are good options.
  • Prep the surface: Make sure your signpost is clean and dry before you start painting. Sand any rough spots or imperfections to create a smooth surface.
  • Apply the paint: Use a brush or roller to apply the paint in thin, even coats. Allow each coat to dry completely before applying the next one.
  • Add details: Once the base coat is dry, you can add details like lettering or designs. Use stencils or freehand painting to create your desired look.

Applying the Finish

Adding a finish to your signpost will help protect it from the elements and give it a polished look. Here are some options to consider:

  • Stain: A wood stain will enhance the natural grain of the wood and provide a protective layer. Choose a stain that is designed for outdoor use and apply it with a brush or rag.
  • Varnish: A clear varnish will add a glossy finish to your signpost while also protecting it from moisture and UV rays. Apply the varnish with a brush or spray can.
  • Sealant: A sealant will create a waterproof barrier that will protect your signpost from rain and snow. Apply the sealant with a brush or spray can.

No matter which finish you choose, make sure to follow the manufacturer’s instructions carefully. Apply the finish in a well-ventilated area and allow it to dry completely before handling your signpost.

With these finishing touches, your wooden signpost will be ready to display proudly in your yard or garden.

Installation Tips

Choosing the Location

Before installing your wooden signpost, it’s important to carefully choose the location. Here are some tips to help you make the best decision:

  • Consider the purpose of the sign: Is it a directional sign, a warning sign, or an informational sign? The location should be easily visible and accessible to the intended audience.
  • Check local regulations: Make sure you are allowed to install a signpost in the chosen location. Some areas have specific rules and regulations regarding sign placement.
  • Avoid obstructing views: Don’t place the signpost where it may block the view of drivers or pedestrians.
  • Consider the ground conditions: Make sure the ground is level and stable enough to support the signpost.

Installing the Signpost

Once you have chosen the location, it’s time to install the signpost. Here are some tips to help you get the job done:

  • Dig the hole: Use a post hole digger to dig a hole that is deep enough to support the signpost. The hole should be at least 1/3 the length of the signpost.
  • Insert the signpost: Place the signpost in the hole and make sure it is straight and level.
  • Secure the signpost: Use concrete to secure the signpost in place. Fill the hole with concrete and allow it to dry completely.
  • Add the sign: Once the concrete is dry, attach the sign to the signpost using screws or bolts.

Remember to take your time and follow these tips to ensure your wooden signpost is installed correctly and safely.

Nikmati pengalaman bermain slot paling fun di Vio88! Temukan berbagai permainan slot yang seru dan menarik dengan peluang besar untuk meraih kemenangan. Ayo, bergabunglah sekarang dan rasakan sensasi bermain di Vio88!

How to Paint a Wooden Table: A Beginner's Guide

How to Paint a Wooden Table: A Beginner's Guide

If you’re looking to give your wooden table a fresh new look, painting it can be a great option. Not only is it an affordable way to update your furniture, but it can also be a fun DIY project. However, if you’ve never painted a table before, it can be a little intimidating. Don’t worry, we’re here to help! In this article, we’ll walk you through the steps on how to paint a wooden table.

Before you get started, it’s important to pick the right products. Long-lasting results go hand-in-hand with the right prep, products, and patience. In this article, we’ll cover different methods for painting a wooden table, including using a roller and paintbrush, spray painting, and spray cans. We’ll also discuss what type of paint you should use for furniture painting and how to prepare the surface of your wooden table for painting. With these tips, you’ll be able to give your wooden table a perfect finish.

Understanding the Basics of Painting

how-to-paint-a-wooden-table

If you have an old wooden table that needs a fresh look, painting it is an excellent way to give it a new lease of life. But before you start, it’s essential to understand the basics of painting to achieve a professional-looking finish.

Types of Paint for Wood

When it comes to painting wood, there are two main types of paint: oil-based and water-based. Oil-based paints are more durable and provide better protection against scratches and stains. However, they take longer to dry and require solvents for cleanup, which can be toxic and harmful to the environment.

Water-based paints, on the other hand, are easier to clean up and dry faster. They are also less toxic and more environmentally friendly than oil-based paints. However, they may not be as durable as oil-based paints, and they may require more coats to achieve full coverage.

When choosing a paint for your wooden table, consider the level of durability you need and the amount of time you have for drying. Also, make sure to choose a color that complements your room’s decor.

Tools Needed for Painting

Before you start painting, you’ll need to gather some essential tools. Here are the tools you’ll need:

  • Sandpaper: You’ll need sandpaper to smooth out any rough spots on the table’s surface and to create a surface that the paint can adhere to.
  • Primer: A primer helps the paint adhere to the surface and provides a smooth base for the paint to go on.
  • Paintbrushes: You’ll need a variety of paintbrushes, including a larger brush for the main areas and smaller brushes for the corners and edges.
  • Paint: Choose a high-quality paint that is specifically designed for wooden surfaces.
  • Drop cloth: A drop cloth will protect your floor or work surface from drips and spills.
  • Painter’s tape: Use painter’s tape to mask off any areas that you don’t want to paint.

By having the right tools and understanding the basics of painting, you can transform your old wooden table into a beautiful and functional piece of furniture that will last for years to come.

Preparing the Wooden Table

Before you start painting your wooden table, it’s important to prepare the surface properly. This will ensure that the paint adheres well and that the finish is smooth and even. In this section, we’ll go over the two main steps involved in preparing your table: cleaning and sanding.

Cleaning the Table

The first step in preparing your wooden table for painting is to clean it thoroughly. This will remove any dirt, dust, or grime that may be on the surface, which can interfere with the paint’s ability to adhere properly. Here are a few tips to help you clean your table effectively:

  • Use a soft cloth or sponge to wipe down the surface of the table.
  • If there are any stubborn stains or marks, use a mild detergent mixed with warm water to clean them off.
  • Be sure to rinse the table thoroughly with clean water to remove any soap residue.
  • Allow the table to dry completely before moving on to the next step.

Sanding the Surface

The next step in preparing your wooden table for painting is to sand the surface. Sanding will help to smooth out any rough spots or imperfections in the wood, and it will also help the paint to adhere better. Here’s how to sand your table:

  1. Choose the right sandpaper: For most tables, a medium-grit sandpaper (such as 120-grit) is a good choice. If your table is in particularly rough shape, you may need to start with a coarser grit and work your way up to a finer grit.
  2. Sand the surface: Use the sandpaper to sand the entire surface of the table, working in the direction of the wood grain. Be sure to sand evenly and thoroughly, paying extra attention to any rough spots or areas that need extra attention.
  3. Clean up: Once you’re done sanding, use a soft cloth or vacuum to clean up any dust or debris. Be sure to remove all of the dust, as it can interfere with the paint’s ability to adhere properly.

By following these steps, you’ll be able to prepare your wooden table properly for painting. With a clean, smooth surface, your table will be ready for the next step: priming.

Priming the Table

Before you start painting your wooden table, you need to prime it. Priming helps the paint adhere better to the surface and gives it a smoother finish. Here are some steps to follow when priming your table:

  1. Choose the right primer: Select a primer that is suitable for wooden surfaces. Look for a primer that is compatible with the type of paint you plan to use. You can choose between oil-based or water-based primers.
  2. Sand the table: Sand the table to remove any old paint, dirt, or imperfections. Use a sandpaper with a grit of 120-150. Make sure to sand along the grain of the wood.
  3. Clean the table: Use a damp cloth to wipe away any dust or debris from the sanding. Make sure the table is completely dry before proceeding.
  4. Apply the primer: Apply the primer evenly using a paintbrush or a roller. Make sure to cover the entire surface of the table. You may need to apply more than one coat of primer depending on the condition of the table.
  5. Let the primer dry: Wait for the primer to dry completely before painting. This may take a few hours or overnight, depending on the type of primer you used.
  6. Sand the table again: Once the primer is dry, sand the table again with a fine-grit sandpaper (220 grit). This will help to smooth out any rough spots or bumps.
  7. Clean the table: Wipe the table with a clean, dry cloth to remove any dust or debris from sanding.

By following these steps, you will have a well-primed table ready for painting. Remember to choose a well-ventilated area to work in and to wear protective gear such as gloves and a mask.

Applying the Paint

applying-the-paint

Once you have prepared your wooden table for painting, it’s time to apply the paint. In this section, we will cover the two main sub-sections of applying the paint: choosing the right color and painting techniques.

Choosing the Right Color

When choosing the color for your wooden table, it’s important to consider the overall style and color scheme of the room it will be in. You want to choose a color that complements the rest of the room and creates a cohesive look. Here are some tips to help you choose the right color:

  • Look at the color wheel: Choose colors that are opposite each other on the color wheel for a complementary look. If you want a more monochromatic look, choose colors that are next to each other on the color wheel.
  • Consider the room’s lighting: If the room is dark, choose a lighter color to brighten it up. If the room is already bright, you can choose a darker color to create a cozy atmosphere.
  • Think about the table’s use: If the table will be used for meals, choose a color that won’t show stains easily. If the table is more decorative, you can choose a bolder color.

Painting Techniques

Now that you have chosen the right color, it’s time to apply the paint. Here are some painting techniques to help you achieve a smooth and even finish:

  • Use a paintbrush: Use a high-quality paintbrush to apply the paint. Start at the top of the table and work your way down, using long strokes in the direction of the wood grain.
  • Roll the paint: If you want to save time, you can use a paint roller to apply the paint to larger areas of the table. Use a small paintbrush to get into any hard-to-reach areas.
  • Apply multiple coats: Depending on the color and type of paint you are using, you may need to apply multiple coats to achieve the desired finish. Allow each coat to dry completely before applying the next.

Remember to follow the manufacturer’s instructions for the paint you are using. With the right color and painting techniques, you can transform your wooden table into a beautiful and functional piece of furniture.

Drying and Finishing

After you have painted your wooden table, the next step is to let it dry properly. This is an important step as it ensures that the paint adheres well to the wood and doesn’t peel off easily. Here are some tips to help you ensure that your table dries properly.

Proper Drying Time

Different types of paint require different amounts of time to dry. Most paints will dry to the touch within a few hours, but it’s important to let the paint cure fully before using the table. The curing time can range from a few days to a few weeks, depending on the type of paint used.

To ensure that your table dries properly, it’s important to place it in a well-ventilated area, away from direct sunlight and heat sources. This will help the paint dry evenly and prevent it from cracking or peeling.

Applying Sealant

Once the paint has dried, you may want to apply a sealant to protect the table from scratches and other damage. There are several types of sealants available, including polyurethane, lacquer, and wax.

Polyurethane is a popular choice as it provides a durable, long-lasting finish. It’s available in both water-based and oil-based formulas and can be applied with a brush or sprayer. Lacquer is another option that provides a high-gloss finish, but it’s more difficult to apply than polyurethane.

Wax is a natural option that provides a soft, matte finish. It’s easy to apply and can be buffed to a shine with a soft cloth. However, it’s not as durable as polyurethane or lacquer and may need to be reapplied more frequently.

Before applying any sealant, it’s important to sand the table to ensure that the surface is smooth and free of any imperfections. Then, apply the sealant according to the manufacturer’s instructions and allow it to dry completely before using the table.

Maintenance Tips

Now that you’ve successfully painted your wooden table, it’s important to maintain it properly to ensure the longevity of your hard work. Here are some maintenance tips to keep your table looking great for years to come:

  • Use coasters and placemats: To prevent scratches and water damage, always use coasters and placemats when placing glasses, plates, or any other items on your table.
  • Avoid harsh chemicals: Harsh chemicals such as bleach or ammonia can damage the paint and finish of your table. Instead, use a mild cleaner and a soft cloth to clean your table.
  • Clean spills immediately: Accidents happen, but it’s important to clean up spills as soon as possible to prevent damage to the paint and wood. Use a damp cloth to gently clean up spills and dry the area thoroughly.
  • Avoid direct sunlight: Direct sunlight can cause the paint to fade and the wood to dry out, leading to cracks and damage. If possible, place your table away from direct sunlight or use curtains or blinds to block the sun.
  • Regularly dust your table: Dust can accumulate on your table and scratch the paint. Use a soft, dry cloth to regularly dust your table and keep it looking clean and beautiful.

By following these simple maintenance tips, you can keep your painted wooden table looking great for years to come.

How Much Does a Wooden Pallet Weigh? Find Out Here!

How Much Does a Wooden Pallet Weigh? Find Out Here!

Are you wondering how much a wooden pallet weighs? Whether you’re in the shipping or construction industry, knowing the weight of a pallet is essential for proper handling and transportation. The weight of a wooden pallet can vary depending on several factors, including the type of wood, size, and thickness of the boards.

The standard size for a wooden pallet in the US is 48 inches by 40 inches, with a height of 6 inches. The weight of this pallet can range from 30 to 70 pounds, depending on whether it’s made of hardwood or softwood. However, lightweight pallets can weigh as little as three pounds, while heavier-duty ones can weigh up to 150 pounds. It’s important to keep in mind that the weight of the pallet itself is only part of the equation, as it also needs to be able to support the weight of the goods being transported.

Understanding Wooden Pallets

how-much-does-a-wooden-pallet-weigh

If you work in the logistics or transportation industry, you are likely familiar with wooden pallets. These platforms are used to transport goods and materials, and they come in various sizes and weights. In this section, we will discuss the weight of wooden pallets and how it can impact your operations.

How much does a wooden pallet weigh?

As per the search results, wooden pallets can weigh anywhere from 30 to 70 pounds, depending on the size and type of wood used. The standard size for a wooden pallet in the United States is 48 inches by 40 inches by 6 inches, with a load-bearing capacity of 1 ton dynamic and 3 tons static. However, you can get smaller or larger pallets depending on your needs.

Why does the weight of a wooden pallet matter?

The weight of a wooden pallet can impact your operations in several ways. For example, if you are shipping goods by weight, the weight of the pallet can add to the overall weight of your shipment, which can increase your shipping costs. Additionally, the weight of the pallet can impact the number of pallets you can fit on a truck or in a warehouse, which can impact your storage and transportation costs.

How can you reduce the weight of your wooden pallets?

If you are looking to reduce the weight of your wooden pallets, there are several options available. For example, you can use lighter weight wood, such as pine or spruce, instead of hardwood. You can also use thinner boards or reduce the overall size of the pallet. Additionally, you can use plastic or metal pallets, which are generally lighter than wooden pallets.

In conclusion, understanding the weight of wooden pallets is essential for anyone involved in logistics or transportation. By choosing the right size and weight of pallets, you can reduce your shipping and storage costs and improve your overall operations.

Standard Weight of a Wooden Pallet

If you’re in the shipping or logistics business, you know that pallets are an essential part of the process. But have you ever wondered how much a wooden pallet weighs? The answer is not straightforward, as there are different sizes and types of pallets, but we’ll give you an idea of what to expect.

Average Weight of a Wooden Pallet

The average weight of a wooden pallet ranges from 30 to 70 pounds, depending on the type of wood used and its moisture content. Softwood pallets tend to be lighter than hardwood pallets, and the drier the wood, the lighter the pallet.

Standard Pallet Sizes and Their Weight Capacity

The most common pallet size in the US is 48 inches by 40 inches by 6 inches. A pallet of this size can hold a dynamic load of one ton and a static load of three tons. The dynamic load is the weight a pallet can hold while in motion, such as when being loaded or unloaded from a truck. The static load is the weight a pallet can hold when stationary.

Other standard pallet sizes include 42 inches by 42 inches and 48 inches by 48 inches. These pallets can hold similar weight loads, but their weight may vary depending on the type of wood used and its moisture content.

Factors That Affect Pallet Weight

The weight of a wooden pallet can vary depending on several factors, including the type of wood used, the thickness of the boards, and the number of boards used. Some pallets may also have additional components, such as metal fasteners or plastic corners, that can add to their weight.

In conclusion, the weight of a wooden pallet can vary depending on several factors, including the type of wood used, the size of the pallet, and any additional components. However, the average weight of a wooden pallet is between 30 to 70 pounds.

Factors Affecting the Weight of a Wooden Pallet

factors-affecting-the-weight-of-a-wooden-pallet

When it comes to determining the weight of a wooden pallet, there are several factors that come into play. Here are some of the main factors that affect the weight of a wooden pallet:

Type of Wood

The type of wood used to construct a pallet can have a significant impact on its weight. For example, fir is generally lighter than pine, so a pallet made of fir will typically weigh less than a pallet made of pine. Other factors that can affect the weight of a wooden pallet include the thickness of the wood and the quality of the wood used.

Size of the Pallet

The size of a wooden pallet can also have a significant impact on its weight. Generally speaking, the larger the pallet, the heavier it will be. However, there are other factors to consider as well, such as the thickness of the wood used to construct the pallet and the design of the pallet.

Moisture Content

The moisture content of a wooden pallet can also affect its weight. Pallets that have been exposed to moisture will generally be heavier than those that have not. This is because moisture can cause the wood to swell, which increases the weight of the pallet. In addition, pallets that have been exposed to moisture may also be more prone to damage and may not be as durable as pallets that have been kept dry.

Overall, the weight of a wooden pallet can vary depending on a number of different factors. By understanding these factors, you can make more informed decisions when it comes to selecting and using wooden pallets for your business needs.

Weight Variations Based on Pallet Design

When it comes to wooden pallets, the weight can vary depending on the design of the pallet. In this section, we will discuss the weight variations based on pallet design, specifically block pallets and stringer pallets.

Block Pallets

Block pallets are typically heavier than stringer pallets due to the additional wood used in their construction. The blocks are placed at each corner of the pallet, providing additional support and stability. The weight of a block pallet can range from 50 to 80 pounds, depending on the size and type of wood used.

Here are some common weight variations for block pallets:

Pallet Size Weight Range
36″ x 36″ 50-70 lbs
42″ x 42″ 60-80 lbs
48″ x 48″ 70-90 lbs

Stringer Pallets

Stringer pallets are typically lighter than block pallets due to their simpler design. They are constructed with two or three parallel pieces of wood, known as stringers, that support the deck boards. The weight of a stringer pallet can range from 20 to 50 pounds, depending on the size and type of wood used.

Here are some common weight variations for stringer pallets:

Pallet Size Weight Range
36″ x 36″ 20-30 lbs
42″ x 42″ 30-40 lbs
48″ x 48″ 40-50 lbs

It’s important to note that the weight of a wooden pallet can also be affected by the moisture content of the wood, as well as any additional components such as metal fasteners or plastic wrapping. When selecting a pallet for your needs, it’s important to consider both the weight and design to ensure that it can safely support your products during transportation and storage.

Impact of Pallet Weight on Shipping Costs

When it comes to shipping, the weight of your cargo is not the only factor that affects the cost. The weight of your pallets can also have a significant impact on your shipping costs. In this section, we’ll take a closer look at how pallet weight affects your shipping costs.

On average, a standard wooden pallet that is 48 inches by 40 inches and made of hardwood weighs about 30-70 pounds, while a standard wooden pallet that is 48 inches by 40 inches and made of softwood weighs about 25-50 pounds. Meanwhile, standard plastic pallets weigh 15 lbs. each.

To put this into perspective, if you needed to ship 100,000 lbs. of cargo, you would need 34 wooden pallets or 67 plastic pallets. This means that the weight of your pallets alone could add up to over 2,000 lbs. for wooden pallets or over 1,000 lbs. for plastic pallets.

The weight of your pallets is important because it affects the overall weight of your shipment. The heavier your shipment, the more it will cost to ship. This is because carriers charge by weight, and the heavier your shipment, the more it will cost to transport.

In addition to the weight of your pallets, the size and type of your pallets can also affect your shipping costs. Standard pallet sizes are 48″ x 40″, 42″ x 42″, and 48″ x 48″. The most common pallets produced in the U.S. are GMA pallets, which are 48″ x 40″ and account for over 30% of all pallets produced.

Overall, it’s important to consider the weight, size, and type of your pallets when calculating your shipping costs. By choosing the right pallets for your shipment, you can help minimize your shipping costs and ensure that your cargo arrives safely and on time.

How to Determine the Weight of a Wooden Pallet

If you need to determine the weight of a wooden pallet, there are a few steps you can follow to get an accurate measurement. Here’s what you need to do:

  1. Weigh the pallet: The first step is to weigh the pallet itself. You can do this using a scale, either a regular bathroom scale or a larger scale designed for weighing pallets. Simply place the pallet on the scale and note the weight.
  2. Determine the weight of the load: If the pallet is carrying a load, you’ll need to determine the weight of the load separately. You can do this by weighing the items on the pallet individually and adding up the total weight. If the items are all the same weight, you can simply multiply the weight of one item by the total number of items on the pallet.
  3. Add the weight of the pallet and the load: Once you have the weight of the pallet and the weight of the load, you can add them together to get the total weight of the pallet and its contents.

It’s important to note that the weight of a wooden pallet can vary depending on its size, thickness, and the type of wood used. As a general rule, a standard wooden pallet will weigh between 30 and 70 pounds. However, larger or thicker pallets can weigh significantly more.

If you need to know the weight capacity of a wooden pallet, you can use a pallet calculator or consult with the manufacturer to determine the maximum weight the pallet can safely carry.

How to Fix a Hole in a Wooden Door: Simple Solutions for a Common Problem

How to Fix a Hole in a Wooden Door: Simple Solutions for a Common Problem

Fixing a hole in a wooden door may seem like a daunting task, but it is actually a simple DIY project that you can easily do yourself. Whether you have a hollow-core or solid wood door, there are a variety of methods you can use to repair the hole and make your door look as good as new.

If you have a hollow-core door, the most common method involves using a quick expansion filler to fill the space in the door and then sanding it down and painting it to match the existing color. For solid wood doors, you can use string, glue, and putty to fill the hole and make a seamless repair. With a little bit of time and effort, you can easily fix the hole and avoid the cost of replacing the entire door.

In this article, we will provide you with step-by-step instructions on how to fix a hole in a wooden door, including the tools and materials you will need. Whether you are a seasoned DIYer or a beginner, our guide will help you make the repair quickly and easily. So, roll up your sleeves and let’s get started!

Recognizing the Type of Hole

how-to-fix-a-hole-in-a-wooden-door-simple-solutions-for-a-common-problem-2

When it comes to fixing a hole in a wooden door, the first step is to recognize the type of hole you’re dealing with. Different types of holes require different approaches to repair. Here are some common types of holes you may encounter:

Small Holes

Small holes in wooden doors are typically caused by screws or nails. These holes are usually less than 1/4 inch in diameter. To fix a small hole, you can use wood filler or putty. Here’s how:

  1. Clean the hole with a damp cloth to remove any debris.
  2. Apply wood filler or putty to the hole, using a putty knife.
  3. Smooth out the surface of the filler or putty with the putty knife.
  4. Let the filler or putty dry completely, according to the manufacturer’s instructions.
  5. Sand the surface of the filler or putty until it’s smooth.
  6. Prime and paint the repaired area to match the rest of the door.

Large Holes

Large holes in wooden doors are usually caused by accidental impact or damage. These holes are typically more than 1/4 inch in diameter. To fix a large hole, you’ll need to use a patch or a new piece of wood. Here’s how:

  1. Cut a piece of wood that’s slightly larger than the hole.
  2. Place the wood over the hole and trace around it with a pencil.
  3. Cut out the traced area with a jigsaw or handsaw.
  4. Apply wood glue to the back of the patch or new piece of wood.
  5. Insert the patch or new piece of wood into the hole and press it firmly in place.
  6. Let the glue dry completely, according to the manufacturer’s instructions.
  7. Sand the surface of the patch or new piece of wood until it’s flush with the rest of the door.
  8. Prime and paint the repaired area to match the rest of the door.

Cracks or Splits

Cracks or splits in wooden doors are usually caused by changes in temperature or humidity. These types of holes can be more difficult to repair. Here’s how:

  1. Use a putty knife to clean out any debris from the crack or split.
  2. Apply wood glue to the crack or split, using a small brush.
  3. Use a clamp to hold the crack or split closed while the glue dries.
  4. Let the glue dry completely, according to the manufacturer’s instructions.
  5. Sand the surface of the repaired area until it’s smooth.
  6. Prime and paint the repaired area to match the rest of the door.

By recognizing the type of hole you’re dealing with, you can choose the appropriate method to fix it. With a little bit of effort, you can have your wooden door looking as good as new again.

Gathering Necessary Tools and Materials

Before you begin fixing a hole in your wooden door, you need to gather the necessary tools and materials. Here is a list of things you will need to fix a hole in a wooden door:

For Small Holes

If you have a small hole in your wooden door, you will need the following tools and materials:

Tools Materials
Hammer Wood filler
Sandpaper Paint or stain
Paintbrush

For Large Holes

If you have a large hole in your wooden door, you will need the following tools and materials:

Tools Materials
Jigsaw or handsaw Plywood or wooden patch
Sandpaper Wood glue
C-clamps Paint or stain
Paintbrush

For Cracks or Splits

If your wooden door has cracks or splits, you will need the following tools and materials:

Tools Materials
Chisel Wood glue
Hammer Clamps
Sandpaper Wood filler
Paint or stain Paintbrush

Make sure to gather all the necessary tools and materials before starting the repair process. This will make the process smoother and faster.

Fixing Small Holes

fixing-small-holes

Fixing small holes in a wooden door is a simple job that you can do yourself. Here are the steps to follow:

Preparation

Before you start, you need to gather the necessary materials. You will need wood filler, sandpaper, a putty knife, a damp cloth, and paint or stain that matches the door. Once you have everything you need, follow these steps:

  1. Clean the area around the hole with a damp cloth to remove any dirt or debris.
  2. Use a putty knife to apply wood filler to the hole. Make sure to fill the hole completely and smooth out the surface of the filler.
  3. Let the wood filler dry completely. This may take several hours depending on the product you are using.

Application of Wood Filler

Once the wood filler is dry, you can start sanding and finishing the door. Follow these steps:

  1. Use sandpaper to sand the surface of the wood filler until it is smooth and level with the surrounding wood.
  2. Use a damp cloth to remove any dust or debris from the surface of the door.
  3. Apply paint or stain to the door to match the existing color. You may need to apply more than one coat to achieve the desired color.

Sanding and Finishing

Once the paint or stain is dry, you can finish the job by sanding the surface of the door. Follow these steps:

  1. Use a fine-grit sandpaper to sand the surface of the door until it is smooth and even.
  2. Wipe the door with a damp cloth to remove any dust or debris.
  3. Apply a coat of finish to the door to protect it from future damage.

By following these simple steps, you can fix small holes in a wooden door and restore its appearance.

Repairing Large Holes

If you have a large hole in your wooden door, don’t worry, it can be fixed. Here is a step-by-step guide to repairing large holes in wooden doors.

Preparation

Before you begin the repair process, you need to prepare the door. First, remove any loose or splintered wood around the hole. Use sandpaper to smooth the edges of the hole and surrounding area. Clean the hole and the surrounding area with a cloth to remove any dust or debris.

Application of Wood Patch

Next, you need to apply a wood patch to fill the hole. There are different types of wood patches available, such as epoxy, wood filler, or wood putty. Choose the one that matches the color of your door.

To apply the wood patch, follow these steps:

  1. Mix the wood patch according to the instructions on the package.
  2. Apply the wood patch to the hole with a putty knife, filling it completely.
  3. Smooth the surface of the patch with the putty knife, making it level with the surface of the door.
  4. Let the patch dry completely, according to the instructions on the package.

Sanding and Finishing

Once the patch has dried, you need to sand and finish the door. Follow these steps:

  1. Sand the surface of the patch with sandpaper until it is smooth and level with the surface of the door.
  2. Clean the surface of the door with a cloth to remove any dust or debris.
  3. Apply a coat of primer to the patch and let it dry completely.
  4. Apply a coat of paint or stain to the patch, matching the color of the door. Let it dry completely.
  5. Apply a clear coat of varnish or polyurethane to the entire door to protect it from moisture and scratches.

By following these steps, you can repair a large hole in your wooden door and make it look like new again.

Mending Cracks or Splits

If your wooden door has cracks or splits, don’t worry. You can easily fix them with some wood glue and clamps. Here’s how:

Preparation

Before you start, gather the necessary materials. You’ll need wood glue, clamps, sandpaper, a putty knife, and a paintbrush. If the crack is dirty, clean it out with sandpaper. Then, apply wood glue to the crack using a putty knife. Make sure to spread the glue evenly over the entire crack.

Application of Wood Glue

Apply a generous amount of wood glue to the crack. Spread it evenly with a putty knife, making sure to fill the entire crack. If the crack is deep, you may need to apply the glue in layers, allowing each layer to dry before applying the next one.

Clamping and Finishing

Once you’ve applied the wood glue, clamp the crack shut. Use as many clamps as necessary to ensure a tight fit. Wipe off any excess glue with a damp cloth. Let the glue dry completely, which can take several hours or overnight. Once the glue is dry, sand the area smooth and paint or stain the door to match the rest of the surface.

By following these simple steps, you can mend cracks or splits in your wooden door and restore it to its original beauty.

Painting or Staining the Door

When it comes to fixing a hole in a wooden door, painting or staining the door is an essential step to make it look like new. Here are some tips to help you get the best results.

Choosing the Right Paint or Stain

Choosing the right paint or stain is crucial to ensure that the door looks good and lasts a long time. When selecting the paint or stain, consider the following:

  • Type of wood: Different types of wood require different types of paint or stain. Make sure to choose a product that is suitable for the type of wood that your door is made of.
  • Color: Choose a color that matches the existing color of the door or complements the overall color scheme of the room.
  • Finish: The finish you choose will affect the final look of the door. Choose a finish that suits the style of the door and the room.

Application Process

Once you have chosen the right paint or stain, it’s time to apply it to the door. Here are some steps to follow:

  1. Sand the door: Sand the door to remove any rough spots or imperfections. This will help the paint or stain adhere better to the surface.
  2. Clean the door: Clean the door thoroughly to remove any dust or debris. Use a damp cloth or sponge to wipe down the surface.
  3. Apply the paint or stain: Apply the paint or stain using a brush or roller. Make sure to apply it evenly and follow the manufacturer’s instructions.
  4. Allow to dry: Allow the paint or stain to dry completely before applying a second coat or reattaching the door to its hinges.
  5. Apply a second coat (optional): If necessary, apply a second coat of paint or stain to achieve the desired look.

Remember to take your time and follow the instructions carefully to get the best results. With a little patience and effort, you can make your door look as good as new.

Preventive Measures for Future Damage

To avoid having to repair holes in your wooden door, there are some preventive measures you can take. Proper door handling and regular maintenance are key to preventing future damage.

Proper Door Handling

One of the most common causes of damage to wooden doors is improper handling. Here are some tips to help you handle your door properly:

  • Avoid slamming the door shut, as this can cause the wood to crack or split.
  • Don’t lean or hang heavy objects on the door, as this can cause the hinges to bend or the wood to warp.
  • Use doorstops to prevent the door from swinging open too far and hitting the wall.

By following these simple tips, you can help prevent damage to your wooden door.

Regular Maintenance

Regular maintenance is also important to prevent damage to your wooden door. Here are some maintenance tips:

  • Keep the door clean and free of dirt and debris. This can help prevent scratches and other damage to the wood.
  • Apply a coat of wax or polish to the door every few months to help protect the wood and keep it looking new.
  • Check the hinges and other hardware regularly to make sure they are tight and functioning properly.

By following these maintenance tips, you can help keep your wooden door in good condition and prevent future damage.

Remember, prevention is key when it comes to maintaining your wooden door. By handling your door properly and performing regular maintenance, you can help prevent damage and keep your door looking great for years to come.

How to Build Wooden Steps: A Beginner's Guide

How to Build Wooden Steps: A Beginner's Guide

Are you looking to add some charm and functionality to your outdoor space? Building wooden steps can be a great way to enhance the look of your yard and provide easy access to different levels of your property. Whether you’re looking to build steps for a deck, patio, or garden, this article will provide you with the basics of how to build wooden steps.

Before you start building, it’s important to prepare the area where the steps will be located. This means removing any shrubs or plants and ensuring the ground is level. You may need to build up low spots with fill dirt so the area slopes away from your house. Once you’ve prepared the area, you’ll need to determine the height and width of the steps. This will depend on the location and purpose of the steps, as well as the materials you’ll be using.

Understanding the Basics of Wooden Steps

how-to-build-wooden-steps-a-beginners-guide-2

When it comes to building wooden steps, there are a few things you need to keep in mind. In this section, we’ll cover the basics of wooden steps, including the types of wood you can use and the safety measures you need to take.

Types of Wood

When it comes to choosing the right type of wood for your steps, there are a few things you need to consider. First, you want to choose a wood that is strong and durable, as your steps will need to support a lot of weight over time. Some of the most popular types of wood for steps include:

  • Cedar: A popular choice for outdoor steps, cedar is a durable and weather-resistant wood that is also resistant to insects and rot.
  • Redwood: Another popular choice for outdoor steps, redwood is a durable and weather-resistant wood that is also resistant to insects and rot.
  • Pressure-treated pine: A popular choice for indoor and outdoor steps, pressure-treated pine is a durable and affordable wood that is treated to resist insects and rot.

When choosing your wood, make sure to choose a type that is appropriate for your climate and the location of your steps.

Safety Measures

When building wooden steps, safety should always be your top priority. Here are a few safety measures you should take:

  • Use a level: Make sure your steps are level and evenly spaced to prevent tripping hazards.
  • Use non-slip treads: Consider using non-slip treads on your steps to prevent slipping, especially if your steps will be used in wet or icy conditions.
  • Install handrails: Handrails can provide additional support and stability when using your steps, especially for children and elderly individuals.
  • Use appropriate tools and equipment: Make sure you have the right tools and equipment for the job, and use them safely and appropriately.

By following these basic guidelines, you can ensure that your wooden steps are safe and durable for years to come.

Tools and Materials Needed

Building wooden steps can be a fun and rewarding DIY project. Before you get started, it’s important to gather all the necessary tools and materials. Here’s what you’ll need:

Tools

  • Circular saw
  • Jigsaw
  • Power drill
  • Hammer
  • Measuring tape
  • Carpenter’s square
  • Level
  • Safety glasses
  • Work gloves

Materials

  • Pressure-treated lumber (2x12s for stringers, 2x6s for treads, and 4x4s for posts)
  • Gravel or crushed stone
  • Concrete mix
  • Galvanized screws or nails
  • Post spikes or concrete anchors

Make sure to choose high-quality materials that are suitable for outdoor use. Pressure-treated lumber is a popular choice because it is durable and resistant to rot and insect damage. You’ll also need gravel or crushed stone to create a stable base for your steps, as well as concrete mix to anchor the posts.

In terms of tools, a circular saw and jigsaw are essential for cutting the lumber to size. A power drill is necessary for drilling pilot holes and attaching the pieces together with screws or nails. A measuring tape and carpenter’s square will help ensure accurate cuts and angles. Don’t forget to wear safety glasses and work gloves to protect yourself while working with power tools.

By gathering all the necessary tools and materials before you start, you’ll be well-prepared to tackle your wooden step project with confidence.

Designing Your Wooden Steps

When building wooden steps, it’s important to consider both functionality and aesthetics. In this section, we’ll cover the key factors to consider when designing your wooden steps.

Step Measurements

Before you start building your wooden steps, you need to measure the area where they will be installed. Here are the key measurements you’ll need to take:

  • Total Rise: Measure the height from the ground to the top of where the steps will end. This will determine the number of steps you need to build.
  • Total Run: Measure the horizontal distance from the bottom of the steps to the top.
  • Tread Depth: This is the horizontal depth of each step. It should be at least 10 inches for comfort and safety.
  • Riser Height: This is the vertical height of each step. It should be between 6 and 8 inches for safety and ease of use.

Once you have these measurements, you can start designing your steps.

Choosing the Design

choosing-the-design

When it comes to designing your wooden steps, there are a few different options to consider. Here are some popular designs:

  • Straight Steps: These are the most basic design, with steps that go straight up and down. They’re easy to build and work well in most situations.
  • L-Shaped Steps: These steps have a landing or platform halfway up, which makes them easier to climb and can add visual interest to your design.
  • U-Shaped Steps: These steps have two landings or platforms, making them ideal for longer staircases. They can be more difficult to build, but they offer a unique and impressive look.

When choosing your design, consider the overall style of your home and the surrounding landscape. You want your wooden steps to complement your property and enhance its curb appeal.

By taking accurate measurements and choosing a design that fits your needs and style, you can create beautiful and functional wooden steps that will last for years to come.

Building the Steps

When it comes to building wooden steps, there are three main steps you need to follow: cutting the wood, assembling the steps, and securing the steps. Here’s a breakdown of each step:

Cutting the Wood

Before you can start assembling your wooden steps, you’ll need to cut the wood to the right size. To do this, you’ll need a saw, a measuring tape, and a pencil. Here’s what you need to do:

  1. Measure the height and width of the area where you want to install the steps.
  2. Cut two pieces of wood to the width of the area where you want to install the steps.
  3. Cut two more pieces of wood to the height of the area where you want to install the steps.
  4. Cut several smaller pieces of wood to the same width as the two larger pieces. These will be used as the steps themselves.

Assembling the Steps

Once you’ve cut all of the wood to the right size, it’s time to start assembling the steps. Here’s what you need to do:

  1. Lay the two larger pieces of wood on the ground where you want to install the steps. These will be the sides of the steps.
  2. Place the smaller pieces of wood on top of the larger pieces, evenly spaced apart. These will be the steps themselves.
  3. Use a level to make sure each step is level before moving on to the next step.
  4. Once you’ve placed all of the steps, use a drill to attach them to the larger pieces of wood on either side.

Securing the Steps

After you’ve assembled the steps, it’s important to make sure they’re secure. Here’s what you need to do:

  1. Use wood glue to attach each step to the larger pieces of wood on either side.
  2. Once the glue has dried, use screws to attach each step to the larger pieces of wood on either side.
  3. Use a level to make sure the steps are still level after you’ve secured them.

By following these three steps, you’ll be able to build wooden steps that are sturdy, secure, and safe to use.

Finishing Touches

Once you have completed building your wooden steps, it’s time to give them a finishing touch. This will not only make them look more attractive but also protect them from the elements. Here are some steps you can take to finish your wooden steps.

Sanding the Steps

Before applying any finish, it’s important to sand your wooden steps. This will help smooth out any rough spots and ensure that the finish adheres properly. Start by using a coarse grit sandpaper, such as 60-grit, to remove any rough spots or splinters. Then, move on to a finer grit sandpaper, such as 120-grit, to smooth out the surface of the wood.

Make sure to sand in the direction of the grain to avoid damaging the wood. You can use a sanding block or an orbital sander to make the job easier. Once you’re done sanding, wipe down the steps with a damp cloth to remove any dust.

Applying the Finish

There are several types of finishes you can use on your wooden steps, including paint, stain, or varnish. Each has its own advantages and disadvantages, so choose the one that best suits your needs.

If you want to paint your steps, make sure to use a high-quality exterior paint that is designed for wood surfaces. Apply the paint in thin, even coats, and allow each coat to dry completely before applying the next.

If you prefer a natural look, you can use a stain to enhance the natural beauty of the wood. Choose a stain that is designed for exterior use and apply it in thin coats with a brush or rag. Make sure to wipe off any excess stain with a clean cloth.

Finally, if you want to protect your steps from the elements, you can use a varnish or sealer. These products will help prevent water damage and protect the wood from UV rays. Apply the varnish or sealer in thin coats, and allow each coat to dry completely before applying the next.

With these finishing touches, your wooden steps will look great and last for years to come.

Maintenance Tips

Taking care of your wooden steps is essential to ensure their longevity and safety. Here are some maintenance tips to keep them in good condition for years to come.

Regular Cleaning

Regular cleaning of your wooden steps is crucial to maintain their appearance and prevent the buildup of dirt and debris. Here are some steps to follow:

  • Sweep the steps regularly to remove dirt, leaves, and other debris.
  • Use a stiff-bristled brush to scrub the steps with a solution of mild soap and water.
  • Rinse the steps thoroughly with water and allow them to dry completely before use.
  • Avoid using a pressure washer as it can damage the wood.

Wood Treatment

Wooden steps are prone to damage from moisture, sunlight, and insects. To prevent this, it is essential to treat them regularly. Here are some tips to follow:

  • Apply a wood preservative to protect the wood from moisture and insects. Follow the manufacturer’s instructions for application and frequency of treatment.
  • Apply a coat of exterior wood sealer or stain to protect the wood from sunlight and weather damage. Choose a product that is suitable for your climate and follow the manufacturer’s instructions for application and frequency of treatment.
  • Inspect the steps regularly for signs of damage such as cracks, splinters, and rot. Repair any damage promptly to prevent further deterioration.

By following these maintenance tips, you can keep your wooden steps in good condition and ensure their safety for you and your family.

How to Install Wooden Blinds: A Step-by-Step Guide

How to Install Wooden Blinds: A Step-by-Step Guide

Are you looking to add some style and functionality to your windows? Installing wooden blinds can be a great way to achieve both. Wooden blinds are a classic and timeless choice that can complement any decor style. Plus, they offer privacy and light control, making them a practical choice as well.

Before you get started, it’s important to choose the right type of wooden blinds for your windows. Consider the size and shape of your windows, as well as the amount of light you want to let in. You can choose from inside mount, outside mount, or ceiling mount installation, depending on your preferences and the type of windows you have. With the right tools and a little bit of patience, you can easily install wooden blinds yourself and enjoy the benefits they offer.

Understanding Wooden Blinds

how-to-install-wooden-blinds

If you’re considering adding wooden blinds to your home, it’s important to understand the different types of wooden blinds available and the benefits they offer. In this section, we’ll cover the basics of wooden blinds so you can make an informed decision.

Types of Wooden Blinds

There are two main types of wooden blinds: real wood and faux wood. Real wood blinds are made from natural wood, such as basswood, oak, or cherry. Faux wood blinds, on the other hand, are made from composite materials that mimic the look of real wood.

Real wood blinds are generally more expensive than faux wood blinds, but they offer a more authentic and natural look. Faux wood blinds are more durable and resistant to moisture, making them a great option for high-humidity areas like bathrooms and kitchens.

Benefits of Wooden Blinds

Wooden blinds offer several benefits, including:

  • Insulation: Wooden blinds can help insulate your windows and keep your home cooler in the summer and warmer in the winter.
  • Light control: Wooden blinds offer excellent light control, allowing you to adjust the amount of light that enters your room.
  • Durability: Wooden blinds are durable and long-lasting, making them a great investment for your home.
  • Style: Wooden blinds offer a classic and timeless look that can complement any decor style.

Overall, wooden blinds are a great option for homeowners who want a stylish and functional window treatment. Whether you choose real wood or faux wood blinds, you’ll enjoy the benefits of improved insulation, light control, and durability.

Preparation

Before you start installing wooden blinds, it’s important to ensure that you have all the necessary tools and that you have accurately measured your window. This will help ensure that the installation process goes smoothly and that your blinds fit perfectly.

Tools Needed

Here are the tools you’ll need to install wooden blinds:

Tools
Measuring tape
Screwdriver or power drill
Level
Pencil
Mounting brackets
Screws

Make sure you have all the necessary tools before you start installing your wooden blinds. If you’re missing anything, you can find most of these tools at your local hardware store.

Measuring Your Window

Before you start installing your wooden blinds, you’ll need to measure your window to ensure that your blinds fit properly. Here’s how to do it:

  1. Measure the width of your window from the inside of the frame at the top, middle, and bottom. Record the smallest measurement.
  2. Measure the height of your window from the inside of the frame at the left, center, and right. Record the longest measurement.
  3. If you’re installing inside mount wooden blinds, subtract 1/2 inch from the width and height measurements to allow for clearance. This will ensure that your blinds fit inside the frame of your window.
  4. If you’re installing outside mount wooden blinds, add 2 to 4 inches to the width and height measurements to ensure that your blinds cover the entire window.

By following these steps, you’ll be able to accurately measure your window and ensure that your wooden blinds fit perfectly.

Purchasing Your Wooden Blinds

purchasing-your-wooden-blinds

When it comes to purchasing wooden blinds, there are a few things you should consider to ensure that you get the right product for your needs. Here are some tips to help you make an informed decision:

1. Measure your windows

Before you start shopping for wooden blinds, you need to know the size of your windows. Measure the width and height of each window to determine the size of the blinds you need. It’s important to get accurate measurements to ensure that your blinds fit properly.

2. Choose the right type of wood

There are several types of wood to choose from when it comes to wooden blinds. Some popular options include basswood, bamboo, and faux wood. Each type of wood has its own unique characteristics, so it’s important to choose the one that best suits your needs.

3. Consider the color and finish

Wooden blinds come in a variety of colors and finishes, so you can choose the one that best matches your decor. Some popular options include natural wood finishes, white, and black. Consider the color of your walls and furniture when choosing the color and finish of your blinds.

4. Decide on the style

Wooden blinds come in several styles, including Venetian, vertical, and horizontal. Venetian blinds are the most popular option, but vertical and horizontal blinds can also be a good choice depending on your needs.

5. Check the warranty

When purchasing wooden blinds, it’s important to check the warranty. Make sure you understand the terms and conditions of the warranty before making your purchase.

By considering these factors, you can choose the right wooden blinds for your home and enjoy the benefits of this classic window treatment.

Installation Process

Installing wooden blinds is a simple process that can be done by anyone with basic DIY skills. Here are the steps you need to follow:

Attaching the Brackets

The first step in installing wooden blinds is to attach the brackets to the window frame. Use a measuring tape to determine the location of the brackets, and mark the spots with a pencil. Position the brackets at the same height on both sides of the window. Use a level to ensure that the brackets are straight, and then screw them into place.

Inserting the Blinds

Once the brackets are in place, you can insert the blinds into the brackets. Hold the headrail of the blinds at an angle and insert one end into the bracket. Then, snap the other end of the headrail into the second bracket. Make sure that the blinds are level and centered in the window frame.

Securing the Valance

The valance is the decorative piece that covers the headrail of the blinds. Most wooden blinds come with a valance that can be attached after the blinds are installed. To attach the valance, slide it onto the headrail and secure it with the provided clips or screws.

Adjusting the Length

If the blinds are too long for your window, you can adjust the length by removing some of the slats. Use a pair of scissors or a saw to cut the excess slats from the bottom of the blinds. Be sure to measure the blinds carefully before cutting to avoid making any mistakes.

Testing the Blinds

Before you finish the installation process, test the blinds to make sure they are working properly. Open and close the blinds a few times to ensure that they move smoothly and evenly. If you notice any problems, adjust the brackets or the blinds until they work correctly.

That’s it! By following these simple steps, you can install wooden blinds in your home and enjoy the benefits of beautiful, functional window treatments.

Maintenance Tips

Cleaning

To keep your wooden blinds looking their best, regular cleaning is key. Dust and debris can accumulate quickly, so it’s important to establish a cleaning routine. Here are some tips for cleaning your wooden blinds:

  • Use a soft, dry cloth or feather duster to remove dust from the slats. Be gentle to avoid damaging the finish.
  • For more thorough cleaning, use a damp cloth or sponge. Avoid using too much water, as excess moisture can warp the wood.
  • If your blinds are heavily soiled, you can use a mild soap solution. Be sure to rinse thoroughly and dry completely.
  • Never use abrasive cleaners or harsh chemicals, as these can damage the finish.

Repairing Minor Damages

Despite your best efforts, accidents can happen. If your wooden blinds sustain minor damages, there are a few things you can do to repair them:

  • If a slat becomes bent or warped, you can try gently bending it back into place. Be careful not to apply too much pressure, as this can cause further damage.
  • If a slat breaks, you can replace it with a new one. Most blinds come with extra slats for this purpose. Simply remove the old slat and slide the new one into place.
  • If the cord becomes tangled or frayed, you can untangle it or trim off the frayed end. If the cord is severely damaged, you may need to replace it. Most blinds come with replacement cords and instructions for how to install them.

By following these maintenance tips, you can keep your wooden blinds looking beautiful for years to come.

Why Is My Wooden Table Sticky? Tips to Get Rid of Stickiness

Why Is My Wooden Table Sticky? Tips to Get Rid of Stickiness

Is your wooden table feeling sticky and gross to the touch? It can be frustrating to try to enjoy a meal or work on a project with a table that won’t stop sticking to your hands. If you’re wondering why your wooden table is sticky, there are a few common causes that you should be aware of.

One of the most common reasons for a sticky wooden table is a buildup of dirt, oil, and wax on the surface. Over time, these substances can accumulate and create a sticky residue that is difficult to remove. Another common cause is a poor quality finish that has started to break down, leaving a sticky surface behind. Children and harsh cleaning agents can also contribute to a sticky table.

In this article, we’ll explore the different reasons why your wooden table might be sticky and provide some tips on how to fix the problem. Whether you have a varnished, stained, or painted table, we’ll cover the most common causes of stickiness and offer solutions that you can try at home. By the end of this article, you’ll have a better understanding of why your table is sticky and how to get it back to its original condition.

Understanding Your Wooden Table

why-is-my-wooden-table-sticky-tips-to-get-rid-of-stickiness-2

When your wooden table feels sticky, it can be frustrating and uncomfortable. But before you can fix the problem, you need to understand what might be causing it. Here are some factors that can affect the stickiness of your wooden table:

Material Composition

The type of wood your table is made from can affect its stickiness. Some types of wood are naturally more porous than others, which means they can absorb more moisture and become sticky. For example, pine and oak are more porous than maple or cherry. Additionally, if your table has a veneer or laminate top, the adhesive used to attach it to the underlying wood can also contribute to stickiness.

Age and Usage

Over time, your wooden table may become sticky due to wear and tear. This can happen if the finish on the table wears away, leaving the wood exposed to moisture and dirt. Additionally, if you use your table frequently, food and drink spills can accumulate and contribute to stickiness. Children may also contribute to stickiness by leaving sticky fingerprints or spills on the table.

To prevent stickiness, it’s important to clean your table regularly and use coasters and placemats to protect the surface. Avoid using harsh cleaning agents or excess wax, which can contribute to stickiness. If your table is already sticky, you can try cleaning it with a mild soap and water solution or a vinegar and water solution. Be sure to dry the table thoroughly after cleaning to prevent moisture from accumulating.

By understanding the material composition and age and usage of your wooden table, you can take steps to prevent or fix stickiness and keep your table looking and feeling great.

Causes of Stickiness

If you have a wooden table that feels sticky to the touch, there are several possible causes. In this section, we will explore some of the most common reasons why wooden tables become sticky.

Spills and Stains

One of the most common causes of a sticky wooden table is spills and stains. Food, drinks, and other substances can leave residue on the surface of the table that can make it feel sticky. If spills and stains are not cleaned up promptly, they can become more difficult to remove and may even damage the finish of the table.

To prevent spills and stains from causing stickiness on your wooden table, it is important to clean up any spills as soon as possible. Use a damp cloth to wipe up the spill, and then dry the area thoroughly with a clean towel. If the spill has already dried, you may need to use a mild cleaning solution to remove the residue.

Humidity and Temperature

Humidity and temperature can also contribute to stickiness on wooden tables. When the air is humid, moisture can be absorbed into the wood, causing it to swell and become sticky. Similarly, high temperatures can cause the wood to expand and contract, which can also lead to stickiness.

To prevent humidity and temperature from causing stickiness on your wooden table, try to keep the room at a consistent temperature and humidity level. Use a dehumidifier or air conditioner if necessary to control the humidity levels in the room.

Improper Cleaning Methods

improper-cleaning-methods

Using improper cleaning methods can also cause wooden tables to become sticky. Harsh chemicals, abrasive cleaners, and excessive amounts of water can all damage the finish of the table and leave it feeling sticky.

To clean your wooden table properly and avoid stickiness, use a soft cloth and a mild cleaning solution. Avoid using abrasive scrubbers or harsh chemicals, and be sure to dry the table thoroughly after cleaning to prevent moisture from being absorbed into the wood.

By understanding the causes of stickiness on wooden tables, you can take steps to prevent it from happening and keep your table looking and feeling great for years to come.

Preventing Stickiness

If you want to keep your wooden table from becoming sticky, there are a few measures you can take to prevent it from happening in the first place. Here are some tips:

Proper Cleaning Techniques

One of the best ways to prevent stickiness on your wooden table is to use proper cleaning techniques. Avoid using harsh chemicals or abrasive cleaners that can damage the finish of your table. Instead, use a mild soap and warm water to clean your table. Be sure to wipe up any spills or stains immediately to prevent them from setting in and causing stickiness.

Use of Coasters and Mats

Another way to prevent stickiness on your wooden table is to use coasters and mats. These can help protect the surface of your table from spills and stains, which can lead to stickiness. Use coasters for drinks and mats for hot dishes to prevent heat damage to your table.

Regular Maintenance

Regular maintenance is also important for preventing stickiness on your wooden table. This includes dusting your table regularly to remove any dirt or debris that can scratch the surface. You should also apply a protective wax or oil to your table periodically to help maintain its finish and prevent stickiness.

By following these tips, you can help prevent stickiness on your wooden table and keep it looking great for years to come.

Solving the Stickiness Problem

If your wooden table is sticky, don’t worry, there are ways to solve the problem. Here are some solutions that you can try:

DIY Cleaning Solutions

If the stickiness is caused by food residues or harsh cleaning agents, you can try cleaning your table with natural ingredients that you probably already have in your kitchen. Here are some DIY cleaning solutions that you can try:

  • Vinegar and Water: Mix equal parts of white vinegar and water in a spray bottle. Spray the solution on the table and wipe it with a clean cloth. Vinegar is a natural disinfectant and can help remove sticky residues.
  • Baking Soda and Water: Mix baking soda and water to make a paste. Apply the paste on the table and scrub it with a soft brush. Baking soda is a natural abrasive and can help remove sticky residues.
  • Tea: Steep black tea bags in boiling water for 10 minutes. Let the tea cool down and then use it to clean the table. The tannic acid in the tea can help remove stickiness.

Professional Help

If the stickiness is caused by a poor quality finish or excess wax, you may need to seek professional help. Here are some options:

  • Refinishing: A professional can strip the old finish off your table and apply a new finish. This can be expensive, but it will give your table a new lease of life.
  • Wax Removal: A professional can remove excess wax from your table. This is a less expensive option than refinishing, but it may not be as effective.

Remember, prevention is better than cure. To prevent stickiness in the future, avoid using harsh cleaning agents, wipe spills immediately, and use coasters and placemats to protect your table.

How Many Incendiary Shells Do You Need to Burn a Wooden Door?

How Many Incendiary Shells Do You Need to Burn a Wooden Door?

Are you tired of constantly guessing how many incendiary shells you need to destroy a wooden door? Look no further! In this article, we will provide you with the most accurate information on how many incendiary shells you need to take down a wooden door.

The number of incendiary shells required to destroy a wooden door depends on the type of wood and the thickness of the door. For example, a thin pine door might only need two or three incendiary shells, while a thick oak door could require six or seven. It’s important to note that using too many incendiary shells can cause unnecessary damage to your base, so it’s best to use the minimum amount necessary to take down the door.

We understand that destroying wooden doors can be a frustrating and time-consuming process, but with the right information, you can save yourself time and resources. Keep reading to find out the most efficient way to use incendiary shells to take down a wooden door.

Understanding Incendiary Shells

understanding-incendiary-shells

If you’re looking to break through a wooden door in Rust, then incendiary shells might be just what you need. These special shotgun shells produce a fiery explosion on impact, dealing extra damage to wooden structures. But how many incendiary shells do you need to destroy a wooden door?

The answer depends on a few factors, such as the type of shotgun you’re using and the quality of the door. Here’s a breakdown of how many incendiary shells it takes to destroy a wooden door using some of the most common shotguns in Rust:

  • Pump Shotgun: 39 shells
  • Double Barrel Shotgun: 20 shells
  • Waterpipe Shotgun: 15 shells

It’s worth noting that these numbers are based on using standard wooden doors. If the door is upgraded to a stronger material, such as sheet metal or armored, it will take more incendiary shells to break through.

Another thing to keep in mind is that incendiary shells have a chance to set the wooden structure on fire, which can cause additional damage over time. This can be helpful for breaking through doors faster, but it also means you’ll need to be careful not to get caught in the flames yourself.

Overall, incendiary shells can be a powerful tool for raiding wooden bases in Rust. Just make sure you have enough shells on hand and take precautions to avoid getting burned.

Wooden Doors and Their Resistance

Wooden doors are a common feature in many homes and buildings, but they vary in their resistance to damage and fire. Understanding the strength and weaknesses of wooden doors can help you better protect your property and make informed decisions about how to secure your doors.

One important factor to consider is the type of wood used in the door. Some types of wood, such as oak, are denser and more resistant to damage than others. Thicker doors made of denser woods will generally be more resistant to damage from tools and other objects.

However, even the strongest wooden doors may not be able to withstand a determined attacker or a fire. It is important to take additional measures to secure your doors, such as installing deadbolts or other locking mechanisms.

When it comes to fire resistance, not all wooden doors are created equal. Fire-rated doors are designed to resist the spread of flames and smoke for a certain period of time. The length of time a door can resist fire is measured in minutes, with higher ratings indicating greater resistance.

If you are concerned about the fire resistance of your wooden doors, consider installing fire-rated doors or adding fire-resistant coatings to your existing doors. It is also important to ensure that your doors are properly installed and maintained to maximize their resistance to fire.

In summary, wooden doors can vary in their resistance to damage and fire, depending on factors such as the type of wood used and the thickness of the door. Taking additional measures to secure your doors and considering fire-rated doors can help you better protect your property.

Calculating Shell Requirement

how-many-incendiary-shells-do-you-need-to-burn-a-wooden-door-2

When it comes to securing your base in Rust, the wooden door is an essential early game building item. However, simply placing a wooden door is not enough to ensure the safety of your base. You must also consider how many incendiary shells you will need to protect your base from enemies.

Factors Affecting Calculation

The number of incendiary shells required to destroy a wooden door depends on several factors. These include the type of shotgun used, the distance between the shooter and the door, and the number of pellets that hit the door.

The type of shotgun used is crucial because different types of shotguns have different damage outputs. For example, the Double Barrel Shotgun has a higher damage output than the Pump Shotgun. The distance between the shooter and the door is also important because the further away the shooter is, the less damage the pellets will do. Finally, the number of pellets that hit the door will affect the number of shells required.

Methods of Calculation

There are two methods of calculating the number of incendiary shells required to destroy a wooden door. The first method is to use trial and error. This involves shooting the door with incendiary shells until it breaks. While this method is straightforward, it can be time-consuming and wasteful.

The second method is to use a Rust calculator such as Rust Labs. Rust Labs provides a table that shows the number of incendiary shells required to destroy a wooden door based on the type of shotgun used. For example, according to Rust Labs, it takes 32 incendiary shells from a Double Barrel Shotgun to destroy a wooden door.

In conclusion, calculating the number of incendiary shells required to destroy a wooden door is essential for securing your base in Rust. Factors such as the type of shotgun used, the distance between the shooter and the door, and the number of pellets that hit the door will affect the calculation. You can use trial and error or a Rust calculator such as Rust Labs to determine the number of incendiary shells required.

Safety Precautions When Using Incendiary Shells

When using incendiary shells, it is important to take proper safety precautions to avoid injury or damage to property. Here are some tips to keep in mind:

  • Always wear appropriate protective gear, such as eye and ear protection, gloves, and a face mask.
  • Make sure the area around you is clear of flammable materials, including grass, leaves, and other debris.
  • Keep a fire extinguisher nearby in case of accidental fires.
  • Make sure you are using the correct type of incendiary shell for your weapon.
  • Never point your weapon at anything you do not intend to shoot.
  • Always keep your finger off the trigger until you are ready to shoot.
  • Do not use incendiary shells in areas where they are prohibited by law or regulation.

By following these simple safety precautions, you can help ensure that your use of incendiary shells is safe and responsible. Remember, always prioritize safety when handling firearms or ammunition.

Alternative Methods for Opening Wooden Doors

If you’re looking for alternative ways to open wooden doors in Rust, there are a few options available to you. While some methods may be more effective than others, it’s important to keep in mind that wooden doors are relatively weak and can be destroyed with a variety of tools and weapons.

Using Incendiary Shells

One effective method for opening wooden doors is to use incendiary shells. These shells are designed to ignite upon impact, causing fire damage to any structures they hit. When fired at a wooden door, incendiary shells can quickly burn through the door and allow you to gain entry.

To use incendiary shells, you’ll need a shotgun or other weapon that can fire them. Simply load the shells into your weapon and aim at the wooden door. Fire the weapon and the shells will ignite upon impact, causing fire damage to the door.

Keep in mind that incendiary shells can be expensive and may not be the most practical option for opening wooden doors in all situations.

Other Methods

If you don’t have access to incendiary shells or prefer not to use them, there are other methods you can try. Some alternative methods for opening wooden doors in Rust include:

  • Using a metal hatchet or other melee weapon to break down the door
  • Using satchel charges or other explosives to blow up the door
  • Using a flamethrower to burn through the door

Each of these methods has its own advantages and disadvantages, so it’s important to consider your options carefully before deciding which method to use.

Overall, there are several effective methods for opening wooden doors in Rust. Whether you choose to use incendiary shells or another method, it’s important to approach the situation carefully and be prepared for any potential risks or challenges.