Category Archives: Blog

How to Make Wooden Shelves: A Beginner's Guide

How to Make Wooden Shelves: A Beginner's Guide

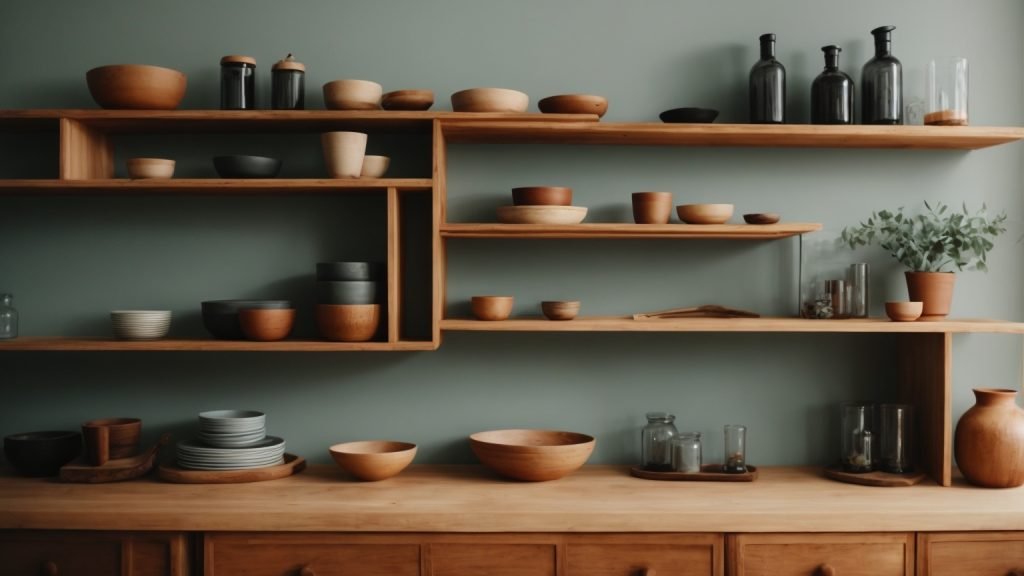
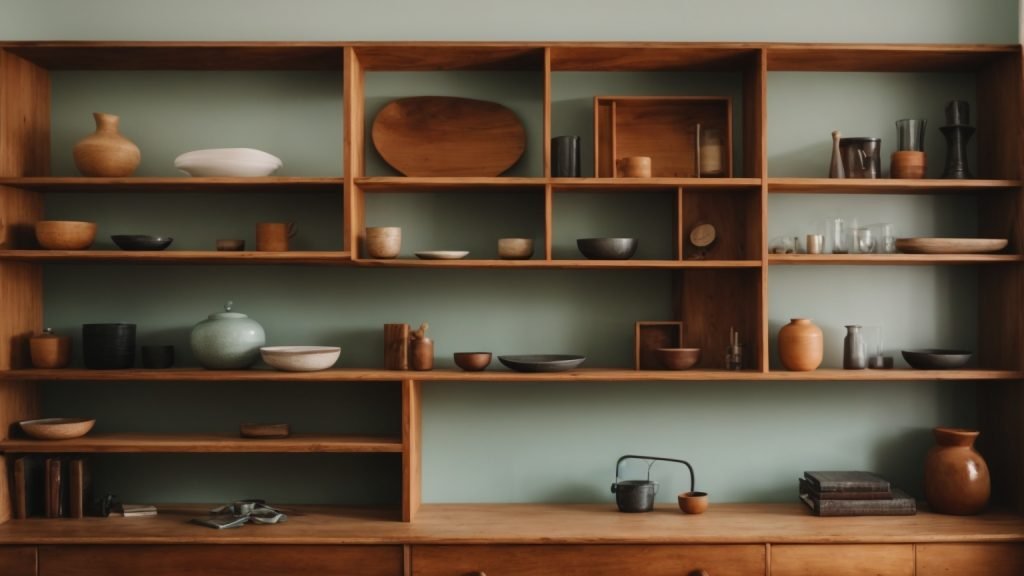
Are you looking for a way to add some extra storage space to your home? Wooden shelves are a great solution that can be customized to fit your specific needs and style. Whether you’re looking to organize your kitchen, display your favorite books, or create a unique piece of decor, building your own wooden shelves can be a fun and rewarding project.

Before you get started, it’s important to consider a few key factors. First, you’ll need to decide on the type of wood you want to use. Softwood boards are a popular choice for their affordability and versatility, while hardwoods like oak and maple offer a more durable and elegant option. You’ll also need to determine the size and shape of your shelves, as well as the method of installation. Will you be using brackets, building floating shelves, or incorporating a built-in design? With these factors in mind, let’s dive into the steps involved in making your own wooden shelves.

Understanding the Basics of Woodworking

how-to-make-wooden-shelves

Woodworking is an art that requires patience, skill, and knowledge. Whether you are a beginner or an experienced woodworker, it is essential to understand the basics of woodworking before starting any project. In this section, we will cover the types of wood and safety measures you need to know before making wooden shelves.

Types of Wood

Before starting any woodworking project, you need to choose the right type of wood. The type of wood you choose will depend on the project you want to undertake. Here are some common types of wood used in woodworking:

Wood Type Characteristics
Pine Softwood, easy to work with, affordable
Oak Hardwood, durable, expensive
Maple Hardwood, fine texture, easy to work with
Cherry Hardwood, beautiful grain, medium hardness

When selecting wood, consider the color, grain pattern, and texture. You can also choose between rough-cut and surfaced wood. Rough-cut wood has a rough texture and requires more work to smooth it out. Surfaced wood has a smooth finish and is ready to use.

Safety Measures

Woodworking involves the use of sharp tools and machinery, making it essential to take safety measures. Here are some safety measures you should follow when making wooden shelves:

  • Wear safety goggles to protect your eyes from flying debris
  • Use ear protection when using loud machinery
  • Keep your work area clean and free of clutter
  • Use sharp tools to prevent accidents
  • Follow the manufacturer’s instructions when using machinery
  • Keep your fingers away from blades and cutters
  • Use a dust mask to protect your lungs from sawdust

By following these safety measures, you can reduce the risk of accidents and injuries while woodworking.

Now that you understand the basics of woodworking, you can start making your wooden shelves. Remember to choose the right type of wood and follow safety measures to ensure a successful project.

Gathering Your Materials

Before you start building your wooden shelves, you need to gather all the necessary materials. This includes choosing the right wood and selecting the proper tools.

Choosing Your Wood

When choosing the wood for your shelves, you need to consider the weight of the items you will be placing on them, as well as the overall aesthetic you are going for. Some common types of wood used for shelves include pine, oak, and maple.

Pine is a softwood that is easy to work with and has a rustic look. Oak is a hardwood that is durable and has a more traditional appearance. Maple is another hardwood that is strong and has a light, uniform color.

Make sure to choose wood that is straight and free of knots, cracks, or other defects that could weaken the shelf.

Selecting Your Tools

To build your wooden shelves, you will need a variety of tools. Some of the essential tools include:

  • Circular saw or table saw
  • Drill and drill bits
  • Screws and nails
  • Wood glue
  • Sandpaper
  • Measuring tape
  • Level

Depending on the design of your shelves, you may also need a router, jigsaw, or other specialty tools.

Make sure to have all the necessary tools on hand before you start building to avoid delays or frustration during the process.

By choosing the right wood and selecting the proper tools, you can ensure that your wooden shelves are sturdy, functional, and visually appealing.

Designing Your Wooden Shelves

designing-your-wooden-shelves

Before you start building your wooden shelves, it’s important to design them first. This will help you determine the size and shape of your shelves, as well as the materials you’ll need. Here are some tips on how to design your wooden shelves:

Determining the Size

The first step in designing your wooden shelves is to determine the size you need. Consider the space where you’ll be installing the shelves and measure the area where you want to place them. Make sure to take into account any obstacles or fixtures that may affect the size of your shelves.

Once you have the measurements, decide on the depth and height of your shelves. The depth should be at least 10 inches to accommodate most standard items, while the height will depend on your preference and the space available.

Sketching the Design

After determining the size of your shelves, it’s time to sketch the design. This will help you visualize how your shelves will look and give you an idea of the materials you’ll need.

Start by sketching the overall shape of your shelves. You can choose between a simple rectangular design or a more complex shape, depending on your preference. Then, decide on the number of shelves you want and their placement.

Next, sketch the details of your shelves, such as the edges and corners. You can choose between a rounded or square edge, depending on the style you want to achieve. You can also add decorative elements, such as brackets or trim, to enhance the look of your shelves.

Finally, make a list of the materials you’ll need, including the type of wood, screws, brackets, and any other hardware. This will help you stay organized and ensure that you have everything you need before you start building your shelves.

By following these tips, you can design wooden shelves that are both functional and stylish. With a little planning and creativity, you can create shelves that will enhance the look of any room in your home.

Preparing the Wood

Before you start building your wooden shelves, you need to prepare the wood. This involves cutting the wood to the right size and sanding it to ensure a smooth finish. Here’s how to do it:

Cutting the Wood

The first step in preparing the wood is to cut it to the right size. You can use a saw or a miter saw to do this. Make sure you measure the wood carefully before cutting it to avoid any mistakes.

If you’re using pre-cut wood, you can skip this step. However, if you’re cutting your own wood, you’ll need to measure it carefully and mark it before cutting. A table saw can also be used to cut the wood, but it is not necessary.

Sanding the Wood

Once you’ve cut the wood to the right size, the next step is to sand it. Sanding the wood will ensure that it is smooth and free of any rough edges or splinters. You can use a palm sander or sanding blocks to do this.

Start with a coarse sandpaper and work your way up to a finer grit. This will help to remove any rough spots and create a smooth surface. Be sure to sand both sides of the wood and the edges as well.

After sanding, wipe the wood down with a damp cloth to remove any sawdust. You can also apply a wood conditioner to the wood to help it accept the stain or paint better.

By following these steps, you can prepare your wood for building your shelves. With the wood cut to the right size and sanded to a smooth finish, you’ll be ready to move on to the next step in building your shelves.

Assembling the Shelves

Once you have cut your wooden boards to the desired length, it’s time to assemble your shelves. In this section, we will guide you through the process of attaching the pieces and securing them with screws.

Attaching the Pieces

To begin, lay out your cut wooden boards on a flat surface, making sure they are aligned correctly. Next, take your drill and create pilot holes in each of the boards where they will connect. Pilot holes will make it easier to attach the boards and prevent the wood from splitting.

Once you have created your pilot holes, apply a thin layer of wood glue to the edges of the boards that will be joined together. Then, using clamps, press the boards together, making sure they are flush and even. Allow the glue to dry completely before moving on to the next step.

Securing with Screws

Now that your boards are securely glued together, it’s time to add screws to reinforce the joints. Select screws that are the appropriate length for the thickness of your boards. You don’t want screws that are too long or too short.

Insert the screws into the pilot holes you created earlier, making sure they are driven in straight and flush with the surface of the wood. Be careful not to overtighten the screws, as this can cause the wood to split.

Repeat this process for each joint until all of your shelves are assembled. Once you have finished, you can sand the edges of the shelves to create a smooth finish.

Congratulations, you have successfully assembled your wooden shelves!

Finishing Touches

Once you have built your wooden shelves, it’s time to add the finishing touches. This will not only give the shelves a professional look but also protect them from damage. In this section, we will cover two important sub-sections: Applying Wood Stain and Adding a Protective Coat.

Applying Wood Stain

Wood stain is a great way to enhance the natural beauty of wood while also protecting it from damage. Here are the steps to apply wood stain:

  1. Sand the surface of the wood to make it smooth.
  2. Clean the surface with a damp cloth to remove any dust or debris.
  3. Apply the wood stain using a brush or a cloth. Make sure to follow the manufacturer’s instructions for the specific product you are using.
  4. Let the stain sit for the recommended amount of time before wiping off any excess with a clean cloth.
  5. Allow the stain to dry completely before applying a protective coat.

Adding a Protective Coat

Adding a protective coat will help keep your wooden shelves looking new and prevent damage from scratches, spills, and other wear and tear. Here are the steps to add a protective coat:

  1. Choose the type of protective coat you want to use. Polyurethane, varnish, and wax are all popular options.
  2. If you are using polyurethane or varnish, apply it with a brush or a roller. If you are using wax, use a clean cloth.
  3. Apply the first coat and let it dry completely before adding another coat. Make sure to follow the manufacturer’s instructions for the specific product you are using.
  4. Once you have applied the recommended number of coats, let the protective coat dry completely before using the shelves.

By following these steps, you can add the finishing touches to your wooden shelves and protect them from damage.

Installing the Shelves

Once you have built your wooden shelves, it’s time to install them. Here are some tips to help you get it right.

Choosing the Right Location

Before you start installing your shelves, think carefully about where you want to put them. Consider the following factors:

  • Weight Capacity: Make sure the wall can support the weight of the shelves and anything you plan to put on them.
  • Accessibility: Choose a location that is easy to access and won’t get in the way of other activities.
  • Style: Consider the overall look and feel of the room and choose a location that complements it.

Mounting on the Wall

When you’re ready to mount your shelves, follow these steps:

  1. Use a stud finder to locate the studs in the wall. Mark the location of the studs with a pencil.
  2. Hold the shelf against the wall at the desired height. Use a level to make sure it is straight.
  3. Use a drill to make pilot holes through the shelf and into the wall studs.
  4. Insert screws into the pilot holes and tighten them with a screwdriver.
  5. Repeat the process for each shelf.

Remember to leave enough space between shelves to accommodate the items you plan to store on them. With these tips, you’ll be able to install your wooden shelves with ease and confidence.

How Many Satchels Do You Need for a Wooden Door?

How Many Satchels Do You Need for a Wooden Door?

When it comes to securing your wooden door, one of the most common questions homeowners ask is how many satchels they need. The answer to this question depends on a range of factors, including the size and weight of your door, as well as the type of hinges and hardware you have installed. In this article, we’ll provide you with a comprehensive guide on how many satchels you need to secure your wooden door.

Generally, it’s recommended to use two to three satchels to secure a standard-sized wooden door. However, if you have a larger or heavier door, you may need four or more satchels to ensure proper security. It’s also important to consider the type of hinges and hardware you have installed, as these may require additional satchels for optimal security. By following these guidelines, you can ensure that your wooden door is properly secured and protected against potential intruders.

Understanding Satchels

how-many-satchels-do-you-need-for-a-wooden-door-2

What is a Satchel?

A satchel is a small bag that is used to carry items. In the context of securing a wooden door, satchels are used as an explosive device to break down the door. Satchels are commonly used in games like Rust and Terraria to raid other players’ bases. In real life, satchels are used by law enforcement and military personnel to breach doors and walls.

Satchels are made of various materials, including leather and synthetic materials. They come in different sizes and shapes, depending on their intended use. Satchels used for breaching doors are typically small and compact, making them easy to carry and handle.

Different Types of Satchels

There are different types of satchels, each with its own unique characteristics and uses. The most common types of satchels used for breaching doors are:

  • Explosive Satchels: These satchels are filled with explosives that are detonated to break down the door. They are powerful and effective, but also dangerous and should only be used by trained professionals.
  • Thermal Satchels: These satchels use heat to break down the door. They are less powerful than explosive satchels but are safer to use and can be used in confined spaces.
  • Mechanical Satchels: These satchels use a mechanical force to break down the door. They are less powerful than explosive and thermal satchels but are also safer to use and can be used in confined spaces.

It is important to choose the right type of satchel for the job to ensure maximum effectiveness and safety. Consulting with a professional is recommended before using satchels for breaching doors.

That’s all you need to know about satchels for securing a wooden door.

Wooden Doors Basics

When it comes to securing your home, your wooden door is the first line of defense. But how many satchels do you need to secure it? Before we get into that, let’s go over some basics of wooden doors.

Types of Wooden Doors

There are many types of wooden doors, each with its own unique features and characteristics. Here are a few common types:

  • Solid wood doors: Made entirely of wood, these doors are durable and offer good sound insulation.
  • Hollow core doors: These doors have a honeycomb-like structure inside, making them lightweight and affordable.
  • Paneled doors: These doors have decorative panels on the front, adding a touch of style to your home.
  • French doors: These doors have glass panels and are often used as patio doors.

Wooden Door Dimensions

Wooden doors come in a variety of sizes, but most standard doors are 80 inches tall and 36 inches wide. However, it’s important to measure your door to ensure you get the right size satchels.

When measuring your door, be sure to measure the height, width, and thickness. The thickness of your door can affect the number of satchels you need. A thicker door may require more satchels for proper installation.

In summary, understanding the basics of wooden doors is important before determining how many satchels you need to secure them. Knowing the type and dimensions of your door will help you make an informed decision.

Determining Satchels for a Wooden Door

determining-satchels-for-a-wooden-door

When it comes to securing a wooden door, it is important to determine the correct number of satchels needed for proper installation. This section will guide you through the process of determining the number of satchels required for your wooden door.

Importance of Accurate Measurements

Before purchasing satchels, it is important to take accurate measurements of your wooden door. This will ensure that you purchase the correct number of satchels required for proper installation. Here are some steps to follow when measuring your wooden door:

  1. Measure the height and width of your wooden door using a tape measure.
  2. Measure the thickness of your wooden door using a caliper or ruler.
  3. Determine the weight of your wooden door using a scale.

Calculating Number of Satchels

Once you have accurate measurements of your wooden door, you can calculate the number of satchels required for proper installation. Here are some factors to consider when calculating the number of satchels needed:

  1. Door size: The size of your wooden door will determine the number of satchels required for proper installation. Generally, a single satchel is used for a door up to 81 inches tall and a double satchel is used for taller doors.
  2. Door weight: The weight of your wooden door will also determine the number of satchels required for proper installation. Generally, two or three satchels are enough to secure a standard-sized wood door, but four or more may be required for larger or heavier doors.
  3. Door hardware: Speciality door hinges and hardware may require additional satchels to ensure proper installation. Be sure to consult a professional before purchasing satchels for your wooden door.

By taking accurate measurements and considering the factors listed above, you can determine the correct number of satchels required for proper installation of your wooden door.

Factors Influencing the Number of Satchels

When determining the number of satchels needed to breach a wooden door, several factors come into play. These factors include the weight of the wooden door, the size of the satchel, and the material of the satchel.

Weight of the Wooden Door

The weight of the wooden door is a critical factor when determining the number of satchels needed to breach it. Generally, the heavier the door, the more satchels you will need to use. A heavier wooden door is usually thicker and made of denser wood, which makes it harder to penetrate. In contrast, a lighter wooden door is usually thinner and made of less dense wood, which makes it easier to breach.

Size of the Satchel

The size of the satchel is another crucial factor that influences the number of satchels needed to breach a wooden door. A smaller satchel will require you to use more of them to breach the door, while a larger satchel will require fewer. It’s essential to use the right size of the satchel to ensure that you don’t waste resources or fail to breach the door.

Material of the Satchel

The material of the satchel is the final factor that influences the number of satchels needed to breach a wooden door. The material of the satchel determines its durability and strength, which affects its ability to penetrate the wooden door. A stronger and more durable satchel will require fewer of them to breach the door, while a weaker and less durable satchel will require more.

In conclusion, the number of satchels needed to breach a wooden door depends on several factors, including the weight of the wooden door, the size of the satchel, and the material of the satchel. It’s essential to consider these factors carefully to ensure that you use the right number of satchels and breach the wooden door successfully.

Practical Tips for Using Satchels with Wooden Doors

When using satchels to open a wooden door, there are a few practical tips that can help ensure a safe and successful operation. In this section, we will discuss some of these tips, including safety precautions and maintenance tips.

Safety Precautions

Before you begin using satchels to open a wooden door, it’s important to take certain safety precautions to avoid injury or damage to the door. Here are some tips to keep in mind:

  • Always wear protective gear, such as gloves and safety goggles, when handling satchels.
  • Make sure the area around the door is clear of any flammable materials or debris that could be ignited by the explosion.
  • Keep a safe distance from the door when the satchel is detonated to avoid injury from flying debris.
  • Never attempt to use satchels on a door that is already damaged or weakened, as this could cause the door to collapse and cause injury.

By following these safety precautions, you can help ensure a safe and successful operation when using satchels to open a wooden door.

Maintenance Tips

To ensure that your satchels are effective and reliable when used with a wooden door, it’s important to take proper care of them. Here are some maintenance tips to keep in mind:

  • Store satchels in a cool, dry place to prevent moisture and heat damage.
  • Check the expiration date on your satchels to ensure they are still effective.
  • Inspect your satchels for any signs of damage or wear before using them.
  • Follow the manufacturer’s instructions for storage and use of satchels to ensure maximum effectiveness.

By following these maintenance tips, you can help ensure that your satchels are effective and reliable when used with a wooden door.

How to Build a Wooden Boat: A Beginner's Guide

How to Build a Wooden Boat: A Beginner's Guide

Building a wooden boat can be a fulfilling and rewarding experience. Whether you’re an experienced boat builder or a novice, building a wooden boat can be a great way to spend your time and create something that you can be proud of. With the right tools, materials, and guidance, you can build a wooden boat that will last for years to come.

The first step in building a wooden boat is to gather all the necessary materials and tools. You will need to choose the right type of wood for your boat, as well as other materials such as epoxy, fiberglass, and marine hardware. You’ll also need to have the right tools on hand, including saws, sanders, clamps, and drills. Once you have all the materials and tools you need, you can begin the process of building your wooden boat.

There are many different methods and techniques for building a wooden boat, and the best approach will depend on the type of boat you want to build and your level of experience. Some common techniques include stitch-and-glue, strip-planking, and lapstrake construction. Regardless of the method you choose, building a wooden boat requires patience, attention to detail, and a willingness to learn new skills. With dedication and hard work, you can create a beautiful and functional wooden boat that you can be proud of.

Understanding the Basics of Boat Building

understanding-the-basics-of-boat-building

Building a wooden boat may seem like a daunting task, but with a little bit of knowledge and patience, it can be a rewarding experience. Before you get started, it’s important to understand the basics of boat building.

Materials

The materials you choose for your boat will depend on the type of boat you want to build and your budget. Common materials for wooden boat building include:

  • Plywood
  • Cedar
  • Mahogany
  • Teak
  • Oak

It’s important to choose high-quality materials that are suitable for your project. Poor quality materials can lead to a weaker, less durable boat.

Tools

You’ll need a variety of tools to build a wooden boat, including:

  • Saw
  • Drill
  • Hammer
  • Chisels
  • Planes
  • Clamps

It’s important to use the right tool for the job to ensure accuracy and safety. If you’re unsure about how to use a particular tool, seek advice from a professional or experienced boat builder.

Plans

Having a good set of plans is essential for building a wooden boat. Plans will provide you with the specifications and measurements you need to build a boat that is safe and seaworthy. You can find plans online, in books, or from boat building associations.

Construction

The construction process for a wooden boat involves several stages, including:

  • Lofting: Transferring the plans to full size on the building floor.
  • Framing: Building the framework of the boat.
  • Planking: Attaching the planks to the framework.
  • Finishing: Sanding, painting, and varnishing the boat.

Each stage requires attention to detail and careful planning to ensure a successful outcome.

By understanding the basics of boat building, you’ll be well on your way to building your own wooden boat. Remember to take your time, use high-quality materials, and seek advice when you need it. Happy building!

Choosing the Right Type of Wood

When building a wooden boat, choosing the right type of wood is crucial to ensure the boat is sturdy, durable, and long-lasting. In this section, we will discuss the two main categories of wood for boat building and the best types of wood to use.

Hardwood vs Softwood

Hardwood and softwood are the two main categories of wood used for boat building. Hardwood is denser, stronger, and more durable than softwood, making it ideal for keels, frames, thwarts, decks, and other major structural components of the boat. Softwood, on the other hand, is more flexible and easier to work with, making it suitable for smaller parts like gunwales, knees, and breasthooks.

Best Types of Wood for Boats

Here are some of the best types of wood to use when building a wooden boat:

Type of Wood Characteristics
Teak Durable, water-resistant, and rot-resistant. Expensive.
Oak Strong, durable, and resistant to rot.
Mahogany Lightweight, strong, and resistant to rot.
Cedar Lightweight, easy to work with, and resistant to rot.
Plywood Affordable, easy to work with, and suitable for small boats.

When choosing the type of wood to use, consider the size and type of boat you want to build, your budget, and the availability of the wood in your area. It’s also important to choose high-quality wood that is free of knots, cracks, and other defects.

In summary, choosing the right type of wood is essential when building a wooden boat. Hardwood is best for major structural components, while softwood is suitable for smaller parts. Teak, oak, mahogany, cedar, and plywood are some of the best types of wood to use, depending on your needs and budget.

Gathering Your Tools

Before you start building your wooden boat, it’s important to gather all the necessary tools. Having the right tools on hand will make your boat-building project much easier and more enjoyable. In this section, we’ll go over the essential hand tools and power tools you may need.

Essential Hand Tools

Here are some of the essential hand tools you’ll need for building a wooden boat:

Tool Description
Hacksaw For cutting metal parts
Edge tools Wide chisel (25-50mm or 1-2inch), narrow chisel (max 15mm or 5/8 inch)
Block plane Preferably a rabbet block plane. Lie-Nielsen makes a wonderful model, but it is not cheap. More affordable models are available from Dictum, Juuma, Kunz, and Axminster – or you could find a vintage tool.
Clamps Various sizes and types of clamps will be necessary for holding pieces together while glue dries.
Hand saw A crosscut saw and a rip saw will be necessary for cutting wood to length and width.
Screwdrivers A set of screwdrivers in various sizes will be needed for installing hardware and fasteners.
Measuring tools A tape measure, combination square, and marking gauge will help you make accurate measurements and cuts.

Power Tools You May Need

While many wooden boat builders prefer to work with hand tools, power tools can make the job faster and easier. Here are some power tools you may want to consider for your boat-building project:

Tool Description
Circular saw A circular saw will make quick work of cutting large pieces of wood.
Jigsaw A jigsaw is useful for cutting curves and intricate shapes.
Router A router can be used for shaping edges and cutting grooves.
Power drill A power drill will be necessary for drilling holes for hardware and fasteners.
Belt sander A belt sander will make sanding large surfaces much faster and easier.

Remember, having the right tools is essential for a successful boat-building project. Take the time to gather all the necessary tools before you start, and your project will be much smoother and more enjoyable.

Creating Your Boat Design

creating-your-boat-design

When it comes to building a wooden boat, creating a design that meets your needs and preferences is crucial. Here are some steps to help you create your boat design:

Sketching Your Initial Design

The first step in creating your boat design is to sketch out your ideas. You can use paper and pencil or a digital design program to create your initial sketches. Start by outlining the basic shape and size of your boat. Consider the type of water you will be using it in, the number of passengers you want it to hold, and any additional features you may want to include.

Once you have a basic outline, you can start adding details such as the placement of seats, storage compartments, and other features. Keep in mind that the more detailed your sketch is, the easier it will be to create a final blueprint.

Finalizing Your Boat Blueprint

After you have created your initial design, it’s time to finalize your boat blueprint. This is where you will add all the necessary details and measurements. You can use a design program or hire a professional boat designer to help you create a detailed blueprint.

When finalizing your blueprint, consider the materials you will be using to build your boat. Make sure your design takes into account the strength and durability of the wood you will be using. You should also consider the tools and equipment you will need to build your boat.

Once you have finalized your blueprint, you can use it to create a materials list and start building your boat. Remember to refer back to your blueprint throughout the building process to ensure you are staying on track and creating the boat you envisioned.

Creating a boat design can be a fun and rewarding experience. By taking the time to sketch out your ideas and finalize your blueprint, you can create a boat that meets your needs and preferences.

Cutting and Shaping the Wood

When building a wooden boat, cutting and shaping the wood is a crucial step in the process. In this section, we will cover the key aspects of preparing your wood, cutting techniques, and shaping your boat pieces.

Preparing Your Wood

Before you start cutting and shaping your wood, it’s important to ensure that it’s properly prepared. Here are a few things to keep in mind:

  • Choose the right type of wood: The type of wood you choose will depend on your budget, the size of your boat, and the conditions it will be used in. Popular options include cedar, mahogany, and oak.
  • Dry your wood: Make sure your wood is properly dried before you start working with it. This will prevent warping and cracking.
  • Sand your wood: Sanding your wood will make it smoother and easier to work with. Use a fine-grit sandpaper to achieve the best results.

Cutting Techniques

When it comes to cutting your wood, there are a few techniques that you should be familiar with:

  • Straight cuts: Use a saw to make straight cuts in your wood. Make sure to use a straight edge as a guide to ensure accuracy.
  • Curved cuts: To make curved cuts, use a jigsaw or bandsaw. Make sure to use a template or pattern to guide your cuts.
  • Bevel cuts: Bevel cuts are angled cuts made on the edge of a piece of wood. Use a table saw or circular saw to make these cuts.

Shaping Your Boat Pieces

Once you’ve cut your wood to the right size and shape, it’s time to start shaping your boat pieces. Here are a few tips to keep in mind:

  • Use a plane: A hand plane is a great tool for shaping your wood. It allows you to remove small amounts of wood at a time, making it easier to achieve the desired shape.
  • Sand your pieces: Sanding your pieces will help smooth out any rough edges and give them a finished look.
  • Test fit your pieces: Before you start gluing your pieces together, make sure to test fit them to ensure they fit together properly.

By following these tips for cutting and shaping your wood, you’ll be well on your way to building a beautiful wooden boat.

Assembling Your Boat

When it comes to assembling your wooden boat, there are a few key things to keep in mind to ensure that your boat is sturdy and reliable. In this section, we’ll cover two important sub-sections: Joining the Pieces Together and Ensuring Structural Integrity.

Joining the Pieces Together

To join the pieces of your boat together, you have a few options. One of the most common methods is to use epoxy and fiberglass tape. This method involves applying a layer of epoxy to the joint, then laying down a strip of fiberglass tape and applying another layer of epoxy. This creates a strong, waterproof bond that will hold up over time.

Another option is to use wooden dowels or screws to join the pieces together. This method can be a bit more time-consuming, but it can also be more aesthetically pleasing since there won’t be any visible fiberglass tape.

Regardless of which method you choose, it’s important to ensure that the joints are tight and that there are no gaps between the pieces. This will help to prevent leaks and ensure that your boat is sturdy and reliable.

Ensuring Structural Integrity

Once the pieces of your boat are joined together, it’s important to ensure that the structure is sound. This means checking for any weak spots or areas where the wood may be prone to splitting or cracking.

One way to do this is to apply a layer of epoxy to the entire boat. This will help to strengthen the wood and prevent any potential issues down the line.

Another important step is to reinforce any areas that may be prone to stress, such as the joints between the bow and stern and the sides of the boat. This can be done by adding additional layers of fiberglass tape or by using wooden braces.

By taking these steps to ensure structural integrity, you can be confident that your wooden boat will be strong and reliable for years to come.

Applying Finishes

Choosing the Right Finish

When it comes to finishing a wooden boat, there are a variety of options to choose from. The most common finishes are varnish, paint, and epoxy. Each finish has its own advantages and disadvantages, so it’s important to consider your needs and preferences before making a decision.

  • Varnish: Varnish is a popular choice for wooden boats because it enhances the natural beauty of the wood while also providing protection against the elements. It’s available in a range of gloss levels, from high gloss to matte, and can be applied in multiple coats for added durability. However, varnish requires regular maintenance and can be difficult to apply evenly.
  • Paint: Paint is a good choice if you want a solid color or if your boat has a lot of imperfections that you want to hide. It’s also a good option if you want a finish that’s easy to maintain and repair. However, paint can be prone to chipping and cracking, and it doesn’t provide as much protection against the elements as varnish or epoxy.
  • Epoxy: Epoxy is a two-part resin that can be used to seal and protect the wood. It’s a good choice if you want a finish that’s extremely durable and resistant to moisture and UV rays. However, epoxy can be difficult to apply and can be expensive.

Applying Your Chosen Finish

Once you’ve chosen your finish, it’s time to apply it to your wooden boat. Here are some tips to help you get the best results:

  • Prepare the surface: Before applying any finish, make sure the surface of your boat is clean, dry, and free of dust and debris. Sand the surface to create a smooth, even surface.
  • Apply the finish in thin coats: It’s better to apply several thin coats of finish rather than one thick coat. This will help the finish dry more evenly and reduce the risk of drips and runs.
  • Use a high-quality brush: A good brush is essential for achieving a smooth, even finish. Choose a brush that’s appropriate for the type of finish you’re using and make sure it’s clean and free of debris before you start.
  • Follow the manufacturer’s instructions: Different finishes have different application techniques, so it’s important to follow the manufacturer’s instructions carefully. This will ensure that you get the best results and that your finish lasts as long as possible.

With these tips in mind, you should be able to apply a beautiful and durable finish to your wooden boat. Remember to take your time and be patient, and you’ll be rewarded with a boat that looks great and lasts for years to come.

Maintenance Tips

Maintaining your wooden boat is essential to ensure its longevity and keep it looking beautiful. Here are a few tips to help you keep your boat in top condition.

Routine Cleaning

Regular cleaning is crucial to prevent dirt and grime buildup, which can lead to discoloration and deterioration of the wood. Here are some tips for routine cleaning:

  • Use a soft-bristled brush or sponge to scrub the boat’s surface gently.
  • Avoid using harsh chemicals or abrasive cleaners that can damage the wood’s finish.
  • Rinse the boat thoroughly with freshwater after cleaning to remove any remaining soap or cleaning solution.

Periodic Inspections

Periodic inspections can help you identify any issues early on, preventing them from becoming bigger problems. Here are some tips for periodic inspections:

  • Check for cracks, splits, or warping in the wood.
  • Look for signs of rot or decay, such as soft spots or discoloration.
  • Check the fasteners, such as screws and bolts, for corrosion or damage.
  • Inspect the boat’s seams and joints for any signs of separation or leaks.

Repairing Common Wood Damage

Wooden boats are prone to damage from exposure to the elements, wear and tear, and accidents. Here are some tips for repairing common wood damage:

  • Sand the damaged area to remove any loose or damaged wood.
  • Apply a wood filler to the damaged area, following the manufacturer’s instructions.
  • Sand the area again once the wood filler has dried.
  • Apply a coat of primer and then a finish coat to match the boat’s existing finish.

By following these maintenance tips, you can keep your wooden boat looking great and ensure its longevity.

How to Make a Wooden Bed Frame: A Simple Guide for Beginners

How to Make a Wooden Bed Frame: A Simple Guide for Beginners

If you’re looking to add a personal touch to your bedroom, building a wooden bed frame is a great way to do so. Not only is it a fun and rewarding DIY project, but it also allows you to customize your bed to fit your specific needs and style. Whether you’re an experienced woodworker or a beginner, building a wooden bed frame is a project that anyone can tackle with the right tools and materials.

Before you get started, it’s important to decide on the size and style of your bed frame. You’ll need to measure your mattress to ensure that your frame fits properly, and consider the height and design of your frame to ensure that it complements the overall aesthetic of your bedroom. Once you have a clear idea of what you want your bed frame to look like, you can begin gathering the necessary materials and tools. Depending on the design you choose, you may need bed rail hangers, wood screws, plywood, and other hardware. With these basic supplies and a little bit of know-how, you’ll be on your way to creating a beautiful and functional wooden bed frame that you can be proud of.

Understanding the Basics of a Wooden Bed Frame

understanding-the-basics-of-a-wooden-bed-frame

If you’re looking to build your own bed frame, it’s important to understand the basics of a wooden bed frame. A wooden bed frame consists of several components that work together to provide a sturdy and comfortable sleeping surface. Here’s what you need to know:

Platform

The platform is the part of the bed frame that supports the mattress. It can be made of slats or a solid piece of wood. If you’re using slats, make sure they’re evenly spaced and sturdy enough to support the weight of the mattress and the people sleeping on it.

Headboard and Footboard

The headboard and footboard are the vertical panels at the head and foot of the bed. They can be simple or ornate, depending on your design preferences. Make sure they’re securely attached to the rest of the bed frame for stability.

Side Rails

The side rails are the horizontal pieces that connect the headboard and footboard. They’re usually made of wood, but can also be made of metal. Make sure they’re long enough to provide ample support for the mattress and people sleeping on it.

Center Support

A center support is optional, but recommended for larger bed frames. It helps to distribute the weight of the mattress and people sleeping on it more evenly, reducing the risk of sagging or warping over time.

Materials

When building a wooden bed frame, it’s important to choose the right materials. Hardwoods like oak, maple, and cherry are strong and durable, but can be expensive. Softwoods like pine and spruce are more affordable, but may not be as strong as hardwoods. Make sure the wood is kiln-dried to prevent warping or cracking.

By understanding the basics of a wooden bed frame, you’ll be better equipped to build a sturdy and comfortable bed that will last for years to come.

Materials Needed

When it comes to building a wooden bed frame, you’ll need a few materials to get started. This section will outline the different types of wood and hardware requirements you’ll need to build a sturdy bed frame.

Wood Types

The type of wood you choose for your bed frame will depend on your personal preference and budget. Here are a few popular options:

  • Pine: Pine is a popular choice for bed frames because it’s affordable and easy to work with. However, it’s a softwood and can dent and scratch easily.
  • Oak: Oak is a hardwood that’s durable and has a beautiful grain pattern. It’s more expensive than pine but will last longer.
  • Maple: Maple is another hardwood that’s known for its strength and durability. It’s more expensive than pine but less expensive than oak.

When selecting your wood, make sure it’s kiln-dried to prevent warping and splitting.

Hardware Requirements

In addition to wood, you’ll need a few hardware items to build your bed frame. Here’s what you’ll need:

  • Bed rail hangers: These are used to attach the side rails to the headboard and footboard.
  • Wood screws: You’ll need screws to attach the bed rail hangers to the headboard and footboard.
  • Wood glue: Wood glue is used to reinforce the joints and make them stronger.
  • Drill and drill bits: You’ll need a drill to make pilot holes for the screws.
  • Saw: A saw is needed to cut the wood to size.
  • Sandpaper: Sandpaper is used to smooth out any rough edges.
  • Finishing materials: Depending on your preference, you may want to finish your bed frame with paint, stain, or a clear coat.

Tools Required

To build a wooden bed frame, you will need a few tools. Here is a list of the essential tools you will need:

Power Tools

  • Circular saw or jigsaw
  • Power drill
  • Drill bits
  • Pocket hole jig
  • Orbital sander

Hand Tools

  • Tape measure
  • Carpenter’s square
  • Chisels
  • Hammer
  • Screwdrivers
  • Clamps
  • Level

Other Materials

  • Wood glue
  • 2½” pocket hole screws
  • 2″ wood screws
  • Finishing nails
  • Sandpaper
  • Sandable wood filler
  • All surface primer and optionally BIN primer
  • Paint or stain
  • Paintbrushes, rags, etc.
  • Safety equipment – goggles, dust mask

Before starting, make sure you have all the necessary tools and materials. It’s also a good idea to read through the entire set of instructions to ensure you understand the process and have everything you need.

Designing Your Bed Frame

designing-your-bed-frame

When it comes to designing your own wooden bed frame, there are a few things to consider. Here are some tips to help you get started:

Size Considerations

The first thing you need to think about is the size of your bed frame. You want to make sure that it fits your mattress perfectly. Here are some standard mattress sizes to keep in mind:

  • Twin: 39″ x 75″
  • Full: 54″ x 75″
  • Queen: 60″ x 80″
  • King: 76″ x 80″
  • California King: 72″ x 84″

Make sure to measure your mattress before you start building your bed frame. You don’t want to end up with a bed that’s too small or too big for your mattress.

Style Preferences

Once you have the size figured out, it’s time to think about the style of your bed frame. Do you want a simple, minimalist design? Or do you prefer something more ornate and decorative?

Here are a few different styles to consider:

  • Platform bed: A simple, low-to-the-ground design that doesn’t require a box spring.
  • Canopy bed: A four-poster bed with a frame that extends above the mattress, often with curtains or drapes.
  • Sleigh bed: A bed with a curved headboard and footboard that resembles a sleigh.

Think about the overall aesthetic of your bedroom and choose a bed frame style that complements it. You can also add your own personal touches, such as carving designs into the wood or painting the frame a unique color.

By considering these factors, you can design a wooden bed frame that fits both your practical needs and personal style preferences.

Preparing the Wood

Before you begin building your wooden bed frame, it’s important to properly prepare your wood. Here are a few steps to follow:

Step 1: Choose the Right Wood

Selecting the right type of wood is crucial to the success of your project. You’ll want to choose a wood that is strong, durable, and easy to work with. Some popular options include pine, oak, and maple. Make sure to choose wood that is straight and free of knots or defects.

Step 2: Measure and Cut

Next, you’ll need to measure and cut your wood to the appropriate lengths. Use a saw to cut your wood to the correct size. Be sure to measure twice and cut once to avoid any mistakes.

Step 3: Sand and Smooth

After cutting your wood, use sandpaper to smooth out any rough edges or surfaces. This will ensure that your bed frame looks professional and is comfortable to use.

Step 4: Apply a Finish

Finally, you’ll want to apply a finish to your wood to protect it from wear and tear. You can choose from a variety of finishes, such as paint, stain, or varnish. Be sure to apply your finish evenly and let it dry completely before assembling your bed frame.

By properly preparing your wood, you’ll ensure that your bed frame is strong, durable, and looks great.

Assembling the Bed Frame

Once you have all the necessary materials, it’s time to start assembling your wooden bed frame. This section will guide you through the process, step by step.

Building the Headboard

First, you’ll want to start with the headboard. Begin by laying out the two long boards parallel to each other, with the shorter boards running perpendicular to them. Use wood glue and screws to attach the shorter boards to the longer ones, forming a rectangular frame.

Next, cut the decorative boards to the desired length and attach them to the frame using wood glue and screws. Make sure they are evenly spaced and level. Sand the entire headboard to smooth out any rough edges.

Constructing the Footboard

The footboard is constructed in the same way as the headboard. Begin by laying out the two long boards parallel to each other, with the shorter boards running perpendicular to them. Use wood glue and screws to attach the shorter boards to the longer ones, forming a rectangular frame.

Next, cut the decorative boards to the desired length and attach them to the frame using wood glue and screws. Make sure they are evenly spaced and level. Sand the entire footboard to smooth out any rough edges.

Forming the Side Rails

To form the side rails, take the remaining long boards and cut them to the desired length. Attach the shorter boards to the ends of the long boards using wood glue and screws, forming a rectangular frame.

Next, attach the headboard and footboard to the side rails using wood screws. Make sure everything is level and secure. Finally, attach the slats to the bed frame, evenly spaced and level.

Congratulations! You have successfully assembled your own wooden bed frame.

Finishing Touches

Once you have assembled your wooden bed frame, it’s time to give it a finishing touch. This will not only add to the aesthetic appeal of your bed but also protect it from wear and tear. Here are some finishing touches you can consider:

Sanding the Wood

Before you apply any finish, it’s important to sand the wood to make it smooth and remove any rough edges. Start with a coarse-grit sandpaper and work your way up to a finer grit. Be sure to sand with the grain of the wood to avoid damaging it.

Painting or Staining

Painting or staining your wooden bed frame is a great way to add color and protect the wood. If you decide to paint, choose a paint that is specifically designed for wood and apply it in thin, even coats. Allow each coat to dry completely before applying the next one.

If you prefer the natural look of wood, staining is a great option. Choose a stain that complements the wood grain and apply it with a brush or cloth. Be sure to wipe off any excess stain and allow it to dry completely before applying a sealer.

Sealing the Wood

Once you have painted or stained your wooden bed frame, it’s important to seal it to protect it from moisture and scratches. You can use a clear polyurethane sealer or wax to seal the wood. Apply the sealer in thin, even coats and allow each coat to dry completely before applying the next one.

By following these simple finishing touches, you can give your wooden bed frame a professional look and protect it from wear and tear.

Safety Precautions

When building a wooden bed frame, safety should be your top priority. Here are a few safety precautions to keep in mind:

Wear Protective Gear

Wear protective gear such as safety glasses, gloves, and a dust mask to protect yourself from dust, wood chips, and other debris. This will help prevent injuries to your eyes, hands, and lungs.

Use the Right Tools

Using the right tools for the job is crucial to ensuring your safety. Make sure your tools are in good condition and are appropriate for the task at hand. Using the wrong tool can result in accidents and injuries.

Follow Instructions Carefully

Follow the instructions carefully and take your time to avoid mistakes. Rushing through the project can lead to errors that can compromise the safety and stability of the bed frame.

Work in a Well-Ventilated Area

Working in a well-ventilated area will help reduce the risk of inhaling harmful fumes from paints, stains, and other chemicals.

Keep Children and Pets Away

Keep children and pets away from your work area to prevent accidents. Make sure your tools and materials are stored safely when not in use.

By following these safety precautions, you can ensure that your wooden bed frame project is completed safely and successfully.

How to Clean Wooden Toys: Simple and Safe Methods

How to Clean Wooden Toys: Simple and Safe Methods

If you have wooden toys, you know how important it is to keep them clean and well-maintained. Wooden toys are durable and long-lasting, but they can also accumulate dirt and grime over time. Cleaning wooden toys is not only important for hygiene reasons, but it can also help extend the lifespan of the toys.

Cleaning wooden toys is a simple process that can be done with a few basic supplies. Warm water and a mild cleaning solution are all you need to get started. You can use white vinegar, apple cider vinegar, or a non-toxic cleaning product that is safe for children. Optional extras include a spray bottle for your water mixture and olive oil or mineral oil for moisturizing the wood. In the following paragraphs, we will discuss the best methods for cleaning different types of wooden toys, as well as important factors to consider when cleaning them.

Understanding the Importance of Cleaning Wooden Toys

clean-wooden-toys

When it comes to keeping your child safe and healthy, cleaning their toys is just as important as feeding them a balanced diet. Wooden toys are a popular choice for parents because they are durable, long-lasting, and don’t contain harmful chemicals. However, they can also be a breeding ground for bacteria and germs, especially if they are not cleaned regularly. In this section, we will discuss the importance of cleaning wooden toys and provide tips on how to do it effectively.

Preventing Bacterial Growth

Wooden toys can harbor bacteria and germs from your child’s hands, mouth, and the environment. If left unchecked, these bacteria can multiply and cause infections or illnesses. Regular cleaning of wooden toys can help prevent the growth of bacteria and keep your child safe from harm.

One way to prevent bacterial growth is to clean wooden toys after each use. Use a damp cloth with warm water and mild soap to wipe down the toy’s surface. Avoid soaking the toy in water as it can cause the wood to swell and warp. Dry the toy thoroughly with a clean cloth before storing it away.

Another way to prevent bacterial growth is to rotate your child’s toys regularly. This will give you time to clean and dry the toys properly before they are used again. It also reduces the chances of your child coming into contact with bacteria from toys that have not been cleaned yet.

Maintaining Toy Quality

Cleaning wooden toys not only prevents bacterial growth but also helps maintain their quality. Over time, dirt and grime can accumulate on the toy’s surface, making it look dull and unappealing. Regular cleaning can help keep the toy looking new and vibrant.

When cleaning wooden toys, it is important to use the right cleaning products. Avoid using harsh chemicals that can damage the wood or remove its natural finish. Instead, use mild soap or vinegar diluted with water to clean the toy’s surface. Be sure to rinse the toy thoroughly with clean water and dry it with a clean cloth.

In conclusion, cleaning wooden toys is a crucial part of keeping your child safe and healthy. Regular cleaning can prevent bacterial growth and maintain the toy’s quality. By following these simple tips, you can ensure that your child’s wooden toys remain safe, clean, and enjoyable for years to come.

Choosing the Right Cleaning Supplies

When it comes to cleaning wooden toys, it’s important to choose the right cleaning supplies to ensure that you’re not damaging the wood or exposing your child to harmful chemicals. Here are some things to keep in mind when selecting cleaning supplies for your wooden toys.

Natural Cleaning Agents

Using natural cleaning agents is a great way to clean your wooden toys without exposing your child to harmful chemicals. Here are some natural cleaning agents that you can use:

  • White vinegar: White vinegar is a great all-purpose cleaner that can be used to clean wooden toys. Mix equal parts white vinegar and water in a spray bottle and use it to clean your wooden toys.
  • Baking soda: Baking soda is another great natural cleaner that can be used to clean wooden toys. Mix baking soda and water to form a paste, apply it to the toy, and scrub gently with a soft cloth.
  • Castile soap: Castile soap is a mild and gentle soap that can be used to clean wooden toys. Mix a small amount of Castile soap with water and use it to clean your wooden toys.

Avoiding Harmful Chemicals

When selecting cleaning supplies for your wooden toys, it’s important to avoid harmful chemicals that can damage the wood or expose your child to toxins. Here are some chemicals to avoid:

  • Bleach: Bleach is a harsh chemical that can damage the wood and expose your child to toxins. Avoid using bleach to clean your wooden toys.
  • Ammonia: Ammonia is another harsh chemical that can damage the wood and expose your child to toxins. Avoid using ammonia to clean your wooden toys.
  • Harsh detergents: Harsh detergents can also damage the wood and expose your child to toxins. Avoid using harsh detergents to clean your wooden toys.

By choosing the right cleaning supplies, you can ensure that your wooden toys are clean and safe for your child to play with. Remember to always test any cleaning solution on a small, inconspicuous area of the toy before applying it to the entire surface.

Step by Step Cleaning Process

Cleaning wooden toys is an essential part of maintaining their quality and safety. Here is a step-by-step guide on how to clean wooden toys properly.

Pre-Cleaning Inspection

Before you begin cleaning, inspect the wooden toys for any damage or loose parts. If you find any issues, repair them before cleaning. Also, check for any stickers or labels that may need to be removed before cleaning.

Cleaning Procedure

  1. Start by removing any loose dirt or debris from the wooden toy surface. You can use a soft-bristled brush or a dry cloth for this purpose.
  2. Next, prepare a cleaning solution according to the type of wooden toy and the level of dirt and grime on its surface. You can use warm water and a mild soap solution or a mixture of white vinegar and water in a 1:10 ratio. Do not use harsh chemicals or abrasive cleaners.
  3. Dip a clean cloth in the cleaning solution and wring it out until it is damp but not soaking wet. Use this damp cloth to wipe the wooden toy surface thoroughly. Make sure to clean all the nooks and crannies of the toy.
  4. For stubborn stains or grime, you can use a soft-bristled brush or an old toothbrush dipped in the cleaning solution to scrub the affected area gently.
  5. Once you have cleaned the entire surface of the wooden toy, rinse it thoroughly with clean water to remove any soap residue.

Drying and Polishing

  1. After rinsing, use a dry cloth to wipe the wooden toy surface and remove any excess water.
  2. Let the wooden toy air dry completely before using it again. Do not use a hairdryer or any other heat source to speed up the drying process.
  3. Once the wooden toy is dry, you can apply a coat of food-grade mineral oil or beeswax polish to protect and preserve the wood. Apply the oil or polish with a clean cloth and let it absorb into the wood for a few hours before wiping off any excess.

By following these simple steps, you can keep your wooden toys clean, safe, and long-lasting.

Tips for Regular Maintenance

tips-for-regular-maintenance

Keeping your child’s wooden toys clean is essential for their health and safety. Regular maintenance can help preserve the quality of the toys and extend their lifespan. Here are some tips for maintaining your wooden toys.

Frequent Light Cleaning

Frequent light cleaning can help prevent build-up of dirt and grime on your child’s wooden toys. Here are some tips for frequent light cleaning:

  • Use a clean, damp cloth to wipe down the toys after each use.
  • Avoid using harsh chemicals or abrasive cleaners that can damage the wood.
  • Keep the toys away from direct sunlight and moisture to prevent warping and cracking.
  • Store the toys in a dry, cool place when not in use.

Deep Cleaning Schedule

Deep cleaning your child’s wooden toys on a regular schedule can help remove any build-up of dirt and grime that may have accumulated over time. Here are some tips for deep cleaning:

  • Use a mixture of warm water and a mild soap solution to clean the toys. You can also use white vinegar or apple cider vinegar as a natural cleaning solution.
  • Avoid soaking the toys in water as this can cause the wood to warp or crack.
  • Use a soft-bristled brush to gently scrub the toys and remove any dirt or grime.
  • Rinse the toys thoroughly with clean water and dry them with a clean, dry cloth.
  • Apply a small amount of olive oil or mineral oil to the toys to help preserve the wood and prevent it from drying out.

By following these tips for regular maintenance, you can keep your child’s wooden toys clean and safe for playtime. Remember to always supervise your child during playtime and inspect the toys regularly for any signs of damage or wear.

Safety Precautions While Cleaning

Cleaning wooden toys is an important part of maintaining their quality and safety. However, it is essential to take safety precautions to ensure that the toys are not damaged during the cleaning process. Here are some safety precautions to keep in mind:

Avoiding Water Damage

Wooden toys can easily get damaged if they are exposed to water for a prolonged period. Therefore, it is important to avoid using too much water while cleaning them. Here are some tips to help you avoid water damage:

  • Use a damp cloth instead of soaking the toy in water.
  • Wipe the toy with a dry cloth immediately after cleaning it with a damp cloth.
  • Avoid using hot water, as it can warp the wood.
  • Do not use a high-pressure water spray to clean the toy.

Ensuring Toy Safety After Cleaning

After cleaning the wooden toy, it is important to ensure that it is safe for your child to play with. Here are some tips to help you ensure toy safety after cleaning:

  • Check the toy for any loose parts or splinters that may have come loose during cleaning.
  • Ensure that the toy is completely dry before giving it to your child to play with.
  • If the toy has any cracks or chips, do not give it to your child to play with. It may be unsafe and could cause injury.
  • If you are unsure about the safety of the toy after cleaning, consult the manufacturer or a toy safety expert.

By following these safety precautions, you can ensure that your child’s wooden toys are clean and safe for playtime.

What President Had Wooden Teeth? Learn About George Washington's Dental History

What President Had Wooden Teeth? Learn About George Washington's Dental History

If you’ve ever wondered which US president had wooden teeth, you might be surprised to learn that the answer is none. Despite the popular myth that George Washington had wooden teeth, the truth is that his dentures were actually made of a variety of materials, including ivory, animal bone, and even human teeth.

While the idea of wooden teeth may seem like an odd and uncomfortable concept, it’s important to remember that dental hygiene and technology were vastly different during Washington’s time. In fact, it’s estimated that by the time he became president, he had only one natural tooth left in his mouth. This led him to seek out various dental treatments, including the use of dentures, which were common among the wealthy at the time.

Despite the fact that Washington’s dentures were not made of wood, the myth has persisted for centuries. Some believe that the misconception arose due to the staining of the ivory used in his dentures, which may have given them a wooden appearance. Others speculate that the use of wooden dentures was more common in the past, leading to the assumption that Washington must have had them as well. Regardless of the origins of the myth, the truth is that no US president has ever had wooden teeth.

George Washington and Wooden Teeth Myth

george-washington-and-wooden-teeth-myth

If you’ve ever heard the story that George Washington had wooden teeth, you’re not alone. This myth has been circulating for centuries, but the truth is far less dramatic. Let’s take a closer look at the origins of the myth and the reality behind it.

Origins of the Myth

The story of George Washington’s wooden teeth can be traced back to the early 19th century, long after Washington’s death. At the time, dentistry was still a relatively new field, and many people suffered from dental problems. It was common for dentists to use a variety of materials to create dentures, including ivory, animal teeth, and even human teeth.

One of Washington’s dentists, John Greenwood, was known to use ivory in his dentures. Over time, the ivory would become stained and discolored, giving it a wooden appearance. It’s believed that this is where the myth of Washington’s wooden teeth originated.

Reality Behind the Myth

The truth is that George Washington did not have wooden teeth. While he did suffer from dental problems throughout his life, he never had dentures made entirely of wood. Instead, his dentures were made from a variety of materials, including ivory, animal teeth, and even human teeth.

In fact, Washington’s dentures were quite advanced for their time. They were designed to fit snugly in his mouth and were held in place with springs and wires. However, despite their advanced design, they still caused Washington a great deal of pain and discomfort.

So, while the story of George Washington’s wooden teeth may make for an interesting legend, the reality is far less exciting. Washington’s dental problems were a source of great pain and discomfort for him throughout his life, and his dentures were a testament to the limitations of dental technology at the time.

Dental Health in the 18th Century

During the 18th century, dental health was not a priority for most people. There was a lack of understanding about the importance of dental hygiene, and dental problems were prevalent. Tooth decay, gum disease, and tooth loss were common issues faced by people in the 18th century.

Common Dental Problems

Tooth decay was a significant problem in the 18th century. People consumed a lot of sugar and carbohydrates, which were harmful to their teeth. The lack of dental hygiene also contributed to the problem. People did not brush their teeth regularly, and there were no modern toothpaste or mouthwash products available.

Gum disease was another common dental problem. It was caused by the buildup of plaque on the teeth, which led to inflammation of the gums. This could result in bleeding, pain, and tooth loss.

Tooth loss was also a prevalent issue in the 18th century. It was caused by a variety of factors, including tooth decay, gum disease, and accidents. Tooth loss could lead to difficulty eating and speaking, as well as a loss of confidence in one’s appearance.

Dental Solutions and Prosthetics

In the 18th century, there were limited options for dental solutions and prosthetics. People often turned to home remedies such as rubbing their teeth with charcoal or salt to whiten them. Some people even resorted to using urine as a mouthwash.

Dentures were also a common solution for tooth loss. However, the dentures of the time were made from a variety of materials, including human teeth, animal teeth, and ivory. They were often uncomfortable and ill-fitting, causing pain and difficulty eating.

In conclusion, dental health was not a priority in the 18th century, and dental problems were prevalent. Tooth decay, gum disease, and tooth loss were common issues faced by people. Limited options for dental solutions and prosthetics were available, and they were often uncomfortable and ill-fitting.

Presidential Dental History

presidential-dental-history

Presidents are often remembered for their accomplishments and legacies, but their dental health is not always discussed. However, many presidents have had dental issues that impacted their lives and public image.

Other Presidents with Dental Issues

George Washington is often associated with having wooden teeth, but this is actually a myth. Washington did have dental issues, however, and lost all of his teeth by the time he was president. He wore dentures made of materials such as human teeth, animal teeth, and ivory.

Other presidents who had dental issues include:

  • John Adams: He had many dental problems and lost several teeth throughout his life. He also had a habit of clenching his jaw, which caused him to suffer from headaches and facial pain.
  • Thomas Jefferson: He had poor dental health and suffered from toothaches and decay. He also lost several teeth over the course of his life.
  • Ulysses S. Grant: He had a severe toothache during the Civil War, which led to the extraction of several teeth. He was also known for smoking cigars, which likely contributed to his dental issues.

Impact on Public Image

Presidents are often expected to be in good health, and dental issues can impact their public image. For example, Washington’s dental problems caused him to have difficulty speaking and smiling, which made him appear less confident and charismatic.

Other presidents also faced criticism for their dental issues. For example, Adams was known for his sunken cheeks and thin lips, which were likely caused by his missing teeth. This led to criticism of his appearance and suggestions that he was not fit for office.

In modern times, dental health is seen as an important aspect of overall health and hygiene. Presidents and other public figures are often expected to have good dental health, and those with dental issues may face scrutiny and criticism.

What is the Wooden Stick for in Granny: A Quick Guide

What is the Wooden Stick for in Granny: A Quick Guide

If you’re a fan of horror games, you’ve likely heard of the popular mobile game, Granny. In this game, you play as a character trapped in Granny’s house, and you must find a way to escape before she catches you. One item that players often wonder about is the wooden stick. What is it for, and how can it help you escape?

The wooden stick is a crucial item in Granny, and it serves multiple purposes. First and foremost, it can be used to disable one of the locks on the escape pipe, which is necessary if you want to use that route to escape. Additionally, the wooden stick can be used as a weapon to defend yourself against Granny’s attacks. Knowing how to use the wooden stick effectively can make all the difference in your chances of escaping Granny’s house.

So, whether you’re a seasoned Granny player or just starting out, understanding the purpose of the wooden stick is essential. In this article, we’ll explore everything you need to know about this item, including how to find it, how to use it, and how it can help you escape Granny’s clutches.

The Wooden Stick in Granny: An Overview

the-wooden-stick-in-granny

When playing Granny, you may come across a wooden stick. This item is an essential tool that can help you escape Granny’s house. In this section, we will provide you with an overview of the wooden stick in Granny.

Appearance

The wooden stick in Granny has a simple appearance. It is a brown stick that is about a foot long. The stick is thin and has a curved end, which makes it easy to hold. You can find the wooden stick in various locations throughout the game.

Mechanics

The wooden stick has two main uses in Granny. Firstly, it can be used as a weapon to defend yourself against Granny’s attacks. Secondly, it can be used to trigger certain events within the game. For example, the wooden stick can be used to disable one of the locks that hold the escape pipe closed.

Usage

To use the wooden stick as a weapon, you simply need to hold it in your hand and hit Granny with it. This will stun her for a few seconds, giving you time to escape. To use the wooden stick to trigger an event, you need to find the location where it is needed and interact with it.

Spawning

The wooden stick can spawn in various locations throughout the game. It can be found in drawers, on shelves, or hidden in secret areas. Keep an eye out for it as it can be a crucial item for your escape.

Trivia

Here are some interesting facts about the wooden stick in Granny:

  • The wooden stick was added to Granny in Version 1.8.
  • The wooden stick is necessary for the Escape Pipe route.
  • The wooden stick can be used to disable one of the locks which holds the pipe closed.

That’s a brief overview of the wooden stick in Granny. Keep in mind that it can be a useful tool for your escape, so keep an eye out for it during your gameplay.

Role of the Wooden Stick

The Wooden Stick is a crucial item in Granny that serves multiple purposes. It is a versatile tool that can be used to defend yourself against Granny’s attacks, trigger certain events, and unlock the Escape Pipe route. Here is a breakdown of the different roles the Wooden Stick plays in the game:

Defense

One of the primary uses of the Wooden Stick is as a weapon for self-defense. You can use it to hit Granny and knock her out for a short period of time. This buys you some time to escape or complete an objective. However, it is important to note that the Wooden Stick is not a foolproof defense mechanism. Granny can still attack you while you are holding it, and it can break after a few uses.

Triggering Events

The Wooden Stick can also be used to trigger certain events within the game. For example, you can use it to knock a vase off a table, which will distract Granny and allow you to sneak past her. You can also use it to hit a button that opens a secret passage or reveals a hidden item.

Unlocking the Escape Pipe

Finally, the Wooden Stick is necessary for unlocking the Escape Pipe route. There are two locks on the pipe that need to be disabled before you can use it to escape Granny’s house. The Wooden Stick is needed to disable one of these locks, so it is an essential item for completing the game.

Overall, the Wooden Stick is an important tool for surviving and progressing in Granny. It has multiple uses that make it a valuable item to have in your inventory. However, it is important to use it wisely and strategically to maximize its effectiveness.

Gameplay Strategies with the Wooden Stick

The Wooden Stick is a crucial item in Granny that allows players to escape from the house through the Escape Pipe. Here are some useful gameplay strategies that you can use when playing with the Wooden Stick:

  1. Finding the Wooden Stick: The Wooden Stick can be found in various locations throughout the house, including the Basement, the Jail Room, and the Backyard. Keep an eye out for it as you explore the house.
  2. Using the Wooden Stick: Once you have found the Wooden Stick, you need to use it to unlock one of the locks that hold the Escape Pipe closed. To do this, go to the Escape Pipe and insert the Wooden Stick into the Lever Lock. This will unlock the lock and allow you to escape through the pipe.
  3. Be Careful: While the Wooden Stick is a useful item, it can also be dangerous if used incorrectly. Be careful not to drop it, as this will make noise that could alert Granny to your presence. Additionally, be aware that the Wooden Stick will not disable all of the locks on the Escape Pipe, so you will need to find other items to unlock the remaining locks.
  4. Practice: Like any other item in Granny, the Wooden Stick requires practice to use effectively. Try out different strategies and see what works best for you. With practice, you will become more skilled at using the Wooden Stick and escaping the house.

In summary, the Wooden Stick is a vital item in Granny that allows players to escape through the Escape Pipe. By following these gameplay strategies, you can use the Wooden Stick effectively and increase your chances of escaping from Granny’s house.

Common Locations of the Wooden Stick

When playing Granny, finding the Wooden Stick is crucial for escaping through the Sewer. Here are some common locations where you can find the Wooden Stick:

  • Main Room: The Wooden Stick can be found on a table in the Main Room, which is located on the ground floor of Granny’s house. Look for a table with a vase and a picture frame on it.
  • Basement: The Wooden Stick can also be found in the Basement, which is accessible through a hidden door in the Study. Look for a shelf with a small wooden crate on it.
  • Attic: Another location where the Wooden Stick can be found is in the Attic. Look for a wooden box on the floor near the entrance to the Secret Area.
  • Special Room: Sometimes, the Wooden Stick can be found in the Special Room, which is accessible through a hidden door in the Baby Room. Look for a table with a lamp and a vase on it.

Remember that the Wooden Stick can spawn in different locations, so keep searching until you find it. Once you have the Wooden Stick, you can use it to open the Escape Pipe and make your way to freedom.

It’s important to note that Granny can hear you when you drop the Wooden Stick, so be careful not to make too much noise. Additionally, if you’re playing on Hard mode, the Wooden Stick may be guarded by a Bear Trap, so be sure to check for traps before picking it up.

Overall, knowing where to find the Wooden Stick can greatly increase your chances of escaping Granny’s house. Keep these common locations in mind and use them to your advantage.

Tips and Tricks for Using the Wooden Stick

The wooden stick is an essential item in Granny that can be used to unlock the escape pipe and help you escape from Granny’s house. Here are some tips and tricks for using the wooden stick effectively:

  • Finding the Wooden Stick: The wooden stick is typically found in the sewer tunnel, which can be accessed through the hidden door in the basement. Once you enter the sewer tunnel, look around for a wooden stick lying on the ground.
  • Using the Wooden Stick: To use the wooden stick, you need to attach it to the lever lock of the escape pipe. To do this, hold the wooden stick in your hand and approach the escape pipe. Once you are close enough, a prompt will appear asking if you want to attach the wooden stick to the lever lock. Select “yes” to attach the wooden stick.
  • Be Careful: While holding the wooden stick, be careful not to make any noise or alert Granny to your presence. If Granny hears you, she will come running and try to catch you.
  • Timing is Key: Use the wooden stick at the right time to maximize its effectiveness. Wait until Granny is far away from the escape pipe before using the wooden stick to unlock it. This will give you more time to escape before Granny catches you.
  • Practice Makes Perfect: Using the wooden stick effectively takes practice. Try different strategies and techniques to see what works best for you.

By following these tips and tricks, you can use the wooden stick to escape from Granny’s house and win the game. Good luck!

Comparing the Wooden Stick with Other Items in Granny

comparing-the-wooden-stick-with-other-items-in-granny

In Granny, there are several items that you can use to escape or defend yourself. The Wooden Stick is one of them, and it has its own unique advantages and disadvantages compared to other items.

Here is a comparison of the Wooden Stick with other items in Granny:

Hammer

The Hammer is a weapon that you can use to knock out Granny for a short period of time. It is also useful for breaking open wooden boards that cover up windows and doors. However, the Hammer is a one-time use item, and once you use it, it will disappear from your inventory. In contrast, the Wooden Stick can be used multiple times, making it more versatile in certain situations.

Screwdriver

The Screwdriver is an item that you can use to unscrew bolts and screws on doors and other objects. It is also useful for opening up certain locks. However, the Screwdriver is a one-time use item, and once you use it, it will disappear from your inventory. The Wooden Stick, on the other hand, can be used multiple times, making it more useful in situations where you need to disable traps or open up locks multiple times.

Cutting Pliers

The Cutting Pliers are an item that you can use to cut through wires and cables. They are useful for disabling traps that are triggered by electrical circuits. However, the Cutting Pliers are a one-time use item, and once you use them, they will disappear from your inventory. The Wooden Stick, on the other hand, can be used multiple times, making it more useful in situations where you need to disable traps multiple times.

Master Key

The Master Key is an item that you can use to unlock any door in Granny’s house. It is a very useful item, but it is also very rare and difficult to find. The Wooden Stick, on the other hand, is much easier to find and can be used to open up certain locks as well.

Overall, the Wooden Stick is a versatile item that can be used in a variety of situations. While it may not be as powerful as some of the other items in Granny, its ability to be used multiple times makes it a valuable tool in your escape plan.

The Wooden Stick in Different Game Modes

In Granny, the wooden stick is a useful tool that can be used to retrieve items that are out of reach. It can also be used to activate certain mechanisms that are necessary to progress through the game. The wooden stick can be found in different game modes, and in this section, we’ll take a closer look at where you can find it and how it can be used.

Granny Mode

In Granny mode, the wooden stick can be found in various locations throughout the house. It can be used to retrieve items that are out of reach, such as keys and weapons. You can also use the wooden stick to activate certain mechanisms, such as opening a hidden passage or unlocking a door. It’s important to note that the wooden stick has limited durability, so use it wisely.

Practice Mode

In Practice mode, the wooden stick can be found in the same locations as in Granny mode. However, the game is more forgiving in this mode, and the wooden stick has unlimited durability. This means that you can use it as many times as you need to retrieve items or activate mechanisms.

Extreme Mode

In Extreme mode, the wooden stick is not available. This mode is designed to be more challenging than the other modes, and you’ll need to rely on your wits and skills to progress through the game. Without the wooden stick, you’ll need to find other ways to retrieve items and activate mechanisms.

Custom Mode

In Custom mode, you can choose whether or not the wooden stick is available. This mode allows you to customize the game to your liking, and you can adjust various settings to make the game easier or more challenging. If you want to make the game more challenging, you can disable the wooden stick and see how far you can get without it.

Overall, the wooden stick is a useful tool that can help you progress through the game. Whether you’re playing in Granny mode, Practice mode, or Custom mode, it’s important to use the wooden stick wisely and make the most of its limited durability.

The Evolution of the Wooden Stick in Granny Updates

If you have played the game Granny, you may be familiar with the Wooden Stick. This item is used for escaping Granny’s house, specifically for disabling one of the locks that hold the Escape Pipe closed. In this section, we will take a look at the evolution of the Wooden Stick in Granny updates.

Version 1.8

The Wooden Stick was added to Granny in Version 1.8. This update introduced the Escape Pipe route, which requires the Wooden Stick to be used in order to escape. When the player acquires the Wooden Stick, they can use it to disable one of the locks holding the pipe closed, making it easier to escape Granny’s house.

Version 1.9

In Version 1.9, the Wooden Stick was given a new use. It can now be used to close traps that Granny has set up around the house. This is a useful tool for players who want to avoid getting caught by Granny’s traps.

Version 1.9.1

In Version 1.9.1, the Wooden Stick was given a new spawn location. It can now be found in the Garage, making it easier for players to acquire it early on in the game.

Version 1.9.2

In Version 1.9.2, the Wooden Stick was given another new use. It can now be used to break the planks that Granny has placed over windows and doors. This is a useful tool for players who want to create new escape routes or avoid getting trapped in a room.

Version 1.9.3

In Version 1.9.3, the Wooden Stick was given a new spawn location. It can now be found in the Car, making it easier for players to acquire it early on in the game.

Overall, the Wooden Stick has evolved over the course of Granny updates, giving players more uses for this item and making it easier to acquire. Whether you are using it to escape Granny’s house or avoid her traps, the Wooden Stick is an essential item for any player looking to survive in Granny.

Frequently Asked Questions about the Wooden Stick

If you’re playing Granny, you might have come across the Wooden Stick. This item is essential for the Escape Pipe route, as it disables one of the locks that hold the pipe closed. Here are some frequently asked questions about the Wooden Stick:

What is the Wooden Stick?

The Wooden Stick is an escape type item in Granny. It is a wooden rod that can be used to unlock one of the locks on the Escape Pipe. It was added to Granny in Version 1.8.

Where can I find the Wooden Stick?

The Wooden Stick can be found in the Sewer Room. It is usually located on a table or on a shelf. You can also find it in the Secret Area, which can be accessed by using the Hammer to break the wall in the Backyard.

How do I use the Wooden Stick?

To use the Wooden Stick, you need to go to the Escape Pipe and find the lock that the Wooden Stick can unlock. Once you find it, select the Wooden Stick from your inventory and tap on the lock to use it. The lock will then be disabled, allowing you to escape through the pipe.

Can I use the Wooden Stick more than once?

No, you can only use the Wooden Stick once. Once you have used it to unlock the lock on the Escape Pipe, it will disappear from your inventory.

What happens if I don’t use the Wooden Stick?

If you don’t use the Wooden Stick, you won’t be able to escape through the Escape Pipe. You will need to find another way to escape from Granny’s house.

Overall, the Wooden Stick is a crucial item in Granny, and you need to find it if you want to escape through the Escape Pipe. Keep an eye out for it when you’re exploring Granny’s house, and make sure to use it wisely when you find it.

How Many Eoka Shots for a Wooden Door: A Quick Guide

How Many Eoka Shots for a Wooden Door: A Quick Guide

If you’re a Rust player, you know that raiding is a big part of the game. One of the most common questions when it comes to raiding is how many Eoka shots it takes to break a wooden door. The answer to this question depends on several factors, such as the size and thickness of the door, the type of door frame being used, and the angle you’re shooting from.

The Eoka pistol is a powerful weapon known for its ability to take down wooden doors and walls quickly. However, the number of shots it takes to break through a wooden door can vary depending on the factors mentioned above. In general, it may take anywhere from 5 to 10 shots to break a wooden door with the Eoka pistol. It’s important to note that this is just an estimate, and the actual number of shots required may be higher or lower depending on the specific circumstances of the raid.

Knowing how many Eoka shots it takes to break a wooden door is an important part of planning a successful raid in Rust. By understanding the factors that can affect the number of shots required, you can better prepare for your raid and increase your chances of success. So, whether you’re a seasoned Rust player or just starting out, it’s important to keep this information in mind when planning your next raid.

Eoka Pistol Basics

how-many-eoka-shots-for-a-wooden-door

When it comes to raiding wooden doors in Rust, the Eoka Pistol is a popular choice for many players. Here are some basics you should know about this firearm:

  • The Eoka Pistol is a handmade, single-shot firearm that is relatively cheap to make.
  • It uses handmade shells as ammunition, which can also be crafted from basic resources.
  • The Eoka Pistol has a relatively slow firing rate, which can make it difficult to use in combat situations.
  • However, it can be effective for raiding wooden doors if used correctly.

To use the Eoka Pistol, you need to hold down the right mouse button to light the fuse, then release it to fire the weapon. The fuse can take anywhere from 0 to 4 seconds to ignite, so it’s important to time your shots carefully.

When raiding a wooden door with the Eoka Pistol, it can take anywhere from 5 to 10 shots to break through. However, this number can vary depending on factors such as the quality of the door and the firing mechanism of the pistol.

It’s worth noting that the Eoka Pistol can be a risky choice for raiding, as the fuse can sometimes fail to ignite or the pistol can misfire. Additionally, it can be loud and attract attention from other players or NPCs in the area.

Overall, the Eoka Pistol can be a useful tool for raiding wooden doors in Rust, but it requires careful timing and a bit of luck to use effectively.

Understanding Wooden Doors in Rust

In Rust, wooden doors are an early game building item that is made from wood and is cheap to produce. It is the cheapest of all the doors and is often used alongside a Lock to quickly secure a base. However, its vulnerability to fire and weak explosive resistance makes the door a temporary solution to securing your base. Due to its flaws, it should quickly be replaced with a more secure door as soon as possible.

Wooden doors in most game scenarios can withstand a considerable amount of damage before giving in. To ensure a successful breach, it usually takes around 45 shots from an Eoka Pistol to break through a sturdy wooden door in Rust. However, this is based on assuming that the firing mechanism of the gun works efficiently and that each shot properly hits its target, which can sometimes vary due to game mechanics.

It’s important to note that the number of Eoka shots required to break a wooden door can also vary depending on the location of the shots. To effectively penetrate wooden doors in Rust, make sure to hit arrows on the top side so the fire falls down. This will increase the chances of hitting the right spot and breaking the door faster.

In summary, wooden doors in Rust are a cheap and quick solution to securing your base, but they are not a long-term solution due to their weak resistance to fire and explosives. To breach a wooden door, it usually takes around 45 Eoka shots, but this can vary depending on the location of the shots. When raiding a base, it’s important to aim for the top side of the door to increase the chances of breaking it faster.

Eoka Shots Required for a Wooden Door

When it comes to raiding a base in Rust, one of the most important things to know is how many Eoka shots it takes to break a wooden door. The Eoka pistol is a cheap and easy-to-craft weapon that is commonly used for raiding wooden structures in the early game.

According to Rust Labs, it takes approximately 45 Eoka shots to break a wooden door. However, it is important to note that this number can vary depending on a number of factors, such as the quality of the Eoka pistol, the skill of the player using it, and the condition of the door being raided.

While the Eoka pistol is an effective tool for raiding wooden structures, it is not without its drawbacks. The Eoka pistol is notoriously unreliable and has a high chance of misfiring, which can be frustrating and even dangerous for the player using it. Additionally, the Eoka pistol is not very accurate and has a short range, which can make it difficult to use in certain situations.

Overall, if you are planning to raid a wooden structure in Rust, the Eoka pistol can be a useful tool to have in your arsenal. However, it is important to use it wisely and to be aware of its limitations. With a little bit of practice and patience, you can become a skilled Eoka raider and take down even the toughest wooden doors in Rust.

Factors Influencing the Number of Eoka Shots

When trying to break down a wooden door using an Eoka pistol, there are several factors that can influence the number of shots required. Here are a few things to keep in mind:

  • Weapon proficiency: Your proficiency with the Eoka pistol will have a significant impact on the number of shots you need to break down the wooden door. If you are not skilled in using the weapon, you may need more shots than someone who is an expert.
  • Door health: The health of the wooden door will also play a role in how many shots you need to break it down. If the door is already damaged, you may need fewer shots to break it down.
  • Ammunition type: The type of ammunition you are using can also affect the number of shots required. Higher quality ammunition can deal more damage and require fewer shots to break down the door.
  • Distance: The distance between you and the door can also impact the number of shots required. If you are too far away, your shots may not be as accurate and you may need more shots to break down the door.

It is important to keep these factors in mind when attempting to break down a wooden door using an Eoka pistol. By taking these factors into consideration, you can increase your chances of breaking down the door with fewer shots.

Eoka Pistol: Damage and Efficiency

When it comes to raiding in Rust, the Eoka Pistol is a popular choice for breaking through wooden doors due to its low cost and ease of use. However, before you start using the Eoka Pistol, it’s important to understand its damage and efficiency.

The Eoka Pistol is a single-shot pistol that fires Handmade Shells, which deal 15 damage per shot. It has a relatively slow firing rate, which can impact the overall time required to break through a wooden door. In general, it may take anywhere from 5 to 10 shots to break a wooden door with the Eoka pistol, depending on various factors such as the door’s health, the quality of the Handmade Shells, and the accuracy of the shots.

To maximize the Eoka Pistol’s efficiency, it’s recommended to use it in combination with other raiding tools such as Satchel Charges or Explosive Ammo. This can help to reduce the number of shots required to break through a wooden door, and ultimately save you time and resources.

In summary, while the Eoka Pistol can be an effective tool for raiding wooden doors, it’s important to understand its limitations and use it in combination with other raiding tools for maximum efficiency. Keep in mind that raiding in Rust can be a risky and resource-intensive activity, so always approach it with caution and a well-planned strategy.

Wooden Door: Durability and Resistance

When it comes to raiding in games, wooden doors are one of the most common obstacles you will encounter. Understanding the durability and resistance of a wooden door is crucial to effectively breach it.

In most game scenarios, wooden doors are relatively durable and can withstand a considerable amount of damage before giving in. However, the number of Eoka shots required to break through a wooden door will depend on various factors, such as the door’s size, the door frame, and the type of ammunition used.

It is essential to note that using the wrong ammunition type can significantly affect the number of shots required to break through a wooden door. For instance, using handmade shells will require more shots compared to Eoka shells, which are more effective in penetrating wooden doors.

Overall, the best approach to breaking through a wooden door is to use the right ammunition type and aim for the door’s weakest points, such as the hinges or locks. With the right strategy, you can effectively breach a wooden door and gain access to the valuable loot inside.

Strategies for Using Eoka on Wooden Doors

strategies-for-using-eoka-on-wooden-doors

When it comes to raiding wooden bases, the Eoka pistol is a popular choice due to its high damage output. However, using the Eoka pistol can be tricky, and it’s important to have a strategy in place to ensure success. Here are some tips for using the Eoka pistol on wooden doors:

  • Get close to the door: The Eoka pistol has a short range, so you’ll need to get up close to the door to ensure your shots hit their mark. Make sure you’re standing directly in front of the door before firing.
  • Aim for the center of the door: Wooden doors have a hitbox that is slightly larger than the visible door itself. To ensure maximum damage, aim for the center of the door where the hitbox is largest.
  • Use multiple Eoka pistols: The Eoka pistol has a high chance of misfiring, which means you may need to use multiple pistols to break through a wooden door. Bring a few extra pistols with you just in case.
  • Be patient: Breaking through a wooden door with an Eoka pistol can take some time, especially if you’re using multiple pistols. Be patient and keep firing until the door breaks down.
  • Watch out for defenders: When raiding a base, it’s important to keep an eye out for defenders who may be waiting to ambush you. Make sure you have a clear path to escape if things go south.

By following these strategies, you can increase your chances of successfully raiding a wooden base with an Eoka pistol. Remember to be patient and stay alert, and you’ll be breaking down doors in no time.

Alternate Methods to Break Wooden Doors

Breaking a wooden door with an Eoka pistol can be a time-consuming process. Fortunately, there are other methods you can use to break down a wooden door more efficiently. Here are some alternate methods you can try:

1. Pickaxe

Using a pickaxe to break down a wooden door is a common method in Rust. It takes around 250 hits with a stone pickaxe or 125 hits with a metal pickaxe to break down a wooden door. However, using a pickaxe can be noisy and draw attention to your location, so be cautious when using this method.

2. Flamethrower

Using a flamethrower is another effective method to break down a wooden door. It takes around 2 minutes to break down a wooden door with a flamethrower. However, using a flamethrower can also be noisy and draw attention to your location, so be cautious when using this method.

3. Explosives

Using explosives is the quickest way to break down a wooden door. However, it is also the most expensive method. It takes around 2 satchel charges or 4 beancan grenades to break down a wooden door. Keep in mind that using explosives can also be very loud and draw attention to your location.

4. Melee Weapons

Using melee weapons, such as a salvaged sword or a machete, can also be effective in breaking down a wooden door. It takes around 9 hits with a salvaged sword or 12 hits with a machete to break down a wooden door. This method is relatively quiet and can be useful if you want to avoid drawing attention to your location.

In conclusion, breaking down a wooden door with an Eoka pistol is not the only option available to you. Using a pickaxe, flamethrower, explosives, or melee weapons can be just as effective and sometimes even quicker. Choose the method that best suits your situation and play style.

Tips and Tricks

When it comes to raiding wooden doors in Rust, using an Eoka pistol is a popular choice due to its low cost and accessibility. Here are some tips and tricks to help you make the most out of your Eoka shots:

Use the Right Ammunition

Using the right ammunition can make a big difference in the number of Eoka shots you need to break a wooden door. The most effective ammunition for raiding wooden doors is handmade shells. They deal more damage than regular shells and have a higher chance of breaking the door in fewer shots.

Get Close to the Door

The closer you are to the door, the more damage your Eoka shots will do. Try to get as close to the door as possible before firing your shots. This will increase your chances of breaking the door in fewer shots.

Aim for the Right Spot

Aiming for the right spot on the wooden door can also make a difference in the number of Eoka shots required. The sweet spot is the center of the door, where the lock is located. Aim for this spot to deal the most damage and break the door in fewer shots.

Bring Extra Eoka Pistols

Eoka pistols have a high chance of misfiring, which means you might need to use more than one pistol to break a wooden door. Bring extra Eoka pistols with you to ensure that you have enough shots to break the door.

Use Incendiary Arrows

If you don’t have enough Eoka pistol ammunition, you can also use incendiary arrows to break wooden doors. They deal a lot of damage and can break the door in just a few shots. However, they are more expensive than Eoka shots, so use them sparingly.

By following these tips and tricks, you can make raiding wooden doors with an Eoka pistol more efficient and cost-effective.

How to Fix a Wooden Bed Frame: Simple Steps to Get Your Bed Back in Shape

How to Fix a Wooden Bed Frame: Simple Steps to Get Your Bed Back in Shape

Are you having trouble sleeping because your wooden bed frame is creaking and wobbling? A broken or weakened bed frame can cause discomfort and even lead to injuries. Fortunately, fixing a wooden bed frame is not as difficult as it may seem. With a few simple tools and materials, you can reinforce and repair your bed frame to make it stronger and more stable.

Before you start fixing your bed frame, it’s important to identify the problem. Is the frame cracked, split, or broken? Are the joints loose or damaged? Depending on the issue, you may need to use different techniques and materials. In this article, we’ll guide you through the process of fixing a wooden bed frame step by step, so you can sleep soundly and safely.

Identifying the Problem

how-to-fix-a-wooden-bed-frame

If you’re experiencing issues with your wooden bed frame, it’s important to identify the problem before attempting to fix it. Here are some common problems you may encounter:

Loose Joints

One of the most common issues with wooden bed frames is loose joints. Over time, the joints can become loose due to wear and tear or improper assembly. To check for loose joints, give the frame a gentle shake. If you hear any rattling or feel any movement, then the joints are likely loose.

Broken Slats

Another common issue with wooden bed frames is broken slats. Bed slats are the wooden boards that support the mattress. If one or more of the slats are broken, then the mattress may sag or become uneven. To check for broken slats, remove the mattress and inspect each slat for cracks or splits.

Worn Out Screws

Finally, worn-out screws can also be a problem with wooden bed frames. Screws can become stripped or damaged over time, which can cause the frame to become unstable. To check for worn-out screws, inspect each screw and look for signs of wear or damage.

By identifying the problem with your wooden bed frame, you can take the necessary steps to fix it and ensure a good night’s sleep.

Gathering Necessary Tools

Before you start repairing your broken wooden bed frame, it is important to gather all the necessary tools. Here are some of the tools you will need:

Screwdrivers

A screwdriver is an essential tool in repairing a wooden bed frame. You will need both a flathead and a Phillips head screwdriver to remove and replace screws. Make sure you have the right size screwdriver for the job.

Wood Glue

Wood glue is necessary for repairing cracks and splits in the wooden bed frame. It is important to use a high-quality wood glue that will bond the wood together securely. Make sure the glue you use is appropriate for the type of wood you are working with.

Clamps

Clamps are important for holding the wooden bed frame together while the glue dries. You will need both C-clamps and bar clamps in different sizes to accommodate the different parts of the bed frame.

Sandpaper

Sandpaper is necessary for smoothing out rough edges and surfaces. You will need different grits of sandpaper, ranging from coarse to fine, to achieve a smooth finish.

Make sure you have all the necessary tools before starting the repair process. This will save you time and frustration and ensure that you can complete the repair successfully.

Fixing Loose Joints

If your bed frame has loose or wobbly joints, it can be a safety hazard and cause discomfort while sleeping. Fortunately, fixing loose joints is a relatively easy task that can be done with a few simple tools.

Materials Needed

Before you begin fixing loose joints on your bed frame, make sure you have the following materials:

  • Wood glue
  • Clamps
  • Screws
  • Drill
  • Screwdriver
  • Sandpaper

Steps to Fix Loose Joints

  1. Disassemble the bed frame: To fix loose joints, you will need to disassemble the bed frame. Remove the mattress and any bedding from the bed frame. Then, use a screwdriver to remove any screws holding the frame together.
  2. Clean the joints: Once the bed frame is disassembled, clean the joints using sandpaper. This will remove any dirt or old glue, ensuring that the new glue will adhere properly.
  3. Apply wood glue: Apply a generous amount of wood glue to the joint. Make sure the glue is applied evenly and covers the entire joint. Use a clamp to hold the joint together while the glue dries.
  4. Screw the joint: Once the glue has dried, use a drill to screw the joint together. This will provide added reinforcement to the joint.
  5. Sand the joint: Once the joint is screwed together, sand the joint to remove any excess glue and smooth out the joint.
  6. Reassemble the bed frame: Once all the joints have been fixed, reassemble the bed frame. Use screws to hold the frame together and ensure that all joints are tight and secure.

By following these simple steps, you can fix loose joints on your bed frame and ensure a safe and comfortable sleeping experience.

Repairing Broken Slats

If you have a broken slat on your wooden bed frame, don’t worry! It’s a common problem that can be easily fixed with a few simple steps. Here’s how to do it:

  1. Remove the broken slat: Carefully remove the broken slat from the bed frame. If it’s attached with screws, use a screwdriver to remove them. If it’s glued in place, use a chisel to carefully pry it loose.
  2. Measure the slat: Measure the length and width of the broken slat so you can purchase a replacement that fits properly.
  3. Purchase a replacement: You can buy replacement slats at most hardware stores or online. Make sure to get one that matches the size of the broken slat.
  4. Install the replacement: Once you have the replacement slat, simply slide it into place where the old one was. If it’s attached with screws, use a drill to secure it. If it’s glued in place, apply wood glue to the ends of the slat and slide it into place. Use clamps to hold it in place until the glue dries.
  5. Reinforce the slats: To prevent future breakage, reinforce the slats with metal brackets or additional screws. This will help distribute the weight of the mattress evenly across the slats and prevent any one slat from bearing too much weight.

By following these simple steps, you can easily repair a broken slat on your wooden bed frame. With a little bit of effort, you can save yourself the cost of buying a new bed frame and enjoy a good night’s sleep once again.

Replacing Worn Out Screws

replacing-worn-out-screws

Over time, screws in a wooden bed frame can become loose or stripped, causing wobbly joints and an unstable bed. If you notice this issue, replacing the worn out screws is a simple fix that can greatly improve the stability of your bed frame.

To replace the screws, you will need a few tools and supplies:

  • Screwdriver
  • New screws (matching the size and type of the old ones)
  • Pliers (optional, for removing stripped screws)

First, remove the old screws by using a screwdriver to turn them counterclockwise. If the screw is stripped and won’t budge, you can try using pliers to grip the head of the screw and turn it out.

Once the old screws are removed, insert the new screws into the same holes and turn them clockwise with a screwdriver. Make sure the screws are tight and secure, but be careful not to overtighten and strip the wood.

If the old screw holes are too stripped or damaged to hold the new screws securely, you can fill the holes with wood filler and let it dry before drilling new holes for the new screws.

By replacing worn out screws, you can ensure that your bed frame is sturdy and stable, allowing you to get a good night’s sleep without any wobbling or creaking.

Finishing Touches

Once you have fixed the issues with your wooden bed frame, it’s time to give it a finishing touch. This will not only make your bed look good but also protect it from wear and tear. Here are some finishing touches you can do to your wooden bed frame.

Sanding

Sanding is an essential step in refinishing wooden bed frames. It helps to smooth out rough edges and surfaces and prepares the wood for staining or painting. Here’s how to sand your wooden bed frame:

  1. Start with a coarse-grit sandpaper and work your way to a fine-grit sandpaper.
  2. Sand in the direction of the grain to avoid damaging the wood.
  3. Use a sanding block to ensure even sanding.
  4. Wipe the bed frame with a damp cloth to remove any dust and debris.

Polishing

Polishing your wooden bed frame will give it a shiny and smooth finish. Here’s how to polish your wooden bed frame:

  1. Apply a small amount of furniture polish onto a soft cloth.
  2. Rub the polish onto the wood in circular motions.
  3. Let the polish sit for a few minutes.
  4. Buff the bed frame with a clean cloth to remove any excess polish.

By following these simple steps, you can give your wooden bed frame a professional-looking finish.

Preventive Measures

To avoid having to fix your wooden bed frame frequently, it’s important to take some preventive measures. Here are some tips that can help you keep your bed frame in good condition for a long time.

Regular Inspection

It’s important to inspect your wooden bed frame regularly to identify any issues before they become major problems. Look for cracks, splits, and loose connections in the frame. Check the slats to make sure they are not broken or sagging. If you notice any issues, fix them as soon as possible to prevent further damage.

Proper Usage

Using your wooden bed frame properly can help prevent damage and extend its lifespan. Here are some tips:

  • Do not jump on the bed or use it as a trampoline.
  • Do not overload the bed with too much weight.
  • Do not drag the bed frame when moving it. Lift it instead.
  • Do not use the bed frame for anything other than sleeping.

By following these tips, you can prevent damage to your wooden bed frame and avoid having to fix it frequently. Remember to inspect your bed frame regularly and fix any issues as soon as possible to prevent further damage.

How to Make a Wooden Flag: Step-by-Step Guide for Beginners

How to Make a Wooden Flag: Step-by-Step Guide for Beginners

Do you want to show your love for your country and your woodworking skills at the same time? Making a wooden flag is a great way to do both. With just a few tools and materials, you can create a beautiful wooden flag that you can display in your home or office.

There are many different ways to make a wooden flag, from simple designs to more complex ones. You can use a variety of woods, stains, and finishes to create a unique look that reflects your personal style. Whether you are a beginner or an experienced woodworker, making a wooden flag is a fun and rewarding project that you can enjoy for years to come.

In this article, we will show you how to make a wooden flag step-by-step. We will cover everything from choosing the right wood to cutting and assembling the pieces. Whether you want to make a rustic American flag or a sleek modern design, we have the tips and techniques you need to create a beautiful wooden flag that you can be proud of.

Understanding the Basics of Woodworking

how-to-make-a-wooden-flag

Woodworking is a rewarding and enjoyable hobby that can produce beautiful and functional pieces. If you’re interested in making a wooden flag, it’s important to understand the basics of woodworking before you start. This section will cover the basics of choosing the right wood, the required tools and accessories, and safety measures to keep in mind.

Choosing the Right Wood

When making a wooden flag, it’s important to choose the right type of wood. Cedar is a popular choice because it’s durable, lightweight, and has a natural resistance to decay. Pine and reclaimed wood are other options to consider. Make sure the wood you choose is about 3/4″ thick and has a smooth surface.

Required Tools and Accessories

To make a wooden flag, you’ll need a few basic tools and accessories. These include:

  • Saw (hand saw, jig saw, circular saw, or miter saw)
  • Palm sander (or sandpaper and sanding block)
  • Hammer or drill
  • Wood glue (optional)

Having the right tools and accessories can make the woodworking process much easier and more enjoyable.

Safety Measures

Woodworking can be dangerous if proper safety measures aren’t taken. Here are a few safety tips to keep in mind:

  • Wear safety goggles to protect your eyes from sawdust and debris.
  • Use a dust mask to avoid inhaling sawdust.
  • Always use sharp tools to prevent accidents.
  • Keep your work area clean and organized to avoid tripping hazards.
  • Use clamps to hold your workpiece in place while you’re cutting or sanding.

By following these safety measures, you can enjoy woodworking safely and without incident.

Designing Your Wooden Flag

designing-your-wooden-flag

When making a wooden flag, designing the flag is an essential step that determines the final look of your project. Here are some sub-sections that will guide you on how to design your wooden flag.

Sketching the Design

Before starting the project, you need to sketch the design of your flag on paper. This step helps you to visualize how the final product will look like and make necessary adjustments before starting. You can sketch the flag using a pencil and paper or use a computer program to design it.

When sketching, consider the number of stripes you want, the size of the union, and the placement of the stars. You can also decide to add other features such as text or symbols. Remember, the design should be simple and easy to replicate.

Determining the Size

The size of your wooden flag depends on the location where you plan to hang it. If you plan to hang it indoors, you can make it smaller than an outdoor flag. If you plan to hang it outdoors, you need to consider the distance from which it will be viewed.

A standard size for an outdoor flag is 3 feet by 5 feet. However, you can make it larger or smaller depending on your preference. When determining the size, consider the size of the wooden boards you plan to use and the number of stripes you want.

In conclusion, designing your wooden flag is an important step in creating a beautiful and unique flag. By sketching the design and determining the size, you can create a flag that meets your specific needs and preferences.

Cutting and Shaping the Wood

Before you can assemble your wooden American flag, you’ll need to cut and shape the wood. Here’s what you need to know:

Making the Stripes

To make the stripes, you’ll need seven 1 1/2″ x 3/4″ pine boards, each 8 feet long. You can find these at Menards, Lowes, or other home improvement stores. Cut each board down to 37 inches in length. Sand the edges of each board to smooth out any rough spots.

Creating the Union

For the union, you’ll need a piece of pine cut to size. You can use the same type of pine as the stripes, or you can use a different type of wood for contrast. Cut the union to 19 1/2 inches wide by 13 inches tall. Sand the edges to smooth them out.

Once you have all of your pieces cut, it’s time to shape them. You can use a jigsaw or a circular saw to create the shape of the flag. Here’s how:

  1. Lay out your stripes in the correct order, with the union in the top left corner.
  2. Use a pencil to sketch out the shape of the flag on the top board.
  3. Use a jigsaw or circular saw to carefully cut along the pencil lines.
  4. Sand the edges of the flag to smooth out any rough spots.

Congratulations! You’ve now cut and shaped the wood for your wooden American flag. It’s time to move on to the next step: painting.

Assembling the Wooden Flag

Once you have completed the cutting and sanding of the wooden pieces, it is time to assemble the flag. This section will guide you through the process of attaching the stripes and fixing the union.

Attaching the Stripes

To attach the stripes, you will need wood glue and clamps. Apply a thin layer of wood glue to the back of each stripe and carefully place it onto the backing board. Use clamps to hold the stripe in place while the glue dries. Repeat this process for all the stripes, making sure to leave space between each stripe for the union.

Fixing the Union

The union is the blue field with the stars on the flag. To fix the union, you will need to cut a piece of wood to size and sand it smooth. Once you have the wood ready, you can start marking out the position of the stars. Use a stencil or a star-shaped cookie cutter to trace the stars onto the wood.

Once you have marked out the stars, you can start drilling holes for them. Use a drill bit that is slightly larger than the diameter of the dowels you will use for the stars. Drill the holes to a depth that is slightly shorter than the length of the dowels.

Next, apply a thin layer of wood glue to the back of the union and carefully place it onto the backing board, making sure to align it with the stripes. Insert the dowels into the holes you drilled earlier and tap them in gently with a mallet. Allow the glue to dry completely before moving on to the next step.

Congratulations, you have now assembled your wooden American flag!

Finishing Touches

Once you have constructed your wooden flag, it is time to add the finishing touches. This section will guide you through the process of sanding, painting, and applying a sealant to your flag.

Sanding the Wood

Before you start painting, you need to sand your flag to ensure that the surface is smooth and free of any rough spots or splinters. Start with a coarse grit sandpaper and work your way up to a finer grit until the wood is smooth to the touch. Be sure to wipe away any dust or debris before moving on to the next step.

Painting Your Flag

Now it’s time to add some color to your flag. You can use any combination of colors you like, but for a traditional American flag, you will need red, white, and blue paint. You can use spray paint or brush-on paint, but be sure to use a paint that is suitable for wood surfaces.

Start by painting the blue rectangle in the top left corner of your flag. Once the blue paint has dried, use painter’s tape to mask off the areas of the flag that will be painted red. Apply the red paint and allow it to dry completely. Finally, remove the painter’s tape and mask off the areas that will be painted white. Apply the white paint and allow it to dry completely.

Applying the Sealant

The final step in finishing your wooden flag is to apply a sealant to protect it from the elements. There are many types of sealants available, but for this project, we recommend using a clear polyurethane spray. Apply the spray in a well-ventilated area and follow the manufacturer’s instructions for best results.

Once the sealant has dried, your wooden flag is complete. Hang it on a wall or display it proudly in your home. Congratulations on a job well done!