Category Archives: Blog

How to Oil a Wooden Cutting Board: A Step-by-Step Guide

How to Oil a Wooden Cutting Board: A Step-by-Step Guide

Maintaining a wooden cutting board is crucial to ensure its longevity and prevent bacteria buildup. One of the most important steps in maintaining a wooden cutting board is oiling it regularly. Oiling a wooden cutting board helps to protect it from moisture, prevent warping, and keep it looking new.

To oil a wooden cutting board, you need to clean it thoroughly first. Use hot water and soap to wash both sides of the board, then let it air dry completely. Once the board is dry, apply a generous amount of food-grade mineral oil to the surface of the board. You can use a clean cloth or paper towel to spread the oil evenly on the board. Let the oil soak in for a few hours, or overnight if possible. Finally, wipe off any excess oil with a clean cloth before using the board again.

Regularly oiling your wooden cutting board will not only help to keep it looking new, but it will also protect it from bacteria buildup and prevent it from warping. It’s recommended to oil your wooden cutting board at least once a month, or more often if you use it frequently. With just a little bit of maintenance, your wooden cutting board can last for years to come.

Understanding the Importance of Oiling a Wooden Cutting Board

how-to-oil-a-wooden-cutting-board

If you own a wooden cutting board, it is essential to take proper care of it. One of the most important things you can do to extend the life of your wooden cutting board is to oil it regularly. Here are some reasons why oiling your wooden cutting board is so important:

Prevents Drying Out and Cracking

Wooden cutting boards are prone to drying out and cracking over time. When you oil your cutting board, it helps to keep the wood moisturized and prevents it from drying out. This can help to prevent cracks from forming and can extend the life of your cutting board.

Protects Against Bacteria

Wooden cutting boards can harbor bacteria if they are not properly cleaned and maintained. When you oil your cutting board, it helps to create a barrier that can protect against bacteria and other harmful substances. This can help to keep your food safe and prevent contamination.

Enhances Appearance

Oiling your wooden cutting board can also enhance its appearance. The oil can help to bring out the natural beauty of the wood and give it a rich, warm glow. This can make your cutting board look more attractive and can add to the overall aesthetic of your kitchen.

Improves Durability

When you oil your cutting board, it can also help to improve its durability. The oil can help to strengthen the wood and make it more resistant to wear and tear. This can help to extend the life of your cutting board and ensure that it remains in good condition for years to come.

Overall, oiling your wooden cutting board is an essential step in its maintenance. By doing so, you can help to prevent cracking, protect against bacteria, enhance appearance, and improve durability. So, make sure to oil your cutting board regularly to keep it in good condition and ensure that it lasts for years to come.

Choosing the Right Oil

When it comes to oiling your wooden cutting board, there are several options to choose from. Here are a few popular choices:

Food-Grade Mineral Oil

Food-grade mineral oil is a popular choice for many people because it is odorless, tasteless, and doesn’t go rancid. It is also affordable and readily available. Mineral oil is a petroleum byproduct, so some people prefer to use a natural oil instead.

Beeswax

Beeswax is not technically an oil, but it is an excellent option for seasoning cutting boards. It repels water and forms a tight, protective seal. Beeswax can also add a nice luster to the wood and help extend the lifespan of your cutting board.

Coconut Oil

Coconut oil is a popular choice for those who prefer natural oils. It has natural antimicrobial properties and is a great moisturizer for the wood. However, some people find that it can go rancid over time and leave a coconut scent on the board.

Walnut Oil

Walnut oil is another natural option that is popular for its rich color and nutty aroma. It is also high in antioxidants and has natural antimicrobial properties. However, it can be expensive and may not be as readily available as other oils.

When choosing an oil for your cutting board, it is important to consider the pros and cons of each option and choose the one that best suits your needs and preferences. Remember to always use a food-grade oil and follow the manufacturer’s instructions for application and maintenance.

Preparation Before Oiling

preparation-before-oiling

Before you start oiling your wooden cutting board, it’s important to prepare it properly. This will ensure that the oil is absorbed evenly and that the board is protected from damage. Here are some steps to follow:

Cleaning the Board

The first step is to clean the cutting board thoroughly. Use warm water and dish soap to wash both sides of the board. Make sure to scrub any food particles or stains off the surface. Avoid using harsh chemicals or abrasive sponges, as they can damage the wood.

After washing the board, rinse it with clean water and dry it with a clean towel. Don’t forget to clean the edges and corners of the board as well.

Drying the Board

Once the board is clean, it’s time to dry it. Make sure the board is completely dry before you start oiling it. You can use a clean towel to dry it, or let it air dry for a few hours.

It’s important to dry both sides of the board evenly. If one side is wetter than the other, it can cause the board to warp or crack when you apply the oil.

You can also use a hair dryer or a fan to speed up the drying process. Just make sure not to overheat the board, as this can also cause damage.

By following these steps, you’ll ensure that your wooden cutting board is clean and dry before you start oiling it. This will help the oil absorb evenly and protect the board from damage.

Step-by-Step Guide to Oiling

If you want to keep your wooden cutting board in good shape, you need to oil it regularly. Here’s a step-by-step guide to oiling your cutting board:

Applying the Oil

  1. Choose the right oil: mineral oil, beeswax, or a combination of both are good options.
  2. Pour a generous amount of oil onto the board surface, starting with one side at a time.
  3. Use a clean cloth or paper towel to spread the oil evenly over the surface of the board. Make sure you cover the entire board, including the sides.
  4. Be careful not to use too much oil. You don’t want to see oil pooling up on the board, but you also don’t want to be too stingy.

Letting the Board Absorb the Oil

  1. Once you’ve applied the oil, let the board sit for at least 20 minutes to allow the oil to soak in.
  2. During this time, you can flip the board over and apply oil to the other side.
  3. If the board is very dry, you may need to apply a second coat of oil.

Wiping Off Excess Oil

  1. After the oil has had time to soak in, use a clean cloth or paper towel to wipe off any excess oil.
  2. Be sure to wipe the board thoroughly to prevent any excess oil from going rancid.
  3. Let the board sit for a few hours or overnight to allow the oil to fully absorb into the wood before using it again.

By following these simple steps, you can keep your wooden cutting board in great condition for years to come.

Frequency of Oiling

To keep your wooden cutting board in top condition, it is important to oil it regularly. But how often should you oil your cutting board? The answer depends on how frequently you use it and how much care you want to take.

As a general rule, you should oil your cutting board once a month. This will help to keep the wood moisturized and prevent it from drying out or cracking. However, if you use your cutting board frequently or if it is exposed to a lot of moisture, you may need to oil it more often.

You can tell if your cutting board needs oiling by looking at its surface. If the wood looks dry or dull, it is time to oil it. You can also try the water test: sprinkle a few drops of water on the board. If the water beads up and doesn’t soak in, the board is well-oiled. If the water soaks in quickly or leaves a dark spot, it’s time to oil the board.

In addition to regular oiling, you should also clean your cutting board after each use. Use a mild dish soap and warm water to clean the board, then rinse it thoroughly and dry it with a clean towel. Avoid soaking the board in water or putting it in the dishwasher, as this can cause the wood to warp or crack.

By oiling your cutting board regularly and taking good care of it, you can extend its lifespan and keep it looking and functioning like new for years to come.

Maintaining Your Oiled Cutting Board

Once you have oiled your wooden cutting board, it is important to maintain it properly to ensure its longevity. Here are some tips for maintaining your oiled cutting board:

Regular Cleaning

To keep your cutting board clean, wash it with warm, soapy water after each use and dry it thoroughly with a clean towel. Avoid soaking the board in water or putting it in the dishwasher, as this can cause the wood to warp or crack. Additionally, avoid using abrasive cleaners or scrubbers, as they can damage the board’s surface.

Avoiding Excessive Heat and Humidity

Wooden cutting boards are sensitive to changes in temperature and humidity. Avoid exposing your board to excessive heat or moisture, as this can cause the wood to warp or crack. For example, do not place your board near a stove or in direct sunlight, and avoid storing it in a damp or humid environment.

Preventing Cross Contamination

To prevent cross-contamination, it is important to use separate cutting boards for different types of food. For example, use one board for raw meat and another for vegetables. Additionally, be sure to clean your board thoroughly after each use to remove any bacteria or food particles.

By following these simple tips, you can ensure that your oiled cutting board remains in good condition for years to come.

What Is a Wooden Spoon Used For? A Guide to This Kitchen Essential

What Is a Wooden Spoon Used For? A Guide to This Kitchen Essential

Have you ever wondered what a wooden spoon is used for in the kitchen? Wooden spoons are a versatile kitchen tool that has been used for centuries. They come in different shapes and sizes and can be used for a variety of cooking tasks.

One of the most common uses for a wooden spoon is stirring and mixing ingredients while cooking. The long handle and round bowl-shaped head make it easy to reach the bottom of pots and pans and mix ingredients thoroughly. Wooden spoons are especially useful when cooking with non-stick cookware since they won’t scratch or damage the surface.

Another use for a wooden spoon is scooping out food from pots and pans. The rounded bowl of the spoon can easily scoop up soups, stews, and sauces. Wooden spoons are also great for serving since they have a classic and rustic look that adds charm to any table setting. So whether you’re cooking a hearty soup or serving up a delicious dessert, a wooden spoon is a must-have tool in any kitchen.

The Basic Uses of a Wooden Spoon

what-is-a-wooden-spoon-used-for

A wooden spoon is a versatile kitchen tool that can be used for various purposes. Here are some basic uses of a wooden spoon:

Stirring

One of the most common uses of a wooden spoon is stirring. You can use it to stir soups, stews, sauces, and other dishes while they are cooking. The long handle of a wooden spoon allows you to reach the bottom of the pot or pan without burning your hand.

Mixing

A wooden spoon is also great for mixing ingredients. You can use it to mix batters, doughs, and other mixtures. The flat surface of a wooden spoon is perfect for scraping the sides of the bowl and ensuring that all the ingredients are well mixed.

Tasting

When you are cooking, you may need to taste your dish to check if it needs more seasoning or not. A wooden spoon is ideal for this purpose as it does not react with acidic or alkaline ingredients. You can use it to taste soups, stews, sauces, and other dishes without altering their taste.

Serving

A wooden spoon can also be used for serving food. You can use it to scoop out rice, pasta, and other dishes from a pot or pan. It is also great for serving salads and other cold dishes.

Preventing Scratches

Wooden spoons are gentle on cookware, and they won’t scratch the surface of your pots and pans. You can use them with non-stick cookware without worrying about damaging the coating.

In summary, a wooden spoon is a must-have kitchen tool that can be used for stirring, mixing, tasting, serving, and preventing scratches on your cookware.

Wooden Spoon in Baking

When it comes to baking, wooden spoons are a must-have tool in your kitchen. They are versatile and can be used for a variety of tasks, from mixing ingredients to creaming butter and sugar. Here are some ways you can use a wooden spoon in baking:

Mixing Ingredients

Wooden spoons are perfect for mixing dry and wet ingredients together. Unlike metal spoons, wooden spoons won’t scratch or damage your mixing bowls, and they won’t react with acidic ingredients like lemon juice or vinegar. When mixing ingredients, use a gentle folding motion to combine them evenly. Be sure to scrape the sides and bottom of the bowl to make sure everything is fully incorporated.

Creaming Butter and Sugar

Creaming butter and sugar is an important step in many baking recipes, and a wooden spoon is the perfect tool for the job. Start by softening your butter to room temperature, then add sugar and use your wooden spoon to mix them together until light and fluffy. This process incorporates air into the mixture, which helps the final product rise and become light and tender.

When using a wooden spoon for creaming butter and sugar, be sure to use a circular motion to fully incorporate the ingredients. You can also use the back of the spoon to press the mixture against the side of the bowl to help break up any lumps.

Overall, a wooden spoon is an essential tool in any baker’s kitchen. Whether you’re mixing ingredients or creaming butter and sugar, a wooden spoon is the perfect tool for the job. So next time you’re in the kitchen, reach for your trusty wooden spoon and start baking!

Wooden Spoon in Cooking

wooden-spoon-in-cooking

When it comes to cooking, a wooden spoon is an essential tool that every home cook should have in their kitchen. It is a versatile utensil that can be used for a variety of tasks, from stirring soups and sauces to sautéing vegetables. In this section, we will explore the different ways you can use a wooden spoon in cooking.

Stirring Soups and Sauces

One of the most common uses of a wooden spoon is for stirring soups and sauces. Unlike metal spoons, wooden spoons do not conduct heat, which makes them ideal for stirring hot liquids. They are also gentle on non-stick surfaces, which means you can use them in your non-stick pots and pans without worrying about scratching the surface.

When stirring soups and sauces, it’s important to use a wooden spoon that is long enough to reach the bottom of the pot. This will ensure that you can stir the contents of the pot evenly and prevent any burning or sticking.

Sautéing Vegetables

Another great use for a wooden spoon is for sautéing vegetables. When cooking vegetables on the stovetop, you want to make sure that they cook evenly and don’t stick to the pan. A wooden spoon can help you achieve this by gently stirring the vegetables as they cook.

To sauté vegetables with a wooden spoon, start by heating up your pan over medium-high heat. Add your vegetables and stir them around with your wooden spoon. As they cook, continue stirring them every few minutes to prevent sticking and ensure even cooking.

Overall, a wooden spoon is a must-have tool for any home cook. Whether you’re stirring soups and sauces or sautéing vegetables, a wooden spoon is gentle on your cookware and can help you achieve delicious results.

Non-Culinary Uses of Wooden Spoon

Wooden spoons are not only useful in the kitchen, but they can also be used in various other ways. Here are a few examples of non-culinary uses of wooden spoons.

Crafting and Art

Wooden spoons can be used for crafting and art projects. They can be painted, carved, or decorated to create unique designs. You can use them to make puppets, ornaments, or even a birdhouse. Wooden spoons are also great for children’s crafts, as they are easy to handle and can be painted with non-toxic paint.

If you are into woodworking, you can use wooden spoons as a starting point for carving more complex designs. They are an excellent way to practice your carving skills before moving on to more challenging projects.

Musical Instrument

Believe it or not, wooden spoons can also be used as a musical instrument. They are a traditional percussion instrument in many cultures, including Irish, Scottish, and Appalachian music. To play the wooden spoons, you hold one spoon in each hand and tap them together rhythmically. You can also use them to tap on a wooden box or table to create a beat.

If you want to take your wooden spoon playing to the next level, you can try making a set of spoons specifically designed for music. These spoons are typically longer and thinner than regular wooden spoons, with a more pronounced curve in the handle for better grip.

In conclusion, wooden spoons are not just for cooking. They can be used in a variety of ways, from crafting to music. So next time you’re in the kitchen, take a moment to appreciate the versatility of your wooden spoons.

Why Use a Wooden Spoon

When it comes to cooking, choosing the right utensils is important. Wooden spoons are a popular choice for many cooks, and for good reason. Here are a few reasons why you should consider using a wooden spoon in your kitchen.

Heat Resistance

One of the biggest advantages of wooden spoons is their ability to withstand high temperatures. Unlike plastic utensils, wooden spoons won’t melt or warp when exposed to heat. This makes them perfect for stirring hot soups, sauces, and stews. Plus, wooden spoons won’t conduct heat like metal utensils, so you won’t burn your hands when you’re cooking.

Non-Reactive Nature

Another benefit of wooden spoons is their non-reactive nature. Unlike metal spoons, wooden spoons won’t react with acidic ingredients like tomatoes or citrus fruits. This means that your food won’t take on a metallic taste or discoloration. Wooden spoons are also a great choice for cooking with non-stick cookware, as they won’t scratch the surface.

Gentle on Cookware

Wooden spoons are also gentle on your cookware. Unlike metal utensils, wooden spoons won’t scratch or damage the surface of your pots and pans. This means that your cookware will last longer and won’t need to be replaced as often. Plus, wooden spoons won’t leave behind any metal residue, which can be difficult to remove and may affect the taste of your food.

In summary, wooden spoons are a versatile and practical choice for any home cook. They’re heat-resistant, non-reactive, and gentle on your cookware. So next time you’re in the market for new cooking utensils, consider adding a wooden spoon to your collection.

How to Season Wooden Spoons: A Quick and Easy Guide

How to Season Wooden Spoons: A Quick and Easy Guide

Are you tired of your wooden spoons cracking or warping after just a few uses? If so, it may be time to start seasoning them. Seasoning wooden spoons is a simple process that can help prolong their lifespan and keep them looking and functioning their best.

To start, you’ll want to clean and dry your wooden spoons thoroughly. Then, you can apply a coat of mineral oil or a mixture of beeswax and oil to the spoons. This will help to protect the wood from moisture and prevent it from drying out and cracking. Repeat the process at least once a month to keep your spoons in top condition.

Understanding Wooden Spoons

how-to-season-wooden-spoons

Wooden spoons have been a staple in kitchens for centuries. They are versatile, durable, and can be used for a variety of tasks. Understanding the basics of wooden spoons can help you choose the right one for your needs and keep it in good condition for years to come.

Types of Wood

Not all wooden spoons are created equal. Different types of wood have different properties that affect their durability, resistance to heat and moisture, and overall performance. Here are some common types of wood used for making wooden spoons:

  • Maple: Hard and durable, maple is a popular choice for wooden spoons. It is resistant to scratches and stains, and can withstand high temperatures without warping or cracking.
  • Cherry: Cherry wood is known for its beautiful color and grain patterns. It is also durable and resistant to moisture, making it a good choice for spoons that will be used for cooking and serving.
  • Beech: Beech wood is strong and dense, making it ideal for heavy-duty tasks like stirring thick sauces and batters. It is also resistant to moisture and won’t absorb flavors or odors.
  • Walnut: Walnut wood is prized for its rich color and grain patterns. It is also strong and durable, but can be more expensive than other types of wood.

Care and Maintenance

Proper care and maintenance can help extend the life of your wooden spoons. Here are some tips to keep in mind:

  • Seasoning: Seasoning your wooden spoons with oil or wax can help protect them from moisture and prevent them from drying out and cracking. See the previous search results for specific instructions on how to season your wooden spoons.
  • Cleaning: Wooden spoons should be washed by hand with warm, soapy water. Avoid soaking them in water or putting them in the dishwasher, as this can cause the wood to warp or crack. If your spoon has a stubborn stain or odor, try rubbing it with a mixture of baking soda and water.
  • Storage: Store your wooden spoons in a dry, well-ventilated area away from heat sources. Avoid stacking them on top of each other, as this can cause them to warp or crack.

By understanding the basics of wooden spoons and taking good care of them, you can enjoy their usefulness and beauty for years to come.

Why Season Wooden Spoons?

Wooden spoons are a staple in most kitchens. They are versatile, durable, and easy to use. However, if not properly cared for, they can quickly become damaged, stained, and even start to smell. This is where seasoning comes in.

Seasoning your wooden spoons involves treating them with oil or wax to help protect the wood from drying out, cracking, and absorbing unwanted odors and flavors. It also helps to maintain their natural beauty and extend their lifespan.

Here are a few reasons why you should consider seasoning your wooden spoons:

1. Prevents cracking and splitting

Wooden spoons are susceptible to cracking and splitting, especially if they are exposed to water or extreme temperatures. Seasoning your spoons with oil or wax helps to keep the wood moisturized and prevent it from drying out, which can lead to cracks and splits.

2. Repels odors and flavors

Wooden spoons can absorb odors and flavors from the food they come into contact with. This can be a problem if you’re using the same spoon to stir different dishes. Seasoning your spoons helps to create a protective barrier that repels unwanted odors and flavors.

3. Improves performance

Seasoning your spoons can also improve their performance. A well-seasoned spoon will glide smoothly through food, making it easier to stir and mix ingredients. It also helps to prevent the wood from sticking to food, which can be frustrating and messy.

In summary, seasoning your wooden spoons is an easy and effective way to protect and prolong their lifespan. It prevents cracking and splitting, repels odors and flavors, and improves their overall performance. With just a little bit of care, your wooden spoons can last for years to come.

Selecting the Right Oil

When it comes to seasoning your wooden spoons, selecting the right oil is crucial. You want to choose an oil that is food-safe, won’t turn rancid over time, and has a high smoke point. Here are three options to consider:

Food Grade Mineral Oil

Food-grade mineral oil is a popular choice for seasoning wooden spoons because it is odorless, tasteless, and won’t go rancid. It is also inexpensive and widely available. Mineral oil is a petroleum by-product, so it is not a natural product, but it is considered safe for use with food.

To use mineral oil to season your wooden spoons, apply a generous amount to the wood and let it soak in for several hours or overnight. Wipe off any excess oil with a clean cloth.

Beeswax

Beeswax is another option for seasoning wooden spoons. It is a natural product and has antimicrobial properties. Beeswax also creates a protective barrier on the wood, which can help prevent staining and moisture damage.

To use beeswax to season your wooden spoons, melt the wax in a double boiler and apply it to the wood with a clean cloth. Let it cool and then buff the wood with a clean cloth.

Coconut Oil

Coconut oil is a natural and food-safe oil that has a high smoke point. It is also relatively inexpensive and widely available. Coconut oil can penetrate the wood and help prevent cracking and warping.

To use coconut oil to season your wooden spoons, warm the oil in a double boiler and apply it to the wood with a clean cloth. Let it soak in for several hours or overnight, then wipe off any excess oil.

When selecting the oil to use for seasoning your wooden spoons, consider your personal preferences and the type of wood you are working with. Remember to always choose a food-safe oil and follow the manufacturer’s instructions for use.

Preparation Before Seasoning

preparation-before-seasoning

Before you start seasoning your wooden spoons, you need to prepare them properly. This will ensure that your spoons are clean and ready to absorb the oil or wax that you will use to season them. Here are the steps you need to follow:

Cleaning the Spoon

The first step is to clean your wooden spoon thoroughly. Use warm water and mild dish soap to remove any dirt, residue, or food particles. If your spoon has any stubborn stains, you can use a mixture of baking soda and water to scrub them away. Be sure to rinse the spoon well with warm water to remove all soap residue.

If your spoon has any buildup, you can soak it overnight in a 1:1 ratio of white vinegar and water. Note: you typically don’t want to submerge wooden spoons in water, but a once-off is fine. This will help remove any bacteria and odors that may have accumulated on the spoon.

Drying the Spoon

After cleaning your wooden spoon, you need to dry it thoroughly. Use a clean towel to pat the spoon dry. Be sure to remove all moisture from the spoon, as excess water can cause the wood to warp or crack.

Once you have dried the spoon, you should leave it to air dry completely. This will ensure that all moisture has evaporated from the wood. Avoid using a hairdryer or any other heat source to dry the spoon, as this can damage the wood.

By following these simple steps, you can prepare your wooden spoons for seasoning. Once your spoon is clean and dry, you can move on to the next step of seasoning.

Step-by-Step Guide to Seasoning

If you’ve just purchased a new wooden spoon or cutting board, it’s important to season it before use. Here’s a step-by-step guide to seasoning your wooden spoons:

Applying the Oil

  1. Clean the wooden spoon thoroughly with warm water and mild dish soap to remove any dirt, residue, or food particles. Rinse the spoon well and pat it dry with a clean towel.
  2. Use a rag to apply a thick coat of mineral oil to your spoons. Be sure to work with the grain.
  3. Rub the oil into the wood, making sure to cover the entire surface of the spoon.
  4. Repeat the process until the spoon is completely coated in oil.

Letting the Oil Penetrate

  1. Give the oil several hours to soak into the wood. This will allow the oil to penetrate the pores of the wood, helping to prevent it from drying out and cracking.
  2. For best results, let the oil penetrate for at least 24 hours before using the spoon.

Wiping Off Excess Oil

  1. After the oil has had time to penetrate the wood, come back and wipe off any excess oil with a clean rag.
  2. Repeat the process at least once a month to keep your wooden spoons in good condition.

Remember, seasoning your wooden spoons is an important step in maintaining their longevity and preventing them from cracking or warping over time. By following these simple steps, you can ensure that your wooden spoons will last for years to come.

Maintaining Your Seasoned Spoons

Once you have seasoned your wooden spoons, it’s important to maintain them properly to ensure that they last a long time. Here are some tips on how to keep your seasoned spoons in top condition:

Regular Re-seasoning

Even though you have already seasoned your wooden spoons, they will still need to be re-seasoned periodically. This is especially true if you use your spoons frequently or if you wash them with soap and water.

To re-season your spoons, simply apply a thin layer of mineral oil or beeswax to the surface of the spoon and let it soak in for a few hours. Then, wipe off any excess oil or wax with a clean cloth. Repeat this process once a month to keep your spoons in good condition.

Safe Cleaning Methods

When it comes to cleaning your wooden spoons, it’s important to avoid using harsh chemicals or soaking them in water for extended periods of time. Here are some safe cleaning methods to use:

  • Use a mild soap and warm water to clean your spoons. Be sure to rinse them thoroughly and dry them completely before storing them.
  • If your spoons have any stubborn stains, you can use a paste made from baking soda and water to gently scrub them clean.
  • To sanitize your spoons, you can wipe them down with a solution of white vinegar and water. Just be sure to dry them thoroughly afterwards.
  • Avoid putting your spoons in the dishwasher or soaking them in water for extended periods of time, as this can cause the wood to warp or crack.

By following these simple tips, you can keep your wooden spoons in great condition for years to come.

Common Mistakes to Avoid

When it comes to seasoning wooden spoons, there are a few common mistakes that people make that can cause damage to the wood or prevent the seasoning from being effective. Here are some things to keep in mind to avoid these mistakes.

Using the Wrong Oil

One of the biggest mistakes people make when seasoning wooden spoons is using the wrong type of oil. Some oils, such as vegetable oil or olive oil, can go rancid over time and cause the wood to smell bad. Other oils, such as linseed oil or tung oil, can take a long time to dry and may leave a tacky residue on the wood.

Instead, use a food-safe mineral oil or beeswax to season your wooden spoons. These oils are odorless, won’t go rancid, and will absorb into the wood quickly.

Not Allowing Enough Time for Oil to Absorb

Another mistake people make is not allowing enough time for the oil to absorb into the wood. It’s important to give the oil several hours to soak in before wiping off any excess. If you don’t allow enough time for the oil to absorb, it won’t be as effective at protecting the wood.

Neglecting Regular Maintenance

Finally, one of the biggest mistakes people make is neglecting regular maintenance of their wooden spoons. Even if you’ve seasoned your spoons properly, they still need to be maintained to keep them in good condition.

This means wiping them down after each use, washing them by hand with warm, soapy water, and allowing them to air dry completely before putting them away. It also means reapplying a thin coat of mineral oil or beeswax at least once a month to keep the wood hydrated and protected.

By avoiding these common mistakes, you can ensure that your wooden spoons will last for years to come and continue to be a valuable tool in your kitchen.

How to Build a Wooden Shed: A Beginner's Guide

How to Build a Wooden Shed: A Beginner's Guide

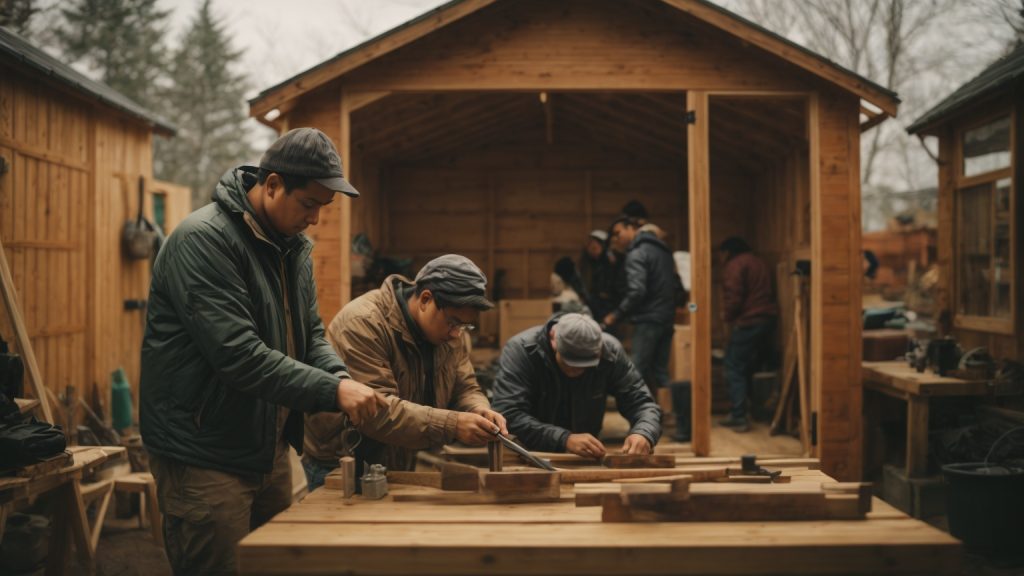
Building a wooden shed can be a fun and rewarding project for any DIY enthusiast. Whether you need extra storage space or a workshop, a wooden shed is a great addition to any backyard. In this article, we will provide you with step-by-step instructions on how to build a wooden shed from scratch.

Before you begin building your wooden shed, you will need to determine the size and location of your shed. Consider the purpose of your shed and the amount of space you have available in your backyard. Once you have determined the size and location of your shed, you can begin gathering the necessary materials and tools. In the following paragraphs, we will provide you with a list of materials and tools you will need to build your wooden shed.

Why Build a Wooden Shed?

building-a-wooden-shed

When it comes to building a shed, there are many different materials to choose from. However, wood remains one of the most popular choices for many reasons. In this section, we will explore why building a wooden shed might be the right choice for you.

Aesthetics

One of the primary reasons people choose wood as their shed building material is aesthetics. Wood has a natural beauty that can’t be replicated by other materials. It adds warmth and character to any outdoor space, making it an ideal choice for those who want their shed to blend in with the surrounding environment.

Versatility

Wooden sheds are incredibly versatile and can be customized to suit your specific needs. Whether you need a small storage shed or a larger workshop, wood can be used to create a structure that fits your requirements. Additionally, wood can be painted or stained to match your home or other outdoor structures, making it a great choice for those who want a cohesive look.

Durability

While it’s true that wood requires more maintenance than other materials, it’s also incredibly durable. With proper care and maintenance, a wooden shed can last for decades. Additionally, wood is a renewable resource, making it an environmentally friendly choice.

Affordability

Compared to other materials, wood is relatively affordable. While there are certainly more expensive options out there, wood is a great choice for those who want a quality shed without breaking the bank. Additionally, wood is easy to work with, making it a great choice for those who want to build their shed themselves.

In conclusion, there are many great reasons to choose wood as your shed building material. From its natural beauty to its affordability, wood is a versatile and durable choice that will provide you with years of use and enjoyment.

Choosing the Right Wood

When building a wooden shed, choosing the right type of wood is crucial to ensure the longevity and durability of your structure. In this section, we will discuss the different types of wood and wood treatment options available to help you make an informed decision.

Types of Wood

There are several types of wood that can be used for building a shed. Here are some of the most common options:

  • Cedar: Cedar is a popular choice for shed building because of its natural resistance to rot and insects. It also has a pleasant aroma and is visually appealing with its reddish-brown color.
  • Pine: Pine is a cost-effective option for shed building. It is readily available and easy to work with. However, it is not as durable as other types of wood and requires regular maintenance to prevent rot and insect damage.
  • Redwood: Redwood is a premium option for shed building because of its natural resistance to decay and insects. It also has a beautiful color and grain pattern. However, it is more expensive than other types of wood.
  • Pressure-treated lumber: Pressure-treated lumber is a popular choice for shed building because it is treated with chemicals to resist rot and insect damage. It is also affordable and readily available. However, it may not be suitable for certain applications, such as interior framing.

Wood Treatment

In addition to choosing the right type of wood, it is important to consider wood treatment options to further protect your shed from the elements. Here are some common wood treatment options:

  • Paint: Painting your shed can help protect it from moisture and UV rays. It also adds a decorative touch and can be easily changed if desired.
  • Stain: Staining your shed can enhance the natural beauty of the wood while also providing protection from moisture and UV rays. It is a popular choice for cedar and redwood sheds.
  • Sealant: Applying a sealant to your shed can help prevent moisture penetration and rot. It is a good option for pressure-treated lumber and pine sheds.

Remember to always follow the manufacturer’s instructions when applying wood treatment products. With the right type of wood and proper treatment, your wooden shed can provide years of use and enjoyment.

Designing Your Shed

When it comes to designing your wooden shed, there are a few important factors to consider. In this section, we’ll discuss the size and layout of your shed, as well as the placement of doors and windows, and the design of your shed’s roof.

Size and Layout

The size and layout of your shed will depend on a few key factors. First, consider how much storage space you need. This will help you determine the overall size of your shed. You should also take into account the available space in your backyard and any zoning regulations that may apply in your area.

Once you have determined the overall size of your shed, consider the layout. Think about how you will use the space inside the shed and plan accordingly. You may want to include shelves or workbenches, for example, or leave space for larger items like lawn mowers or bicycles.

Door and Window Placement

The placement of doors and windows in your shed is important for both functionality and aesthetics. You should consider how you will enter and exit the shed, as well as how much natural light you want to let in.

When it comes to doors, consider whether you want a single or double door, and where you want it to be located. A double door may be more convenient for larger items, while a single door may be more space-efficient.

For windows, think about how many you want and where you want them to be located. Windows can provide natural light and ventilation, but too many windows may compromise the structural integrity of your shed.

Roof Design

The design of your shed’s roof is an important consideration, both for practical and aesthetic reasons. A sloped roof is recommended for shedding rainwater and snow, and can also give your shed a more traditional look.

You should also consider the type of roofing material you want to use. Asphalt shingles are a popular option, but you may also want to consider metal roofing or even a thatched roof for a more unique look.

Overall, designing your wooden shed requires careful consideration of several key factors. By taking the time to plan out your shed’s size, layout, door and window placement, and roof design, you can create a functional and attractive addition to your backyard.
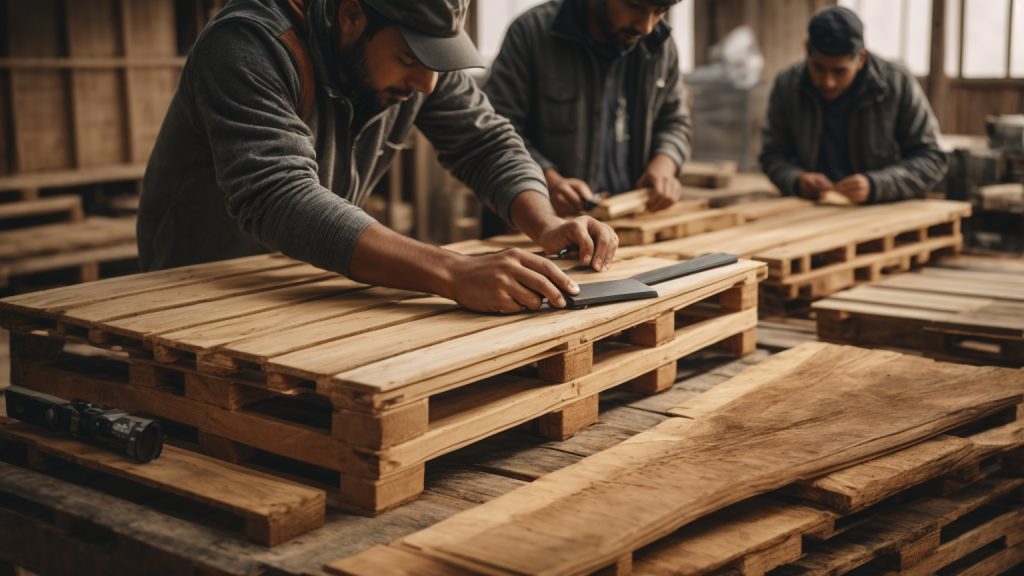
Gathering Materials

When it comes to building a wooden shed, gathering the right materials is essential. In this section, we’ll cover the three main categories of materials you’ll need: wood, tools, and fasteners and hardware.

Wood

The type of wood you choose for your shed will affect its durability, appearance, and cost. Here are some common types of wood used for shed construction:

Type of Wood Pros Cons
Pressure-treated lumber Resistant to rot and insects More expensive than untreated lumber
Cedar Naturally resistant to rot and insects More expensive than other types of wood
Pine Affordable and easy to work with Not as durable as other types of wood

In addition to the type of wood, you’ll also need to consider the size and shape of the boards you’ll be using. Common sizes include 2x4s, 2x6s, and 4x4s.

Tools

Having the right tools on hand will make your shed-building project much easier and more efficient. Here are some essential tools you’ll need:

  • Circular saw
  • Power drill
  • Hammer
  • Level
  • Tape measure
  • Square
  • Chalk line
  • Sawhorses
  • Safety glasses
  • Work gloves

In addition to these basic tools, you may also need specialized tools depending on the design of your shed. For example, if you plan to install a metal roof, you’ll need a metal-cutting blade for your saw.

Fasteners and Hardware

Fasteners and hardware are the small but important components that hold your shed together. Here are some common types you’ll need:

  • Nails: Used to attach boards together
  • Screws: Used for a stronger hold than nails
  • Bolts: Used to attach larger pieces of wood together
  • Hinges: Used to attach doors to the frame
  • Latches: Used to keep doors closed
  • Roofing nails: Used to attach shingles or other roofing materials
  • L-brackets: Used to reinforce corners and joints

Make sure to choose fasteners and hardware that are appropriate for the type of wood you’re using and the design of your shed. For example, if you’re using pressure-treated lumber, you’ll need to use galvanized or stainless steel fasteners to prevent corrosion.

Building the Foundation

building-the-foundation


Before you start building your wooden shed, you need to create a sturdy foundation that will keep it level and protected from moisture. In this section, we’ll go over the three main steps of building a wooden shed foundation: choosing the location, leveling the ground, and laying the foundation.

Choosing the Location

The first step in building a wooden shed foundation is choosing the location. You want to find a spot that is level, dry, and away from any trees or other structures that could damage the shed. Make sure to also check with your local building codes to ensure you are following any regulations.

Leveling the Ground

Once you have chosen the location for your wooden shed, you need to level the ground. This is an important step to ensure that your shed will be stable and secure. You can use a shovel, rake, or other tools to remove any rocks, debris, or vegetation that may be in the way. You can also use a level to check that the ground is even and adjust as necessary.

Laying the Foundation

After you have leveled the ground, it’s time to lay the foundation. There are several different types of foundations you can choose from, including on-grade and frost-proof choices. On-grade foundations are usually made of concrete blocks, while frost-proof foundations are made of concrete footings or piers.

To lay the foundation, start by marking out the perimeter of your shed with stakes and string. Then, dig the holes for your foundation and pour in the concrete. Make sure to let the concrete dry completely before moving on to the next step.

In conclusion, building a wooden shed foundation is an essential step in creating a sturdy and long-lasting shed. By following these three steps of choosing the location, leveling the ground, and laying the foundation, you can ensure that your shed will be secure and protected for years to come.

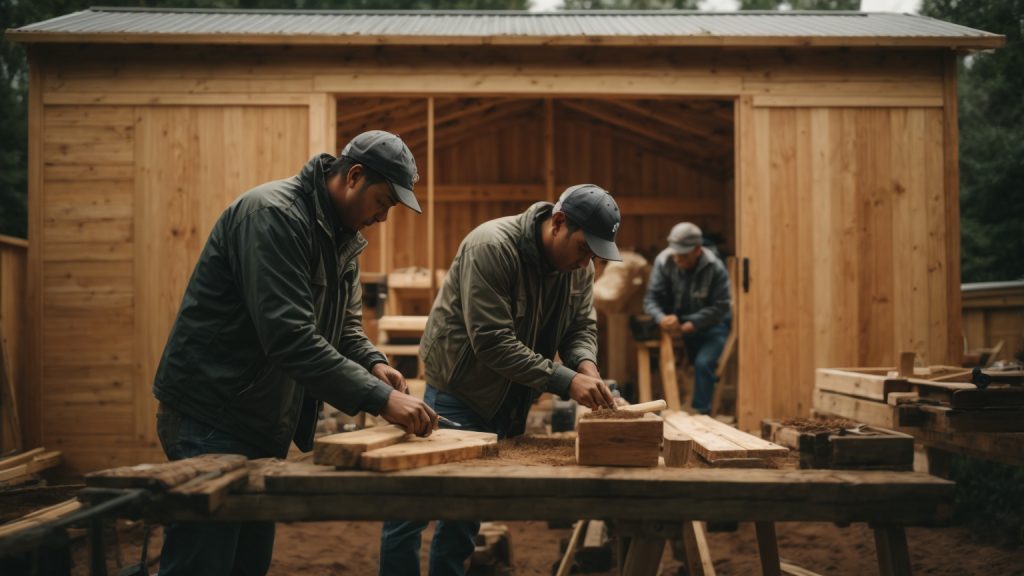
Constructing the Walls

Now that you have built the base of your wooden shed, it’s time to construct the walls. This is where the real fun begins!

Materials Needed

Before you start building the walls, make sure you have all the necessary materials. Here’s a list of what you’ll need:

  • 2×4 lumber for framing the walls
  • Plywood sheets for the exterior sheathing
  • Nails or screws to secure the lumber and plywood
  • Saw for cutting the lumber and plywood to size
  • Hammer or drill for attaching the lumber and plywood
  • Level to ensure the walls are straight and level

Framing the Walls

Start by measuring and cutting the lumber to the appropriate size for the walls. Use a saw to cut the lumber to the correct length and width. Once you have all the lumber cut, it’s time to start framing the walls.

To frame the walls, start by attaching the bottom plate to the base using nails or screws. Then attach the top plate to the top of the wall using the same method. Once the top and bottom plates are in place, you can start attaching the studs. Make sure to space the studs evenly, usually 16 inches apart, and attach them to the top and bottom plates.

Sheathing the Walls

Once the framing is complete, it’s time to sheath the walls with plywood. Cut the plywood sheets to size and attach them to the framing using nails or screws. Make sure to leave a small gap between each sheet to allow for expansion and contraction due to changes in temperature and humidity.

Adding Windows and Doors

If you plan on adding windows or doors to your shed, make sure to frame them out before sheathing the walls. This will make installation much easier.

Conclusion

Constructing the walls of your wooden shed is a crucial step in the building process. Make sure to take your time and follow the steps carefully to ensure a sturdy and long-lasting structure.

Installing the Roof

Once you have built the walls of your wooden shed, it’s time to install the roof. This section will guide you through the process of installing a wooden shed roof.

Framing the Roof

The first step in installing a wooden shed roof is to frame the roof. To frame the roof, you need to install the roof rafters and ridge beam. The roof rafters are the wooden beams that support the roof sheathing and shingles. The ridge beam is the horizontal beam that runs along the top of the rafters.

To frame the roof, follow these steps:

  1. Measure and cut the roof rafters to the correct length.
  2. Install the ridge beam on top of the walls of the shed.
  3. Attach the roof rafters to the ridge beam and the top plate of the wall.
  4. Install collar ties to prevent the roof from sagging.

Applying the Sheathing

Once the roof is framed, the next step is to apply the sheathing. Sheathing is the layer of plywood or OSB that covers the roof rafters and provides a base for the shingles.

To apply the sheathing, follow these steps:

  1. Measure and cut the sheathing to size.
  2. Install the sheathing perpendicular to the roof rafters.
  3. Nail the sheathing to the roof rafters with 8d nails.
  4. Leave a 1/8-inch gap between the sheathing panels to allow for expansion.

Adding the Shingles

The final step in installing a wooden shed roof is to add the shingles. Shingles are the overlapping pieces of material that cover the sheathing and protect the roof from the elements.

To add the shingles, follow these steps:

  1. Install the drip edge along the eaves of the roof.
  2. Install the underlayment over the sheathing.
  3. Install the starter shingles along the eaves of the roof.
  4. Install the shingles in rows, starting at the bottom of the roof and working your way up.
  5. Cut the shingles to fit around vents and other roof penetrations.
  6. Install the ridge cap shingles along the ridge of the roof.

Congratulations! You have successfully installed a wooden shed roof.

Adding Doors and Windows

Adding doors and windows to your wooden shed is an essential step in creating a functional and comfortable space. Here are some tips to help you with the process:

Choosing the Right Doors and Windows

When selecting doors and windows for your shed, it’s important to consider the following factors:

  • Size: Make sure that the doors and windows you choose are the right size for your shed. Doors should be wide enough to accommodate large items, and windows should be large enough to let in plenty of natural light.
  • Material: Wooden doors and windows are a popular choice for sheds because they are durable and can be painted or stained to match the rest of the structure. However, you can also choose doors and windows made from other materials, such as vinyl or metal.
  • Style: Doors and windows come in a variety of styles, from traditional to modern. Choose a style that complements the overall look of your shed.

Installing Doors and Windows

Once you’ve chosen your doors and windows, it’s time to install them. Here are some general steps to follow:

  1. Measure the rough opening: Measure the width and height of the rough opening for the door or window.
  2. Cut the opening: Cut the opening in the shed wall using a saw.
  3. Install the frame: Install the frame for the door or window using screws or nails.
  4. Install the door or window: Place the door or window in the frame and secure it in place using screws or nails.
  5. Add weatherstripping: Install weatherstripping around the edges of the door or window to prevent drafts and moisture from entering the shed.

Tips for Adding Windows

Adding windows to your shed can provide natural light and ventilation. Here are some tips to keep in mind:

  • Position the windows strategically: Place the windows in a position that allows for maximum natural light and ventilation.
  • Consider the size of the windows: Larger windows will let in more light and provide a better view, but they may also be more expensive.
  • Choose the right type of glass: Consider using tempered glass for safety and durability.
  • Add window coverings: Consider adding blinds or curtains to the windows for privacy and to control the amount of light that enters the shed.

By following these tips, you can add doors and windows to your wooden shed with ease, creating a functional and comfortable space for all your storage needs.

Finishing Touches

Once you have completed the construction of your wooden shed, it’s time to add the finishing touches to make it look complete and attractive. Here are some ideas to help you finish off your shed:

Painting or Staining

One of the easiest ways to give your shed a finished look is to paint or stain it. Not only does this add a layer of protection to the wood, but it also adds color and personality to your shed. Before you begin painting or staining, make sure to clean the surface thoroughly and let it dry completely. You may also want to sand the surface lightly to ensure that the paint or stain adheres properly.

When choosing a paint or stain, consider the climate in your area. If you live in a humid environment, you may want to choose a paint or stain that is specifically formulated to resist mildew and mold. If you live in an area with harsh winters, you may want to choose a paint or stain that is formulated to withstand extreme temperatures.

Adding Trim

Another way to give your shed a finished look is to add trim. Trim can be used to cover up any gaps or rough edges, and it can also add a decorative touch to your shed. There are many different types of trim available, including corner trim, fascia trim, and window trim.

When adding trim to your shed, make sure to measure carefully and cut the trim to the correct length. You may also want to pre-paint or stain the trim before installing it. Use finishing nails or screws to attach the trim to the shed, and make sure to fill any nail or screw holes with wood filler before painting or staining.

By adding a coat of paint or stain and some trim, you can give your wooden shed a polished, finished look that will make it the envy of your neighborhood.

Maintaining Your Wooden Shed

To ensure your wooden shed lasts for years to come, it’s important to maintain it properly. Regular maintenance will help you avoid costly repairs and keep your shed looking great. Here are some tips for maintaining your wooden shed:

Regular Inspections

Regular inspections are important to catch any damage or problems early on. Inspect your shed at least once a year, ideally before winter when the weather can cause the most damage. Look for signs of rot, mold, mildew, or insect infestations. Check the roof, walls, and foundation for any cracks, leaks, or other damage. Inspect the door and windows for proper sealing and operation.

Repairing Damage

If you do find any damage during your inspection, it’s important to repair it as soon as possible. Small problems can quickly turn into big ones if left unaddressed. Replace any damaged or rotting wood, fix any leaks, and repair any cracks. Use wood filler to fill in any gaps or holes. Sand and repaint any areas that need it to prevent further damage.

Weatherproofing

To protect your shed from the elements, it’s important to weatherproof it. Use a high-quality waterproof sealant on the exterior of your shed to prevent water from seeping in. Apply a fresh coat of paint or stain every few years to protect the wood from UV rays and moisture. Make sure the roof is in good condition and replace any missing or damaged shingles. You can also add gutters to direct water away from your shed.

Regular maintenance and proper care will help your wooden shed last for years to come. By following these tips, you can keep your shed looking great and avoid costly repairs.

How to Oil Wooden Spoons for Long-lasting Use

How to Oil Wooden Spoons for Long-lasting Use

If you’re someone who loves to cook, you probably have a collection of wooden spoons and cutting boards in your kitchen. Wooden spoons are a versatile tool that can be used for stirring, mixing, and even serving. However, over time, wooden spoons can become dry and brittle, making them more susceptible to cracking and splintering. That’s where oiling comes in – it’s a simple process that can help keep your wooden spoons in great condition for years to come.

To oil your wooden spoons, you’ll need to choose an oil that’s safe for food use. Mineral oil is a popular choice, as it’s odorless, tasteless, and won’t go rancid. You can also use walnut oil, tung oil, or linseed oil – just be sure to read the label to make sure it’s safe for food use. Once you’ve chosen your oil, you’ll want to apply it generously to your wooden spoons, making sure to cover all surfaces. Let the oil soak in for at least 30 minutes, or overnight if possible, before wiping off any excess with a clean cloth.

By oiling your wooden spoons regularly, you’ll help keep them from drying out and cracking, which can extend their lifespan and make them a joy to use for years to come. With just a little bit of effort and the right oil, you can keep your wooden spoons in great condition and enjoy using them in your kitchen for many meals to come.

Understanding Wooden Spoons

how-to-oil-wooden-spoons-for-long-lasting-use-2

Wooden spoons are a staple in any kitchen. They are versatile, durable, and gentle on cookware. However, they require proper care and maintenance to ensure their longevity. In this section, we will discuss the benefits of using wooden spoons, the different types of wood used to make them, and how to properly care for them.

Benefits of Using Wooden Spoons

There are several benefits to using wooden spoons. They are:

  • Gentle on cookware: Unlike metal utensils, wooden spoons do not scratch or damage non-stick cookware.
  • Versatile: Wooden spoons can be used for stirring, mixing, scraping, and even serving.
  • Durable: Wooden spoons can last for years with proper care and maintenance.
  • Natural and eco-friendly: Wooden spoons are made from renewable resources and are biodegradable.

Types of Wood Used to Make Wooden Spoons

Different types of wood are used to make wooden spoons. The most common types are:

  • Maple: Maple wood is hard and durable, making it ideal for kitchen utensils. It has a light color and a tight grain pattern.
  • Cherry: Cherry wood is also hard and durable. It has a reddish-brown color and a distinctive grain pattern.
  • Olive: Olive wood is dense and heavy, making it perfect for cooking utensils. It has a unique grain pattern and a warm color.

Caring for Wooden Spoons

Proper care and maintenance are essential to keep your wooden spoons in good condition. Here are some tips:

  • Wash your wooden spoons by hand with warm, soapy water. Avoid soaking them in water as it can cause the wood to warp or crack.
  • Dry them thoroughly after washing. You can air dry them or use a towel to dry them off.
  • Oil your wooden spoons regularly to prevent them from drying out and cracking. Use food-grade mineral oil or walnut oil to oil your spoons.
  • Store your wooden spoons in a dry place away from heat and moisture. A utensil holder or a drawer organizer is ideal for storing them.

By following these tips, you can keep your wooden spoons in good condition for years to come.

Why Oiling is Important

If you use wooden spoons regularly, it’s important to keep them in good condition. Oiling your wooden spoons can help extend their lifespan and keep them looking beautiful. Here are a few reasons why oiling is important:

Prevents Drying and Cracking

Wooden spoons can dry out over time, especially if they’re exposed to heat or moisture. When wood dries out, it can become brittle and prone to cracking. Oiling your spoons helps to keep them hydrated, preventing them from drying out and cracking.

Protects Against Stains and Odors

Wooden spoons can absorb stains and odors from the foods you’re cooking. Oiling your spoons can help to create a barrier that protects against these stains and odors. This can help to keep your spoons looking and smelling great for longer.

Enhances the Wood’s Natural Beauty

Oiling your wooden spoons can bring out the natural beauty of the wood. It can help to highlight the grain and color of the wood, giving your spoons a unique and attractive appearance.

Improves Grip and Comfort

Oiling your wooden spoons can also improve their grip and comfort. The oil can help to smooth out any rough spots on the spoon, making it more comfortable to use. Additionally, the oil can help to create a non-slip surface, making it easier to grip the spoon while you’re cooking.

Overall, oiling your wooden spoons is an easy and effective way to keep them in great condition. By preventing drying and cracking, protecting against stains and odors, enhancing the wood’s natural beauty, and improving grip and comfort, oiling can help to extend the lifespan of your spoons and keep them looking and feeling great for years to come.

Choosing the Right Oil

choosing-the-right-oil

When it comes to oiling wooden spoons, there are a few options to consider. Here are three popular choices:

Food Grade Mineral Oil

Food grade mineral oil is a popular choice for oiling wooden spoons and cutting boards. It is a colorless, odorless, and tasteless oil that is safe for food contact. Mineral oil is also affordable and easy to find in most stores.

To use mineral oil, simply apply a small amount to the wood surface and rub it in with a clean cloth. Let it sit for a few hours or overnight, then wipe away any excess oil with a dry cloth. Repeat this process every few months to keep your wooden spoons in good condition.

Beeswax

Beeswax is a natural wax that can be used to protect and seal wooden spoons. It creates a barrier that prevents moisture from penetrating the wood and helps to prevent cracking. Beeswax also gives wooden spoons a warm, natural finish.

To use beeswax, melt a small amount in a double boiler or microwave. Apply the melted wax to the wood surface using a clean cloth or brush. Let it sit for a few minutes, then buff the surface with a dry cloth to remove any excess wax. Repeat this process every few months to maintain the protective barrier.

Coconut Oil

Coconut oil is a popular alternative to mineral oil for those who prefer a natural option. It is a solid oil at room temperature, but melts easily when warmed up. Coconut oil is also known for its antibacterial properties, which can help to keep wooden spoons clean and hygienic.

To use coconut oil, warm up a small amount until it becomes liquid. Apply the oil to the wood surface using a clean cloth, and rub it in well. Let it sit for a few hours or overnight, then wipe away any excess oil with a dry cloth. Repeat this process every few months to keep your wooden spoons in good condition.

Remember, whichever oil you choose, be sure to use a food-grade option that is safe for food contact. And always follow the manufacturer’s instructions for best results.

Oiling Process

Wooden spoons are a great addition to any kitchen, but they require proper care to maintain their quality and longevity. One of the most important steps in caring for your wooden spoons is oiling them regularly. Here is a step-by-step guide on how to oil your wooden spoons properly.

Cleaning the Spoons

Before you start oiling your wooden spoons, you need to make sure they are clean. Wash them with warm soapy water and rinse thoroughly. You can also use a mild abrasive like baking soda to remove any stains or discoloration. Once the spoons are clean, dry them with a towel and allow them to air dry completely.

Applying the Oil

Now it’s time to apply the oil. There are many different types of oils you can use, but we recommend using food-grade mineral oil or walnut oil. These oils are safe for use with food and will not turn rancid over time. Pour a small amount of oil onto a clean cloth and rub it into the wood, making sure to cover all surfaces. You can also use a brush to apply the oil if you prefer. Be sure to apply the oil generously, but not so much that it pools on the surface.

Drying and Curing

After you have applied the oil, let the spoons sit for at least 30 minutes to allow the oil to penetrate the wood. You can also let the spoons sit overnight for best results. Once the oil has had time to soak in, wipe off any excess with a clean cloth. Then, place the spoons in a well-ventilated area to dry and cure for at least 24 hours. This will help the oil to fully cure and harden, creating a protective barrier on the surface of the wood.

By following these simple steps, you can keep your wooden spoons in great condition for years to come. Remember to oil them regularly to prevent drying and cracking, and to keep them looking their best.

Maintaining Oiled Spoons

After oiling your wooden spoons, it is important to maintain them properly to ensure their longevity. Here are some tips on how to maintain your oiled spoons:

Regular Oiling

To keep your wooden spoons in good condition, it is recommended to oil them regularly. This will help prevent the wood from drying out, which can cause cracking and splintering. You can use food-grade mineral oil or coconut oil to oil your spoons.

To oil your spoons, simply apply a small amount of oil to a soft cloth or paper towel and rub it onto the surface of the spoon. Make sure to cover all crevices and the handle. Leave the oil on the spoon for a few hours or overnight to allow it to soak into the wood.

Avoiding Dishwasher

It is important to avoid washing your wooden spoons in the dishwasher. The high heat and harsh detergents can damage the wood and cause it to dry out. Instead, wash your spoons by hand using warm water and mild dish soap.

After washing, dry your spoons thoroughly with a clean towel and let them air dry completely before storing them. Do not store your spoons in a damp or humid environment, as this can cause the wood to warp or crack.

By following these simple tips, you can maintain the beauty and functionality of your oiled wooden spoons for years to come.

How to Make Wooden Pallets: A Beginner's Guide

How to Make Wooden Pallets: A Beginner's Guide

If you’re looking to build your own furniture or create a unique DIY project, wooden pallets can be a great material to work with. Not only are they affordable and easy to find, but they can also be customized to fit your specific needs and style. In this article, we’ll walk you through the process of making your own wooden pallets, so you can start creating your own one-of-a-kind pieces.

Before we get started, it’s important to note that there are two types of pallets: chemically treated and heat treated. Chemically treated pallets are often used for shipping and can contain harmful chemicals, so it’s best to avoid using them for DIY projects. Heat treated pallets, on the other hand, are treated with heat to kill any pests and are safe to use for furniture and other projects. It’s important to look for the “HT” stamp on the pallet to ensure it’s safe to use. Once you have your heat treated pallets, you’re ready to start building!

Understanding the Basics of Pallet Making

how-to-make-wooden-pallets

If you are interested in making wooden pallets, it is important to understand the basics of pallet making. Pallets are typically made from a combination of softwood and hardwood, with oak and pine being popular choices. Here are some key factors to consider when making wooden pallets:

Wood Selection

When selecting wood for your pallets, you should consider factors such as strength, availability, and cost. Most pallets are made from softwood and hardwood, with the choice of wood depending on the intended use of the pallet. Oak is a strong and widely available hardwood, while pine is a popular and relatively affordable softwood.

Size and Trim

The size of your pallet will depend on its intended use. Pallets are typically either 48×40 inches or 42×42 inches, but custom sizes can be made as well. Once you have determined the size of your pallet, you will need to trim the wood to the appropriate length.

Deck Boards and Stringers

The deck boards and stringers are the main components of a pallet. Deck boards are the top and bottom boards that support the load, while stringers are the boards that run perpendicular to the deck boards and provide support. The size and spacing of the deck boards and stringers will depend on the intended use of the pallet.

Notches and Fasteners

Notches can be cut into the stringers to allow forklifts or pallet jacks to easily lift and move the pallet. Fasteners such as nails or screws are used to hold the pallet together. It is important to use the appropriate fasteners and to ensure that they are properly secured to prevent the pallet from breaking apart during use.

By understanding the basics of pallet making, you can create strong and durable pallets that are suitable for a variety of applications.

Materials Required

If you’re planning to make wooden pallets, you will need a few essential materials. In this section, we will discuss the types of wood and other materials required to make wooden pallets.

Types of Wood

The type of wood you choose for your pallets will depend on your budget, the purpose of the pallets, and the availability of the wood. Here are a few common types of wood used in making pallets:

  • Softwood: Softwood is the most common type of wood used in making pallets. It is affordable and readily available. Pine is a popular softwood used in making pallets.
  • Hardwood: Hardwood is more durable than softwood but is also more expensive. Oak is a popular hardwood used in making pallets.
  • Mixed Wood: Most pallets are made of a mixture of softwood and hardwood. This is because pallet manufacturers cannot always specify the type of wood used in making the pallets.

Other Essential Materials

Apart from the wood, you will also need a few other essential materials to make wooden pallets. Here are a few of them:

  • Nails: You will need nails to hold the pallet together. Make sure to use nails that are long enough to go through the wood and hold it securely.
  • Saw: You will need a saw to cut the wood to the desired size and shape.
  • Hammer: You will need a hammer to drive the nails into the wood.
  • Measuring Tape: You will need a measuring tape to measure the wood accurately.
  • Pencil: You will need a pencil to mark the wood before cutting it.
  • Safety Equipment: You will need safety equipment such as gloves and safety glasses to protect yourself while working with the wood.

By having all the necessary materials on hand, you can make your own wooden pallets and save money in the process.

Choosing the Right Wood

When it comes to making wooden pallets, choosing the right type of wood is crucial. The right wood will ensure that your pallets are durable, sturdy, and able to withstand the weight of the products they are carrying. Here are some factors to consider when choosing the right wood for your pallets:

Hardwood vs. Softwood

Most pallet manufacturers prefer to use hardwood for making pallets. This is because hardwood is denser and more durable than softwood, which makes it better suited for heavy-duty applications. However, softwood can also be used for making pallets, especially if the pallets are intended for lighter loads.

Location and Availability

The type of wood you choose for your pallets will also depend on your location and the availability of different types of wood in your area. For example, if you live in an area with a lot of pine trees, it may be more cost-effective to use pine wood for your pallets instead of importing hardwood from another region.

Intended Use

The intended use of your pallets is another important factor to consider when choosing the right wood. If your pallets will be used for outdoor storage or transportation, you may want to choose a type of wood that is more resistant to moisture and rot, such as cedar or redwood. On the other hand, if your pallets will be used for indoor storage or transportation, you may not need to worry as much about moisture resistance.

Other Considerations

In addition to the factors mentioned above, there are a few other things to consider when choosing the right wood for your pallets:

  • Size: Make sure the wood you choose is the right size for your pallets.
  • Strength: Choose wood that is strong enough to support the weight of your products.
  • Sustainability: Consider using wood that is sustainably sourced to reduce your environmental impact.

By considering these factors when choosing the right wood for your pallets, you can ensure that your pallets are strong, durable, and able to meet your specific needs.

Pallet Designing

When it comes to designing pallets, there are two main options: standard sizes and custom designs.

Standard Pallet Sizes

Standard pallet sizes are widely used in the industry and can be easily sourced from manufacturers. The most common sizes are:

Size Dimensions (inches)
48×40 48 x 40 x 6
42×42 42 x 42 x 6
48×48 48 x 48 x 6

These sizes are popular because they are compatible with most pallet jacks and forklifts. They are also easy to stack and transport.

Custom Pallet Designs

Custom pallet designs are an option for those who need a specific size or shape that is not available in standard sizes. When designing a custom pallet, there are several factors to consider:

  • Load capacity: Determine the weight and size of the items that will be placed on the pallet to ensure it can handle the load.
  • Material: Choose the appropriate type of wood or other material based on the intended use of the pallet.
  • Durability: Consider the expected lifespan of the pallet and choose materials and design elements that will ensure longevity.
  • Compatibility: Ensure the pallet is compatible with the machinery that will be used to move and transport it.

Custom pallets can be designed in a variety of shapes and sizes, including circular, triangular, and hexagonal. They can also be designed with additional features such as notches, grooves, and handles for easier handling.

Overall, whether you choose a standard size or a custom design, it’s important to consider the specific needs of your business and the intended use of the pallet. With the right design, pallets can be a valuable asset for your operations.

Cutting the Wood

Now that you have chosen your wood, it’s time to cut it into the proper-sized deck boards and stringers for your pallet. Here are the steps to follow:

  1. Trim the cants: Pallet cants from local sawmills are trimmed to the proper length before being ripped into boards. The length of the cants will depend on the size of the pallet you want to make.
  2. Rip into boards: Once the cants are trimmed, they are then ripped into boards of the proper width. The width will depend on the type of pallet you want to make.
  3. Sawn into deck boards and stringers: After the boards are ripped, they are sawn into deck boards and stringers that will fit the type of pallet being used.
  4. Cut notches into stringers: The next step is to cut notches into stringers. This allows for 4-way entry using forklifts, or 2-way entry using pallet jacks.

When cutting the wood, it’s important to take safety precautions. Always wear protective gear, such as safety glasses and gloves, and ensure that the saw blade is sharp and in good condition. It’s also important to make sure the wood is securely held in place while cutting to avoid accidents.

By following these steps, you can cut the wood for your pallet with ease and precision.

Assembling the Pallet

assembling-the-pallet

Now that you have all the necessary materials, it’s time to assemble your wooden pallet. Here are the steps you need to follow:

  1. Lay out the bottom deck of the forklift by placing two 5-1/2 by 40 by 5/8 inch crosspiece boards on the ground. Mount one flush with each end of the two outside stringers. Nail the third stringer parallel to the others in the middle. Use nine nails per 5-1/2 inch crosspiece, three at each joining.
  2. Once the bottom deck is complete, lay the top deck on top of it and secure it with nails or screws. Make sure to align the boards of the top deck with those of the bottom deck.
  3. Next, attach the blocks to each corner of the pallet. These blocks will help distribute the weight of the load and prevent the pallet from collapsing.
  4. Finally, attach the optional stringers to the bottom of the pallet. These stringers will provide additional support and stability to the pallet.

Remember to use the appropriate safety gear, such as gloves and safety glasses, when assembling your pallet. Also, make sure to inspect your pallet for any defects or damage before using it. With these simple steps, you can create a sturdy and reliable wooden pallet that will serve your needs for years to come.

Finishing the Pallet

Once you have assembled your wooden pallet, it’s time to give it a finishing touch. Finishing a pallet is important not only for aesthetic reasons but also to protect the wood from weathering and deterioration. In this section, we will cover two important steps in finishing your pallet: sanding and sealing.

Sanding

Sanding is crucial to give your pallet a smooth and polished surface. Sanding will also help to remove any rough edges and splinters, making your pallet safe to handle. Here are some tips for sanding your pallet:

  • Use a coarse-grit sandpaper (60-80 grit) to start sanding the surface of the pallet.
  • Sand in the direction of the wood grain to avoid damaging the wood fibers.
  • Once you have sanded the surface, use a finer grit sandpaper (120-150 grit) to smooth out the surface further.
  • Sand the edges of the pallet to remove any rough edges and splinters.
  • Use a tack cloth to remove any dust or debris left from sanding.

Sealing

Sealing your pallet is important to protect the wood from moisture and weathering. There are several options for sealing your pallet, including staining, painting, or using a clear sealant. Here are some tips for sealing your pallet:

  • If you want to stain your pallet, choose a stain that is suitable for outdoor use and matches the color of your other outdoor furniture.
  • If you want to paint your pallet, choose a paint that is suitable for outdoor use and matches the color of your other outdoor furniture.
  • If you want to use a clear sealant, choose a sealant that is suitable for outdoor use and provides UV protection.
  • Apply the sealant evenly with a brush or roller, making sure to cover all surfaces of the pallet.
  • Allow the sealant to dry completely before using the pallet.

By following these tips for sanding and sealing your pallet, you can ensure that your pallet will look great and last for years to come.

Safety Precautions

When working with wooden pallets, it is important to take proper safety precautions to avoid injury. Here are some tips to keep in mind:

Wear Protective Gear

Wearing protective gear is crucial when working with wooden pallets. Safety equipment such as puncture-proof gloves, safety shoes, and clothing that covers your legs and arms will help protect you from slivers and other injuries.

Check the Condition of the Pallet

Before using a wooden pallet, make sure it is in good condition. Check for any broken or loose boards, protruding nails, or other damage that could cause injury. Do not use a damaged or underrated pallet.

Be Careful When Handling Pallets

When handling pallets, be sure to lift with your legs and not your back. Do not try to lift a pallet that is too heavy for you to handle safely. Use a pallet jack or forklift if necessary.

Avoid Hazardous Pallets

Some pallets are used to transport hazardous materials or may harbor bacteria. Avoid using these pallets for indoor projects, and be sure to take appropriate precautions when handling them.

Use Tools Safely

When cutting or sawing wooden pallets, be sure to use the appropriate tools and follow all safety guidelines. Wear eye protection and keep your hands and fingers away from the blade.

By following these safety precautions, you can work with wooden pallets safely and avoid injury.

Maintaining Your Wooden Pallets

Keeping your wooden pallets in good condition is important to ensure they last longer and can be reused. Here are some tips for maintaining your wooden pallets:

1. Store Pallets Properly

Storing your pallets correctly is essential to prevent damage and extend their lifespan. Keep them in a dry, cool place away from direct sunlight and moisture. You can stack them on top of each other, but make sure to place a layer of cardboard or other protective material between them to avoid scratches and damage.

2. Inspect Regularly

Inspect your pallets regularly to identify any damage or issues that need to be addressed. Check for cracks, splinters, loose boards, or any signs of rot or decay. If you notice any damage, remove the pallet from circulation and repair or replace it as needed.

3. Clean Pallets

Cleaning your pallets is essential to maintain their quality and hygiene. Use a soft-bristled brush or a pressure washer to remove any dirt, debris, or stains. Avoid using harsh chemicals or bleach as they can damage the wood and reduce its lifespan.

4. Treat Pallets

Treating your pallets can help protect them from moisture, insects, and other environmental factors that can cause damage. You can use a variety of treatments such as paint, stain, or sealant to protect the wood. Make sure to choose a treatment that is safe for the intended use of the pallet.

5. Handle with Care

When handling your pallets, make sure to do so with care to avoid damage. Use a forklift or pallet jack to move them around and avoid dragging them on the ground. Also, avoid overloading them beyond their weight capacity as it can cause damage and increase the risk of accidents.

By following these simple tips, you can maintain your wooden pallets and ensure they last longer and can be reused.

How to Build a Wooden Mailbox: A Step-by-Step Guide

How to Build a Wooden Mailbox: A Step-by-Step Guide

Are you tired of your old, rusty mailbox that just doesn’t fit the aesthetic of your home? Building a wooden mailbox may be just the solution you need. Not only is it a functional addition to your property, but it can also add some charm and character to your curb appeal.

Building a wooden mailbox may seem like a daunting task, but with the right tools and materials, it can be a fun and rewarding DIY project. Whether you’re a seasoned woodworker or a beginner, there are plenty of resources available to guide you through the process. From step-by-step tutorials to detailed plans, you can find everything you need to build a mailbox that is both functional and stylish. So why wait? Get started on building your very own wooden mailbox today!

Choosing the Right Wood

how-to-build-a-wooden-mailbox

When it comes to building a wooden mailbox, choosing the right type of wood is crucial to ensure the longevity and durability of your mailbox. Here are some factors to consider when selecting the right wood for your project.

Hardwood vs Softwood

The first decision you need to make is whether to use hardwood or softwood for your mailbox. Hardwoods, such as oak and maple, are denser and more durable, making them ideal for outdoor projects. However, they can be more expensive and harder to work with than softwoods.

Softwoods, such as cedar and pine, are more affordable and easier to work with, but they are less durable than hardwoods. If you choose to use a softwood, make sure it is treated to resist decay and insect damage.

Treated vs Untreated Wood

Another important factor to consider is whether to use treated or untreated wood for your mailbox. Treated wood is chemically treated to resist decay and insect damage, making it more durable and long-lasting than untreated wood. However, treated wood can be more expensive and may contain harmful chemicals.

Untreated wood, on the other hand, is more affordable but is more susceptible to decay and insect damage. If you choose to use untreated wood, make sure to apply a weather-resistant finish to protect it from the elements.

In summary, when selecting the right wood for your wooden mailbox, consider the durability, cost, and environmental impact of the wood. Hardwoods are denser and more durable, but they can be more expensive and harder to work with. Softwoods are more affordable and easier to work with, but they are less durable than hardwoods. Treated wood is more durable but may contain harmful chemicals, while untreated wood is more affordable but requires a weather-resistant finish to protect it from the elements.

Designing Your Mailbox

When designing your wooden mailbox, there are a few things to consider. In this section, we will cover size specifications and style considerations to help you create a unique and functional mailbox.

Size Specifications

Before you start building your wooden mailbox, you need to determine the size specifications. The size of your mailbox should be based on the amount of mail you receive and the size of your property.

Here are some general size guidelines to follow:

  • The mailbox should be large enough to hold letters, magazines, and small packages.
  • The mailbox should be at least 6 inches away from the curb or road.
  • The mailbox should be between 41 and 45 inches from the ground to the bottom of the mailbox.
  • The mailbox should be at least 8 inches deep and 6 inches wide.

By following these guidelines, you can ensure that your mailbox is the right size for your needs and meets the requirements of your local post office.

Style Considerations

When it comes to style considerations, there are many options to choose from. You can create a simple and classic mailbox or a more elaborate design that reflects your personal style.

Here are some style considerations to keep in mind:

  • Choose a wood that is durable and weather-resistant, such as cedar or redwood.
  • Consider adding decorative elements, such as a post cap or finial, to give your mailbox a unique look.
  • Decide on a mailbox door style, such as a hinged door or a drop-down door.
  • Choose a mailbox color that complements your home’s exterior.

By considering these style elements, you can create a wooden mailbox that not only functions well but also adds to the curb appeal of your home.

In conclusion, designing your wooden mailbox involves determining the size specifications and style considerations. By following these guidelines, you can create a unique and functional mailbox that adds to the overall aesthetic of your home.

Gathering Materials

Before starting to build your wooden mailbox, you need to gather all the necessary materials. This will ensure that you have everything you need at hand and won’t need to make any unnecessary trips to the hardware store. In this section, we will cover the materials you will need to build a wooden mailbox.

Wood and Hardware

The first thing you will need is wood. You can use any type of wood you like, but cedar, redwood, and pine are popular choices. Cedar and redwood are naturally resistant to rot and insects, while pine is an affordable option that can be treated to resist rot and insects.

In addition to wood, you will need hardware to assemble your wooden mailbox. Here is a list of hardware you will need:

  • Screws or nails
  • Hinges
  • Latch
  • Post cap
  • Post anchor

Make sure to choose hardware that is suitable for outdoor use and can withstand the elements.

Tools Needed

To build a wooden mailbox, you will need a few basic tools. Here is a list of tools you will need:

  • Circular saw or handsaw
  • Drill
  • Screwdriver or hammer
  • Measuring tape
  • Level
  • Pencil
  • Safety glasses
  • Work gloves

If you don’t own these tools, you can rent them from a hardware store or borrow them from a friend.

With these materials and tools, you are now ready to start building your wooden mailbox. In the next section, we will cover the steps to build a wooden mailbox.

Building the Mailbox

building-the-mailbox

Building a wooden mailbox can be a fun and rewarding project. In this section, we will guide you through the process of building your own wooden mailbox. We will cover the steps involved in cutting the wood, assembling the pieces, and installing the door.

Cutting the Wood

The first step in building your wooden mailbox is to cut the wood to size. You will need to cut the following pieces:

  • Two 4×4 posts, each 6 feet long
  • One 1×6 board, 6 feet long
  • Two 1×6 boards, each 2 feet long
  • One 1×6 board, 1 foot long
  • One 1×8 board, 1 foot long
  • One 1×2 board, 1 foot long

You can use a miter saw or a circular saw to cut the wood to size. Be sure to measure carefully and double-check your measurements before making any cuts.

Assembling the Pieces

Once you have cut the wood to size, you can begin assembling the pieces. Here are the steps involved:

  1. Attach the two 4×4 posts to the 2-foot-long 1×6 boards using screws. These will be the legs of your mailbox.
  2. Attach the 6-foot-long 1×6 board to the top of the posts using screws. This will be the bottom of your mailbox.
  3. Attach the 1-foot-long 1×6 board to the front of the bottom board using screws. This will be the front of your mailbox.
  4. Attach the 1-foot-long 1×8 board to the top of the front board using screws. This will be the top of your mailbox.
  5. Attach the 1-foot-long 1×2 board to the bottom of the front board using screws. This will be the bottom of your mailbox door.

Installing the Door

The final step in building your wooden mailbox is to install the door. Here’s how to do it:

  1. Cut a piece of plywood to fit the opening in the front of your mailbox.
  2. Attach the plywood to the 1×2 board using hinges.
  3. Attach a latch to the front of the door and the mailbox to keep the door closed.

Congratulations! You have now built your own wooden mailbox.

Finishing Touches

After building your wooden mailbox, it’s time to add the finishing touches to make it look great and protect it from the elements. Here are some tips to help you complete your project.

Sanding the Wood

Before you paint or stain your mailbox, it’s important to sand the wood to make it smooth and remove any rough spots. Start with a coarse-grit sandpaper and work your way up to a fine-grit sandpaper for a smooth finish. Be sure to sand in the direction of the wood grain to avoid scratches.

Painting or Staining

Once the wood is sanded, you can paint or stain your mailbox to match your home’s exterior. If you choose to paint, use a high-quality exterior paint and apply it in thin, even coats. Allow each coat to dry completely before applying the next one.

If you prefer the natural look of wood, you can stain your mailbox instead. Choose a stain that is designed for exterior use and apply it with a brush or rag. Be sure to follow the manufacturer’s instructions and apply the stain in thin coats for the best results.

Adding Numbers and Names

To make it easy for your mail carrier to find your mailbox, be sure to add your house number or name to the mailbox. You can use vinyl lettering, stencils, or even paint the numbers or name by hand.

If you want to add a decorative touch, consider adding a design or pattern to your mailbox. You can use stencils or tape to create a design, or even use a decal or sticker to add some personality to your mailbox.

By following these tips, you can add the finishing touches to your wooden mailbox and create a beautiful and functional addition to your home.

Installation Tips

When it comes to installing your wooden mailbox, there are a few things you need to keep in mind to ensure that your mailbox is secure and functional. In this section, we’ll cover some installation tips to help you get started.

Choosing a Location

The first thing you need to do when installing your wooden mailbox is to choose a suitable location. Here are some things to consider:

  • Accessibility: Make sure your mailbox is easily accessible from the road or sidewalk. The mailbox should be no more than 45 inches above street level, as per USPS requirements.
  • Visibility: Ensure that your mailbox is visible to the mail carrier and clearly marked with your house number.
  • Distance: Keep your mailbox at least 6-8 inches away from the curb or road to prevent damage from snowplows or passing vehicles.
  • Obstructions: Avoid installing your mailbox near trees, bushes, or other obstructions that could interfere with mail delivery.

Securing the Mailbox

Once you’ve chosen a suitable location, it’s time to secure your mailbox. Here are some tips to help you do so:

  • Use a sturdy post: A wooden mailbox post should be at least 4×4 inches in size and set in concrete to prevent it from tipping over.
  • Secure the mailbox to the post: Use screws or bolts to attach the mailbox to the post. Make sure the mailbox is level and securely attached.
  • Add a support arm: If you’re concerned about the weight of your mailbox, you can add a support arm to the post to help distribute the weight.
  • Consider a locking mailbox: If you’re concerned about mail theft, consider installing a locking mailbox to keep your mail secure.

By following these installation tips, you can ensure that your wooden mailbox is secure and functional for years to come.

How to Remove Wax from Wooden Table: A Quick and Easy Guide

How to Remove Wax from Wooden Table: A Quick and Easy Guide

If you have a wooden table that is covered in wax, you may be wondering how to remove it. Wax can build up over time, leaving your table looking dull and dirty. Fortunately, there are several methods you can use to remove wax from a wooden table.

One of the easiest ways to remove wax from a wooden table is with distilled vinegar and water. Mix equal parts of vinegar and water in a bowl, and then use a cloth to apply the solution to the table. Let the solution sit for a few minutes, and then wipe the table clean with a dry cloth.

Another method for removing wax from a wooden table is to use heat. Place a clean cloth over the wax, and then use a warm iron to heat the cloth. The heat will melt the wax, allowing it to be absorbed by the cloth. Repeat this process until all of the wax has been removed from the table.

Understanding Wax and Wood

how-to-remove-wax-from-wooden-table

If you have a wooden table that has been waxed, you may notice that over time, the wax can build up and leave a residue that can be difficult to remove. Before attempting to remove the wax, it’s important to understand a bit about how wax and wood interact.

How Wax Protects Wood

Wax is a natural substance that has been used for centuries to protect and beautify wood. When applied to wood, wax creates a protective layer that helps to repel water and other liquids. This can help to prevent stains and damage from spills.

Wax also helps to enhance the natural beauty of wood by bringing out its natural grain and color. This can give wood a warm, inviting glow that is difficult to achieve with other finishes.

Why Wax Buildup Occurs

While wax is a great way to protect and beautify wood, it can also cause problems if it is not properly maintained. Over time, wax can build up on the surface of wood, creating a hazy, cloudy appearance. This can make the wood look dull and unattractive.

Wax buildup can occur for a number of reasons, including:

  • Over-application of wax
  • Failure to properly buff the wax after application
  • Using the wrong type of wax for the wood
  • Failure to properly clean the wood before applying wax

How to Remove Wax from Wood

If you have a wooden table with wax buildup, there are several methods you can use to remove the wax. Some of the most effective methods include using heat, solvents, or a combination of both.

Before attempting to remove the wax, it’s important to test any method you plan to use on a small, inconspicuous area of the table to ensure that it does not damage the wood. Once you have determined that the method is safe to use, you can then proceed with removing the wax from the rest of the table.

By understanding how wax and wood interact, you can take steps to prevent wax buildup and keep your wooden table looking beautiful for years to come.

Precautions Before Starting

Before you start removing wax from your wooden table, there are a few precautions you should take to ensure that you don’t damage the wood or harm yourself. Here are some things to keep in mind:

Protect Your Hands

Wax removal typically involves using solvents or other chemicals that can be harmful to your skin. To protect your hands, wear gloves while working with these substances. Latex gloves are a good option, but if you have sensitive skin, you may want to opt for nitrile gloves instead.

Test the Solvent

Before you start removing wax from your table, test the solvent you plan to use on a small, inconspicuous area of the wood. This will help you determine whether the solvent will damage the finish or discolor the wood. Apply a small amount of the solvent to the test area and wait a few minutes to see if any damage occurs.

Work in a Well-Ventilated Area

Many wax removal solvents produce fumes that can be harmful if inhaled. To protect your health, work in a well-ventilated area. Open windows and doors to allow fresh air to circulate, and consider wearing a respirator mask if you’re working with particularly strong solvents.

Protect Your Work Surface

When removing wax from your table, you’ll likely be using solvents or other substances that can damage the surface of your work area. To protect your table or countertop, cover it with a drop cloth or plastic sheeting before you begin.

Be Patient

Removing wax from wood can be a time-consuming process, especially if the wax has been on the wood for a long time. Be patient and take your time to ensure that you remove all of the wax without damaging the wood. Rushing the process can lead to mistakes and damage to the wood.

Tools Needed for Wax Removal

Removing wax from a wooden table is not a difficult task, but you will need some tools to do it properly. Here are the tools you will need:

1. Soft Cloth

You will need a soft cloth to wipe the table after removing the wax. Make sure the cloth is clean and dry before using it.

2. Plastic Scraper

A plastic scraper is a useful tool for removing hardened wax from the table surface. It is important to use a plastic scraper to avoid scratching the wood.

3. Hair Dryer or Iron

A hair dryer or iron can be used to soften the wax before scraping it off. Be careful not to overheat the wood, as this can cause damage.

4. Distilled White Vinegar

Distilled white vinegar is a natural cleaning agent that can be used to remove wax residue from the table. Mix equal parts of vinegar and water in a bowl and use a soft cloth to apply the solution to the table.

5. Furniture Polish

After removing the wax, it is a good idea to apply furniture polish to the table to restore its shine. Choose a polish that is suitable for your type of wood and follow the instructions on the label.

Having these tools on hand will make the wax removal process much easier and more effective. With a little bit of patience and elbow grease, you can restore your wooden table to its former glory.

Step-by-Step Guide to Removing Wax

If you have a wooden table that has been covered in wax, don’t worry. Removing wax from a wooden table is a straightforward process that you can do yourself. Here is a step-by-step guide to help you remove wax from your wooden table:

  1. Scrape off the wax: Using a plastic scraper or credit card, gently scrape off as much of the wax as possible. Be careful not to scratch the surface of the wood.
  2. Soften the wax: If there is still wax remaining on the table, use a hair dryer or clothing iron on a low setting to soften the wax. Place a clean cloth over the wax and run the hair dryer or iron over the cloth. The heat will melt the wax, and the cloth will absorb it.
  3. Wipe off the wax: Once the wax has been softened, wipe it off with a clean cloth. Be sure to use a new section of the cloth for each wipe to avoid spreading the wax around.
  4. Remove any residue: If there is still residue left on the table, mix equal parts white vinegar and water in a spray bottle. Spray the solution onto a microfiber cloth and use it to wipe the surface of the furniture, following the direction of the wood grain. Apply firm but gentle pressure, focusing on areas with heavy wax buildup.
  5. Polish the table: After removing the wax and residue, polish the table with furniture polish or wax to restore its shine. Apply the polish or wax with a clean cloth, and buff it in with a separate cloth.

By following these simple steps, you can easily remove wax from your wooden table and restore its natural beauty.

Cleaning the Table After Wax Removal

cleaning-the-table-after-wax-removal

Now that you have successfully removed the wax from your wooden table, it’s time to clean it up and restore its shine. Here are some tips to help you clean your table effectively:

  • Use a damp cloth: After removing the wax, use a clean, damp cloth to wipe down the table. Make sure to remove any remaining wax residue and dirt.
  • Dry the table: After wiping down the table, use a dry cloth to remove any excess moisture. This will prevent water damage to the wood.
  • Apply furniture polish: To restore the shine of your wooden table, apply a furniture polish. Choose a polish that is specifically designed for wooden furniture. Apply the polish in a circular motion and buff it with a clean cloth.
  • Avoid harsh chemicals: Avoid using harsh chemicals or abrasive materials that can damage the wood. Instead, opt for gentle cleaning solutions that are safe for wooden surfaces.
  • Regular maintenance: To keep your wooden table looking its best, it’s important to maintain it regularly. Wipe it down with a damp cloth every few days and apply furniture polish once a month.

By following these simple tips, you can keep your wooden table looking beautiful for years to come.

Maintaining Your Wooden Table

Your wooden table is a beautiful and functional piece of furniture that can last for years with proper care. One of the most important aspects of maintaining your wooden table is to keep it clean and free of wax buildup. Here are some tips to help you keep your wooden table in top condition:

1. Clean spills immediately

Wood is a porous material and can easily absorb liquids, which can cause stains and damage to the surface. To prevent this, make sure to clean up spills immediately using a clean, damp cloth. Avoid using harsh chemicals or abrasive cleaners that can scratch the surface of the wood.

2. Use coasters and placemats

To protect your wooden table from scratches and stains, use coasters and placemats under glasses, plates, and other objects. This will help prevent water rings, heat marks, and other damage to the surface of the wood.

3. Dust regularly

Dust can accumulate on the surface of your wooden table, which can make it look dull and unattractive. To prevent this, dust your table regularly using a soft, dry cloth or a feather duster. Avoid using a wet cloth or cleaning products that can damage the finish of the wood.

4. Use furniture wax sparingly

While furniture wax can help protect the surface of your wooden table, it can also build up over time and create a dull, sticky residue. To prevent this, use furniture wax sparingly and only when necessary. Apply a thin layer of wax using a soft cloth and buff it gently with a clean, dry cloth.

By following these simple tips, you can keep your wooden table looking beautiful and functional for years to come.

Common Mistakes to Avoid

Removing wax from a wooden table can be a tricky task, and there are some common mistakes that people make that can actually make the problem worse. Here are some things to avoid when removing wax from your wooden table:

Using Hot Water

One common mistake people make when trying to remove wax from a wooden table is using hot water. While hot water may seem like a good idea because it can melt the wax, it can also damage the wood. Hot water can cause the wood to expand and warp, which can lead to permanent damage. Instead, use room temperature water to soften the wax before removing it.

Scrubbing Too Hard

Another mistake people make when removing wax from a wooden table is scrubbing too hard. Scrubbing too hard can scratch the surface of the wood, leaving it looking dull and damaged. Instead, use a soft cloth or sponge to gently remove the wax.

Using Harsh Chemicals

While it may be tempting to use harsh chemicals to remove wax from your wooden table, this can actually do more harm than good. Harsh chemicals can strip the finish off the wood, leaving it looking dull and damaged. Instead, use a mild cleaner that is safe for use on wood.

Not Protecting the Wood

After you have removed the wax from your wooden table, it is important to protect the wood to prevent further damage. One mistake people make is not protecting the wood after cleaning it. Be sure to apply a protective coating to the wood to prevent scratches and damage.

By avoiding these common mistakes, you can safely and effectively remove wax from your wooden table without causing any damage.

Alternative Methods for Stubborn Wax

If the wax on your wooden table is particularly stubborn, there are a few alternative methods you can try to remove it. Here are some options to consider:

Use Mineral Spirits

Mineral spirits are a type of solvent that can be effective at dissolving wax buildup on wooden surfaces. To use this method, follow these steps:

  1. Apply a small amount of mineral spirits to a clean, soft cloth.
  2. Rub the cloth over the wax buildup, applying gentle pressure.
  3. Continue rubbing until the wax is dissolved and removed.
  4. Wipe the area clean with a separate clean cloth.

It’s important to note that mineral spirits can be flammable, so be sure to use them in a well-ventilated area and away from any sources of heat or flames.

Try a Hair Dryer

Another option for removing stubborn wax is to use a hair dryer. Here’s how to do it:

  1. Set your hair dryer to its lowest heat setting.
  2. Hold the hair dryer a few inches away from the wax buildup.
  3. Move the hair dryer back and forth over the wax, heating it up until it begins to melt.
  4. Wipe the melted wax away with a clean cloth.
  5. Repeat as necessary until all the wax is removed.

Be careful not to hold the hair dryer too close to the wood, as this could cause damage.

Use a Plastic Scraper

If the wax on your table is particularly thick, you may need to use a plastic scraper to remove it. Here’s how:

  1. Use a plastic scraper to gently scrape away as much of the wax as possible.
  2. Apply a small amount of mineral spirits to a clean, soft cloth.
  3. Rub the cloth over the remaining wax buildup, applying gentle pressure.
  4. Continue rubbing until the wax is dissolved and removed.
  5. Wipe the area clean with a separate clean cloth.

Be careful not to use a metal scraper, as this could scratch or damage the wood.

Sand the Table

If all else fails, you may need to sand your table to remove the wax buildup. Here’s how:

  1. Use a fine-grit sandpaper to sand the wax buildup off the table.
  2. Be sure to sand with the grain of the wood to avoid causing any damage.
  3. Once the wax is removed, wipe the table clean with a damp cloth.
  4. Allow the table to dry completely before applying any new finish or wax.

Keep in mind that sanding your table should be a last resort, as it can be time-consuming and may damage the wood if not done carefully.

Professional Help for Wax Removal

If you have tried all the DIY methods and still cannot remove the wax from your wooden table, it may be time to call in the professionals. Here are some options to consider:

Furniture Restoration Companies

Many furniture restoration companies specialize in removing wax buildup from wooden furniture. These companies have the expertise and tools necessary to safely remove the wax without damaging your table.

When choosing a furniture restoration company, do your research to ensure that they have experience working with wooden tables and that they use safe and effective methods for wax removal.

Professional Cleaners

Professional cleaners may also be able to remove the wax from your table. Look for cleaners who specialize in wood cleaning and restoration.

When hiring a professional cleaner, make sure that they are experienced and have a good reputation. Ask for references and read reviews online before making a decision.

Furniture Refinishers

If your table has significant damage from the wax buildup, you may need to hire a furniture refinisher to restore it. Refinishers can repair and refinish the table to make it look like new again.

When choosing a furniture refinisher, make sure that they have experience working with wooden tables and that they use safe and effective methods for wax removal and refinishing.

Remember, hiring a professional can be more expensive than DIY methods, but it may be necessary if the wax buildup is severe or if you do not feel comfortable attempting to remove it yourself.

How to Paint Wooden Beads: A Beginner's Guide

How to Paint Wooden Beads: A Beginner's Guide

If you’re looking for a fun and easy DIY project, painting wooden beads is a great option. Not only is it a relaxing activity, but it also allows you to create unique and personalized accessories for your home or wardrobe. Whether you’re a beginner or an experienced crafter, painting wooden beads can be a simple and enjoyable way to express your creativity.

To get started, you’ll need some basic supplies such as wooden beads, paint, brushes, and a skewer or toothpick. You can use any type of paint you like, including acrylic, watercolor, or spray paint, depending on your preference and the effect you want to achieve. Before you start painting, it’s a good idea to sand the wooden beads lightly to create a smooth surface for the paint to adhere to. Once you have your supplies ready, you can start experimenting with different colors, patterns, and techniques to create your own unique designs.

Understanding Wooden Beads

paint-wooden-beads

Wooden beads are a versatile and popular crafting material that can be used for a wide range of projects. They come in different shapes, sizes, and colors, and can be painted, stained, or left natural. Whether you’re a seasoned crafter or just starting out, understanding wooden beads is essential to creating beautiful and functional projects.

Types of Wooden Beads

There are several types of wooden beads available, each with its own unique characteristics. Here are some of the most common types:

  • Round beads: These are the most common type of wooden beads and come in a variety of sizes and colors. They are perfect for jewelry making, home decor, and other craft projects.
  • Faceted beads: These beads have flat surfaces that reflect light, creating a sparkling effect. They are often used in jewelry making and other decorative projects.
  • Barrel beads: These beads have a cylindrical shape and are often used in jewelry making and home decor projects.
  • Spacer beads: These beads are small and are used to separate other beads in jewelry making and other projects.

Choosing the Right Size

When choosing wooden beads for your project, size matters. Beads come in a wide range of sizes, from tiny seed beads to large statement beads. Here are some tips for choosing the right size:

  • Consider the project: The size of the beads you choose will depend on the project you’re working on. For example, if you’re making a delicate necklace, you’ll want to choose smaller beads. If you’re making a statement piece, larger beads may be more appropriate.
  • Think about the design: The size of the beads you choose can also impact the overall design of your project. Consider the other materials you’ll be using and choose beads that will complement them.
  • Experiment: Don’t be afraid to experiment with different sizes to find the perfect fit for your project.

Painting Wooden Beads

Painting wooden beads is a great way to customize them for your project. Here are some tips for painting wooden beads:

  • Choose the right paint: Acrylic paint is a good choice for painting wooden beads. It dries quickly and comes in a wide range of colors.
  • Prepare the beads: Before painting, sand the beads lightly to remove any rough spots. Wipe them clean with a damp cloth and let them dry completely.
  • Paint the beads: You can paint the beads with a brush or use a spray paint. Apply a thin coat of paint and let it dry completely before applying a second coat.
  • Seal the beads: To protect the paint and make it last longer, seal the beads with a clear varnish.

Understanding wooden beads is the first step to creating beautiful and unique projects. With the right tools and techniques, you can create stunning jewelry, home decor, and more.

Choosing the Right Paint

When it comes to painting wooden beads, choosing the right paint is crucial to achieving the desired result. There are several types of paint to choose from, each with its own unique properties. Here are some options to consider:

Acrylic Paint

Acrylic paint is a popular choice for painting wooden beads. It is water-based, which means it dries quickly and is easy to clean up. Acrylic paint is also versatile and can be used on a variety of surfaces, including wood, plastic, and metal. When using acrylic paint, it is important to thin it with water to achieve a smooth and consistent finish. You can also mix different colors of acrylic paint to create custom shades.

Spray Paint

Spray paint is another option for painting wooden beads. It is quick and easy to apply, and it dries quickly. Spray paint is available in a variety of colors and finishes, including matte, satin, and glossy. When using spray paint, it is important to protect your work surface and wear a mask to avoid inhaling fumes. Spray paint is not recommended for intricate designs or small details.

Oil-Based Paint

Oil-based paint is a durable option for painting wooden beads. It is resistant to water and can withstand wear and tear. Oil-based paint is also available in a variety of colors and finishes, including high-gloss and semi-gloss. When using oil-based paint, it is important to work in a well-ventilated area and wear gloves to avoid skin contact. Oil-based paint takes longer to dry than other types of paint, so be sure to allow plenty of time for it to dry before handling.

No matter which type of paint you choose, be sure to read the manufacturer’s instructions carefully and follow all safety precautions. Always work in a well-ventilated area and wear protective gear as necessary. With the right paint and a little creativity, you can create beautiful and unique wooden beads that are sure to impress.

Preparation of Wooden Beads

Before painting wooden beads, it is important to properly prepare them. This will ensure that the paint adheres well to the surface and that the finished product looks smooth and professional. Here are some steps to follow when preparing wooden beads for painting:

Cleaning the Beads

The first step in preparing wooden beads for painting is to clean them. This will remove any dirt, dust, or oils that may be on the surface and prevent the paint from adhering properly. To clean the beads, you can use a soft cloth or a small brush and a mild soap solution. Be sure to rinse the beads thoroughly with water and allow them to dry completely before proceeding to the next step.

Sanding the Beads

The next step in preparing wooden beads for painting is to sand them. Sanding the beads will help to smooth out any rough spots or imperfections on the surface and create a better surface for the paint to adhere to. To sand the beads, you can use a fine-grit sandpaper or a sanding sponge. Be sure to sand the beads lightly and evenly, and wipe away any dust with a soft cloth before proceeding to the next step.

By following these simple steps, you can ensure that your wooden beads are properly prepared for painting. This will help to create a smooth and professional-looking finished product that you can be proud of.

Painting Techniques

When it comes to painting wooden beads, there are several techniques you can use to achieve the desired result. In this section, we will explore three popular painting techniques: brush painting, dipping method, and spray painting.

Brush Painting

Brush painting is a traditional and straightforward method of painting wooden beads. It involves using a paintbrush to apply paint to the surface of the beads. This technique is ideal for those who want to achieve a more precise and detailed finish.

To brush paint wooden beads, you will need a few supplies, including a paintbrush, paint, and a palette. Start by pouring a small amount of paint onto the palette. Dip the tip of the brush into the paint and apply it to the surface of the bead. Make sure to cover the entire surface of the bead evenly. Allow the paint to dry completely before applying a second coat if needed.

Dipping Method

The dipping method is another popular technique for painting wooden beads. This method involves dipping the beads into a container of paint to coat them evenly. It is a quick and easy technique that is ideal for those who want to paint a large number of beads at once.

To use the dipping method, you will need a container of paint and a pair of tongs. Start by pouring the paint into the container. Hold the beads with the tongs and dip them into the paint. Make sure to coat the entire surface of the bead evenly. Allow the paint to dry completely before handling the beads.

Spray Painting

Spray painting is a modern and popular technique for painting wooden beads. It involves using a can of spray paint to apply an even coat of paint to the surface of the beads. This technique is ideal for those who want to achieve a smooth and even finish quickly.

To spray paint wooden beads, you will need a can of spray paint and a well-ventilated area. Start by placing the beads on a piece of cardboard or newspaper. Hold the can of spray paint about 6 inches away from the beads and spray a thin coat of paint evenly over the surface of the beads. Allow the paint to dry completely before handling the beads.

In conclusion, brush painting, dipping method, and spray painting are three popular techniques for painting wooden beads. Each technique has its advantages and disadvantages, so choose the one that best suits your needs and preferences.

Drying and Sealing

Proper Drying

After painting your wooden beads, it is important to let them dry completely before handling them. The drying time will depend on the type of paint you used and the humidity levels in your environment. If you are in a rush, you can use a hair dryer on a low setting to speed up the drying process. However, be careful not to hold the hair dryer too close to the beads, or they may go flying.

To avoid any sticking, it is recommended to place the beads on a paper towel or wax paper while they dry. This will prevent any paint from transferring onto other surfaces. Once the beads are completely dry, you can move on to the next step.

Applying Sealant

To protect your painted wooden beads from wear and tear, it is a good idea to apply a sealant. There are several types of sealants available, including varnish, polyurethane, and wax. Each type of sealant has its own advantages and disadvantages, so choose the one that best suits your needs.

Before applying the sealant, make sure the beads are completely dry. Then, use a brush to apply a thin layer of sealant to each bead. Be sure to cover the entire surface of the bead, including any crevices or details.

Once you have applied the sealant, let it dry completely before handling the beads. This will ensure that the sealant has enough time to cure and provide maximum protection. Depending on the type of sealant you used, you may need to apply multiple coats for optimal protection.

By properly drying and sealing your painted wooden beads, you can ensure that they will last for years to come.

Safety Tips

When painting wooden beads, safety should always be a top priority. Here are some safety tips to keep in mind:

Using Protective Gear

It is important to wear protective gear when painting wooden beads. This includes gloves, eye protection, and a mask. Gloves will protect your hands from the paint and eye protection will protect your eyes from any paint splatters. A mask will prevent you from inhaling any harmful fumes from the paint.

Proper Ventilation

Proper ventilation is also important when painting wooden beads. Make sure you are in a well-ventilated area, preferably outdoors or in a room with open windows. This will prevent you from inhaling any fumes from the paint. If you are painting indoors, consider using a fan to help circulate the air.

Remember to always follow the manufacturer’s instructions when using paint and other materials. By taking the necessary safety precautions, you can ensure a safe and enjoyable painting experience.

Troubleshooting Common Issues

Paint Bubbling

If you notice bubbling in your painted wooden beads, it could be due to a few reasons. One possible cause is that the paint was applied too thickly, causing air bubbles to form. Another cause could be that the surface of the beads was not properly cleaned before painting, causing the paint to bubble up as it dries.

To avoid paint bubbling, make sure to clean the surface of the wooden beads before painting. Additionally, apply the paint in thin layers, allowing each layer to dry completely before applying the next. If you do notice bubbling, gently sand the affected area and repaint.

Uneven Coating

An uneven coating on your wooden beads can be frustrating, but it is a common issue that can be easily fixed. One possible cause is that the paint was not mixed well enough before application, causing the pigment to settle and create an uneven finish.

To avoid uneven coating, make sure to mix the paint thoroughly before applying it to the wooden beads. Additionally, use a brush or spray paint in a well-ventilated area to avoid drips and uneven application. If you do notice an uneven coating, lightly sand the affected area and repaint.

Remember, with a little patience and attention to detail, you can easily troubleshoot common issues when painting wooden beads.

How to Hang a Wooden Sign: A Step-by-Step Guide

How to Hang a Wooden Sign: A Step-by-Step Guide

Hanging a wooden sign can add a touch of rustic charm to your home or business. However, it can be tricky to know where to start. Whether you’re hanging a sign indoors or outdoors, on drywall or concrete, there are a few key things to keep in mind. In this article, we’ll guide you through the process of hanging a wooden sign, step by step.

First, you’ll need to choose the right hardware for your sign and the surface you’re hanging it on. For lightweight signs, picture-hanging hardware or a simple nail or screw may be sufficient. For heavier signs, you’ll need to use more heavy-duty hardware such as a French cleat or a Sawtooth hanger. If you’re hanging your sign on drywall, it’s important to locate a stud to ensure that it will be securely anchored. For concrete surfaces, you’ll need to use concrete screws or anchors.

Once you’ve chosen your hardware, it’s time to measure and mark the location where you want to hang your sign. Use a level to ensure that your sign will hang straight. If you’re hanging multiple signs, make sure to measure and mark the location of each one individually. With the right hardware and a little bit of careful planning, you’ll be able to hang your wooden sign in no time.

Choosing the Right Spot

how-to-hang-a-wooden-sign


When it comes to hanging a wooden sign, choosing the right spot is crucial to ensure that your sign is visible and adds to the aesthetics of the room or space. Here are some things to consider when choosing the right spot to hang your wooden sign.

Considering Wall Material

The first thing you need to consider is the material of the wall where you plan to hang your wooden sign. Some walls, such as drywall, plaster, or brick, may require specific hardware to ensure that your sign stays securely in place. Here are some things to keep in mind:

  • Drywall: If you plan to hang your wooden sign on drywall, you will need to use a stud finder to locate the studs behind the drywall. Once you find the studs, you can use screws or nails to hang your sign. If you cannot find a stud, you will need to use drywall anchors to ensure that your sign stays in place.
  • Plaster: Hanging a wooden sign on plaster walls can be tricky, as plaster is a brittle material that can crack easily. If you plan to hang your sign on a plaster wall, you will need to use a drill to make small holes in the wall, then use screws or nails to hang your sign. Be sure to use a drill bit that is smaller than the screw or nail to avoid damaging the plaster.
  • Brick: If you plan to hang your wooden sign on a brick wall, you will need to use masonry screws or anchors to ensure that your sign stays securely in place. Be sure to use a drill with a masonry bit to make holes in the brick.

Measuring Your Space

Once you have determined the type of wall where you plan to hang your wooden sign, the next step is to measure your space. Here are some things to keep in mind:

  • Height: When hanging a wooden sign, you want to make sure that it is at eye level and easy to read. The height at which you hang your sign will depend on the size of the sign and the height of the room. As a general rule, you should hang your sign so that the center of the sign is at eye level.
  • Spacing: If you plan to hang multiple wooden signs, you will need to consider the spacing between the signs. You want to make sure that each sign is spaced evenly and that there is enough space between the signs to avoid overcrowding.
  • Location: Finally, you will need to consider the location of your sign. If you plan to hang your sign in a high-traffic area, you will want to make sure that it is securely fastened and out of the way. If you plan to hang your sign in a more decorative area, you may want to consider using decorative hooks or hangers to add to the aesthetics of the space.

In conclusion, choosing the right spot to hang your wooden sign is crucial to ensure that it is visible and adds to the aesthetics of the room or space. Be sure to consider the type of wall where you plan to hang your sign, as well as the height, spacing, and location of the sign.

Selecting the Perfect Wooden Sign

When it comes to choosing the perfect wooden sign to hang, there are a few things you should consider. In this section, we’ll go over the different wood types you can choose from and how to select the right size for your space.

Understanding Different Wood Types

The type of wood you choose for your sign can affect its durability, appearance, and overall style. Here are some common wood types used for signs:

Wood Type Characteristics
Pine Affordable, lightweight, and easy to work with.
Cedar Durable, weather-resistant, and has a natural aroma.
Oak Strong, heavy, and has a distinctive grain pattern.
Maple Hard and dense, with a light color and uniform texture.

Consider the style and purpose of your sign when choosing a wood type. For example, if you want a rustic or vintage look, pine or cedar may be a good choice. If you want a more polished or refined look, oak or maple may be a better option.

Choosing the Right Size

The size of your wooden sign should be proportional to the space where you plan to hang it. Here are some tips to help you choose the right size:

  • Measure the space where you want to hang the sign and choose a size that fits comfortably.
  • Consider the distance from which the sign will be viewed. If it will be viewed from far away, a larger size may be necessary.
  • Think about the amount of text or design you want to include on the sign. If you have a lot of information to convey, a larger size may be needed to ensure legibility.

Remember, it’s always better to go slightly larger than too small when it comes to choosing the size of your wooden sign. A well-sized sign can make a big impact in your space and add a touch of personality and charm.

Gathering Necessary Tools

Before you start hanging your wooden sign, it’s important to gather all the necessary tools to ensure a smooth and safe installation process. In this section, we’ll cover the hardware essentials and safety equipment you’ll need to complete the job.

Hardware Essentials

To hang your wooden sign, you’ll need the following hardware essentials:

Hardware Description
Structural Screws Sized to support the weight of your sign
Drill Bit 1/16 of an inch smaller than the diameter of your structural screw
Stud Finder To locate a stud behind your drywall
Pencil To mark where you want to hang your sign
Ruler To measure the distance between your hanger and the top of the sign
Level To ensure your sign is straight

Safety Equipment

Safety should always be a top priority when hanging a wooden sign. Here are some safety equipment you should have on hand:

  • Safety Glasses: To protect your eyes from flying debris while drilling
  • Work Gloves: To protect your hands from splinters and sharp edges on your wooden sign
  • Ladder or Step Stool: To reach high places safely
  • Power Drill: To make the installation process easier and faster

By gathering all the necessary tools and safety equipment, you’ll be able to hang your wooden sign with ease and confidence.

Preparation Steps

Before hanging your wooden sign, you need to make sure you have all the necessary tools and materials. Here are the preparation steps to follow:

Marking the Wall

The first step is to determine where you want to hang your wooden sign. Use a stud finder to locate the studs behind the drywall. Once you locate the studs, mark their location on the wall using a pencil. This will ensure that your sign is securely anchored to the wall.

Preparing the Sign

Before hanging your wooden sign, you need to prepare it. Here are the steps to follow:

  1. Determine the weight of your sign: The weight of your sign will determine the type of hardware you need to use to hang it. Use a scale to weigh your sign.
  2. Choose the right hardware: There are different types of hardware you can use to hang your wooden sign, including sawtooth hangers, keyhole hangers, and D-ring hangers. Choose the hardware that is appropriate for the weight of your sign.
  3. Attach the hardware to the sign: Once you have chosen the hardware, attach it to the back of your sign using screws or nails. Make sure the hardware is securely attached to the sign.

By following these preparation steps, you will ensure that your wooden sign is securely anchored to the wall and will not fall down.

Hanging the Wooden Sign

hanging-the-wooden-sign

When it comes to hanging a wooden sign, there are a few things to keep in mind to ensure it is secure and stable. In this section, we will go over how to secure the sign and how to check for stability.

Securing the Sign

Before you begin hanging the sign, make sure you have the necessary tools and hardware. You will need a stud finder, a pencil, a ruler, a power drill, a 3 1/2 inch structural screw, and a drill bit that is 1/16 of an inch smaller than the diameter of your structural screw. You may also need a spirit or digital level to ensure the sign is straight.

To secure the sign, follow these steps:

  1. Use the stud finder to locate a stud behind your drywall where you want to hang the sign.
  2. Mark the location of the stud with a pencil.
  3. Measure and mark the placement of the sign on the wall.
  4. Use the power drill to drill a hole into the stud at the marked location.
  5. Insert the structural screw into the hole and tighten it with a screwdriver.
  6. Hang the sign on the screw.

Checking for Stability

After hanging the sign, it is important to check for stability to ensure it will not fall or become loose over time. Here are some tips for checking the stability of your wooden sign:

  • Use a level to check that the sign is straight.
  • Gently shake the sign to see if it feels loose or wobbly.
  • Check the screw and hardware to make sure they are tight and secure.
  • If the sign feels unstable, remove it and repeat the process, making sure to secure it into a stud.

By following these steps, you can ensure that your wooden sign is securely and stably hung on your wall.

Maintaining Your Wooden Sign

Cleaning Tips

To keep your wooden sign looking great, it’s important to clean it regularly. Here are some tips to help you keep your sign clean:

  • Use a soft-bristled brush to remove any loose dirt or debris from the surface of the sign.
  • Mix a solution of warm water and mild detergent, such as dish soap or laundry detergent.
  • Dip a clean cloth or sponge into the solution and wring out any excess water.
  • Gently scrub the surface of the sign with the cloth or sponge, being careful not to apply too much pressure.
  • Rinse the sign with clean water and dry it thoroughly with a clean towel or cloth.

Periodic Checks

In addition to regular cleaning, it’s also important to periodically check your wooden sign for any signs of damage or wear. Here are some things to look for:

  • Check the mounting hardware to make sure it’s still secure and in good condition.
  • Look for any cracks or splits in the wood, which could indicate that the sign is starting to deteriorate.
  • Check for any signs of discoloration or fading, which could indicate that the sign is being exposed to too much sunlight or moisture.

By following these simple tips, you can help ensure that your wooden sign stays in great condition for years to come.