Tag Archives: fire extinguisher nearby

How Many Incendiary Shells Do You Need to Burn a Wooden Door?

How Many Incendiary Shells Do You Need to Burn a Wooden Door?

Are you tired of constantly guessing how many incendiary shells you need to destroy a wooden door? Look no further! In this article, we will provide you with the most accurate information on how many incendiary shells you need to take down a wooden door.

The number of incendiary shells required to destroy a wooden door depends on the type of wood and the thickness of the door. For example, a thin pine door might only need two or three incendiary shells, while a thick oak door could require six or seven. It’s important to note that using too many incendiary shells can cause unnecessary damage to your base, so it’s best to use the minimum amount necessary to take down the door.

We understand that destroying wooden doors can be a frustrating and time-consuming process, but with the right information, you can save yourself time and resources. Keep reading to find out the most efficient way to use incendiary shells to take down a wooden door.

Understanding Incendiary Shells

understanding-incendiary-shells

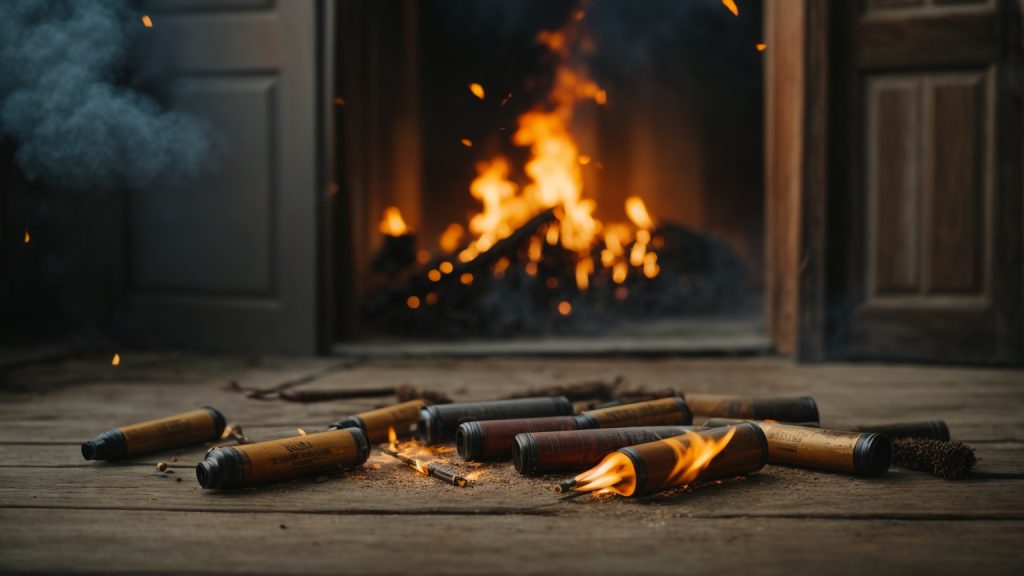
If you’re looking to break through a wooden door in Rust, then incendiary shells might be just what you need. These special shotgun shells produce a fiery explosion on impact, dealing extra damage to wooden structures. But how many incendiary shells do you need to destroy a wooden door?

The answer depends on a few factors, such as the type of shotgun you’re using and the quality of the door. Here’s a breakdown of how many incendiary shells it takes to destroy a wooden door using some of the most common shotguns in Rust:

  • Pump Shotgun: 39 shells
  • Double Barrel Shotgun: 20 shells
  • Waterpipe Shotgun: 15 shells

It’s worth noting that these numbers are based on using standard wooden doors. If the door is upgraded to a stronger material, such as sheet metal or armored, it will take more incendiary shells to break through.

Another thing to keep in mind is that incendiary shells have a chance to set the wooden structure on fire, which can cause additional damage over time. This can be helpful for breaking through doors faster, but it also means you’ll need to be careful not to get caught in the flames yourself.

Overall, incendiary shells can be a powerful tool for raiding wooden bases in Rust. Just make sure you have enough shells on hand and take precautions to avoid getting burned.

Wooden Doors and Their Resistance

Wooden doors are a common feature in many homes and buildings, but they vary in their resistance to damage and fire. Understanding the strength and weaknesses of wooden doors can help you better protect your property and make informed decisions about how to secure your doors.

One important factor to consider is the type of wood used in the door. Some types of wood, such as oak, are denser and more resistant to damage than others. Thicker doors made of denser woods will generally be more resistant to damage from tools and other objects.

However, even the strongest wooden doors may not be able to withstand a determined attacker or a fire. It is important to take additional measures to secure your doors, such as installing deadbolts or other locking mechanisms.

When it comes to fire resistance, not all wooden doors are created equal. Fire-rated doors are designed to resist the spread of flames and smoke for a certain period of time. The length of time a door can resist fire is measured in minutes, with higher ratings indicating greater resistance.

If you are concerned about the fire resistance of your wooden doors, consider installing fire-rated doors or adding fire-resistant coatings to your existing doors. It is also important to ensure that your doors are properly installed and maintained to maximize their resistance to fire.

In summary, wooden doors can vary in their resistance to damage and fire, depending on factors such as the type of wood used and the thickness of the door. Taking additional measures to secure your doors and considering fire-rated doors can help you better protect your property.

Calculating Shell Requirement

how-many-incendiary-shells-do-you-need-to-burn-a-wooden-door-2

When it comes to securing your base in Rust, the wooden door is an essential early game building item. However, simply placing a wooden door is not enough to ensure the safety of your base. You must also consider how many incendiary shells you will need to protect your base from enemies.

Factors Affecting Calculation

The number of incendiary shells required to destroy a wooden door depends on several factors. These include the type of shotgun used, the distance between the shooter and the door, and the number of pellets that hit the door.

The type of shotgun used is crucial because different types of shotguns have different damage outputs. For example, the Double Barrel Shotgun has a higher damage output than the Pump Shotgun. The distance between the shooter and the door is also important because the further away the shooter is, the less damage the pellets will do. Finally, the number of pellets that hit the door will affect the number of shells required.

Methods of Calculation

There are two methods of calculating the number of incendiary shells required to destroy a wooden door. The first method is to use trial and error. This involves shooting the door with incendiary shells until it breaks. While this method is straightforward, it can be time-consuming and wasteful.

The second method is to use a Rust calculator such as Rust Labs. Rust Labs provides a table that shows the number of incendiary shells required to destroy a wooden door based on the type of shotgun used. For example, according to Rust Labs, it takes 32 incendiary shells from a Double Barrel Shotgun to destroy a wooden door.

In conclusion, calculating the number of incendiary shells required to destroy a wooden door is essential for securing your base in Rust. Factors such as the type of shotgun used, the distance between the shooter and the door, and the number of pellets that hit the door will affect the calculation. You can use trial and error or a Rust calculator such as Rust Labs to determine the number of incendiary shells required.

Safety Precautions When Using Incendiary Shells

When using incendiary shells, it is important to take proper safety precautions to avoid injury or damage to property. Here are some tips to keep in mind:

  • Always wear appropriate protective gear, such as eye and ear protection, gloves, and a face mask.
  • Make sure the area around you is clear of flammable materials, including grass, leaves, and other debris.
  • Keep a fire extinguisher nearby in case of accidental fires.
  • Make sure you are using the correct type of incendiary shell for your weapon.
  • Never point your weapon at anything you do not intend to shoot.
  • Always keep your finger off the trigger until you are ready to shoot.
  • Do not use incendiary shells in areas where they are prohibited by law or regulation.

By following these simple safety precautions, you can help ensure that your use of incendiary shells is safe and responsible. Remember, always prioritize safety when handling firearms or ammunition.

Alternative Methods for Opening Wooden Doors

If you’re looking for alternative ways to open wooden doors in Rust, there are a few options available to you. While some methods may be more effective than others, it’s important to keep in mind that wooden doors are relatively weak and can be destroyed with a variety of tools and weapons.

Using Incendiary Shells

One effective method for opening wooden doors is to use incendiary shells. These shells are designed to ignite upon impact, causing fire damage to any structures they hit. When fired at a wooden door, incendiary shells can quickly burn through the door and allow you to gain entry.

To use incendiary shells, you’ll need a shotgun or other weapon that can fire them. Simply load the shells into your weapon and aim at the wooden door. Fire the weapon and the shells will ignite upon impact, causing fire damage to the door.

Keep in mind that incendiary shells can be expensive and may not be the most practical option for opening wooden doors in all situations.

Other Methods

If you don’t have access to incendiary shells or prefer not to use them, there are other methods you can try. Some alternative methods for opening wooden doors in Rust include:

  • Using a metal hatchet or other melee weapon to break down the door
  • Using satchel charges or other explosives to blow up the door
  • Using a flamethrower to burn through the door

Each of these methods has its own advantages and disadvantages, so it’s important to consider your options carefully before deciding which method to use.

Overall, there are several effective methods for opening wooden doors in Rust. Whether you choose to use incendiary shells or another method, it’s important to approach the situation carefully and be prepared for any potential risks or challenges.

How to Make a Wooden Patio Bench: A Simple Guide for DIY Enthusiasts

If you’re looking to add some extra seating to your patio, a wooden bench is a great option. Not only is it sturdy and durable, but it can also add a touch of natural beauty to your outdoor space. Plus, building your own bench allows you to customize it to your specific needs and preferences.

Before you get started, you’ll need to gather some supplies. Depending on the design you choose, you may need wood boards, screws, a saw, a drill, and sandpaper. It’s also important to have a clear idea of the size and style of bench you want, as this will affect the amount of materials you need and the level of difficulty of the project. Once you have everything you need, you can begin building your bench.

Understanding the Basics

When it comes to building a wooden patio bench, there are a few basics you need to understand before you get started. This section will cover the types of wood you can use and the safety measures you should take.

Types of Wood

Choosing the right type of wood is essential for building a sturdy and durable patio bench. Here are some of the most common types of wood used for outdoor furniture:

Type of Wood Characteristics
Cedar Resistant to rot and insects, lightweight, and easy to work with.
Redwood Resistant to decay and insects, durable, and has a natural reddish-brown color.
Teak Extremely durable, resistant to rot and insects, and has a beautiful golden-brown color.
Pine Affordable, easy to work with, and can be stained or painted to match your patio decor.

When choosing your wood, make sure it is kiln-dried to prevent warping and cracking. You should also consider the climate in your area and choose a wood that can withstand the weather conditions.

Safety Measures

Before you start building your patio bench, it is important to take the necessary safety precautions. Here are some tips to keep in mind:

  • Wear protective gear such as safety glasses and gloves to prevent injuries.
  • Use a dust mask when sanding or cutting wood to avoid inhaling sawdust.
  • Always use sharp tools to prevent accidents and make clean cuts.
  • Use clamps to secure the wood in place while you work on it.
  • Follow the manufacturer’s instructions when using power tools.
  • Keep a fire extinguisher nearby in case of emergencies.

By following these safety measures, you can ensure a safe and enjoyable woodworking experience.

Gathering the Materials

Before you start building your wooden patio bench, you need to gather all the materials required for the project. Here are the materials you will need:

Wood

The main material you will need for building your bench is wood. You can use any type of wood you prefer, but cedar, redwood, and teak are popular choices for outdoor furniture due to their durability and resistance to rot and insects. You will need the following pieces of wood:

  • Two 2x4s for the legs, each cut to 16 inches in length
  • Two 2x4s for the seat supports, each cut to 40 inches in length
  • Four 1x4s for the seat slats, each cut to 48 inches in length
  • Two 1x4s for the armrests, each cut to 25 inches in length
  • Two 1x4s for the backrest supports, each cut to 36 inches in length
  • Three 1x4s for the backrest slats, each cut to 48 inches in length

Nails and Screws

You will need nails and screws to hold the bench together. Galvanized or stainless steel screws and nails are recommended for outdoor furniture because they are resistant to rust and corrosion. Here are the nails and screws you will need:

  • 2.5-inch deck screws for attaching the legs to the seat supports and the backrest supports to the seat supports
  • 1.5-inch deck screws for attaching the seat slats to the seat supports and the backrest slats to the backrest supports
  • 2-inch finishing nails for attaching the armrests to the backrest supports

Paint and Finish

To protect your bench from the elements and give it a finished look, you will need to paint or stain it. You can choose any color or finish you like, but make sure to use a paint or stain that is specifically formulated for outdoor use. Here are the materials you will need for painting or staining your bench:

  • Outdoor paint or stain
  • Paintbrush or roller
  • Sandpaper (medium and fine grit)
  • Painters tape (optional)

Now that you have gathered all the necessary materials, you are ready to start building your wooden patio bench.

Creating the Design

Before you start building your wooden patio bench, you’ll need to create a design that fits your needs and style. This section will guide you through the process of creating a design that is functional, comfortable, and aesthetically pleasing.

Measurements

The first step in creating your design is to measure the space where the bench will be placed. This will help you determine the size of the bench and ensure that it fits comfortably in the space. Measure the length, width, and height of the area where the bench will be placed.

Next, consider how many people you want the bench to seat. A standard bench can seat two to three people comfortably, but if you have a larger space, you may want to consider a longer bench that can seat four or more people.

Sketching the Design

Once you have your measurements, it’s time to sketch out your design. You can use graph paper or a design software to create a detailed sketch of your bench. Start by drawing the basic shape of the bench, including the seat and backrest. Then, add details such as armrests, legs, and any decorative elements you want to include.

When sketching your design, keep in mind the style of your outdoor space. If you have a modern patio, you may want to create a bench with clean lines and minimal decoration. If you have a more traditional space, you may want to include decorative elements such as curved arms or intricate details.

Once you have your design sketched out, take some time to review it and make any necessary adjustments. Consider the materials you will be using and make sure your design is feasible. You may also want to share your design with a friend or family member to get their feedback.

By taking the time to create a thoughtful design, you’ll ensure that your wooden patio bench is both functional and beautiful.

Building the Frame

Cutting the Wood

Before you start building your wooden patio bench, you need to cut the wood pieces to the right size. You will need four legs, two seat supports, two back supports, and several slats for the seat and back. The exact dimensions will depend on the design you choose, but here are some general guidelines:

  • Legs: 2×4 boards cut to 16-18 inches long
  • Seat supports: 2×4 boards cut to 48 inches long
  • Back supports: 2×4 boards cut to 36 inches long
  • Seat and back slats: 1×4 or 2×4 boards cut to 48 inches long

Make sure to measure and mark the wood pieces accurately before cutting them with a saw. You can use a circular saw, a miter saw, or a handsaw, depending on your preference and skill level. Always wear safety glasses and gloves when cutting wood.

Assembling the Frame

Once you have all the wood pieces cut to size, you can start assembling the frame of the bench. Follow these steps:

  1. Lay the legs flat on the ground, parallel to each other, with the top ends facing up.
  2. Place the seat supports on top of the legs, perpendicular to them, about 14 inches from the top ends. Use wood screws or bolts to attach the seat supports to the legs.
  3. Attach the back supports to the top ends of the legs, perpendicular to them, using wood screws or bolts. Make sure the back supports are level and centered.
  4. Add additional support pieces if desired, such as diagonal braces or crossbars between the legs.
  5. Install the seat and back slats, starting from the bottom and working your way up. Use wood screws or nails to attach the slats to the supports. Space the slats evenly and make sure they are level.

Once the frame is assembled, you can sand it smooth and apply a protective finish, such as paint or stain. Your wooden patio bench is now ready to use and enjoy!

Adding the Seating

Now that the frame of your wooden patio bench is complete, it’s time to add the seating. This section will cover the steps to attach the slats and secure the seating.

Attaching the Slats

The slats are the individual pieces of wood that make up the seating of the bench. To attach them, follow these steps:

  1. Measure the distance between the inside edges of the frame where the slats will be placed.
  2. Cut the slats to the correct length, making sure they are all the same size.
  3. Lay out the slats on a flat surface and space them evenly, leaving a small gap between each slat for drainage.
  4. Use a pencil to mark where each slat will be attached to the frame.
  5. Pre-drill holes for screws or nails where you made the marks.
  6. Attach the slats to the frame using screws or nails, making sure they are flush with the top of the frame.

Securing the Seating

To ensure that your wooden patio bench is sturdy and safe for sitting, you’ll need to secure the seating. Here’s how:

  1. Turn the bench over so that it is resting on the legs.
  2. Cut two pieces of wood to fit between the legs, one at the front of the bench and one at the back.
  3. Pre-drill holes in the wood where it will be attached to the legs.
  4. Attach the wood to the legs using screws or nails.
  5. Cut two more pieces of wood to fit between the front and back pieces, one on each side.
  6. Pre-drill holes in the wood where it will be attached to the front and back pieces.
  7. Attach the side pieces to the front and back pieces using screws or nails.

Congratulations, you have now completed your wooden patio bench!

Finishing Touches

Once you have completed building your wooden patio bench, it’s time to add the finishing touches to make it look polished and professional. This section will cover the final steps of sanding, painting, and finishing your bench.

Sanding

Before you start painting or staining your bench, it’s important to sand it down to ensure a smooth and even surface. Use a medium-grit sandpaper to remove any rough spots or imperfections. Then, switch to a fine-grit sandpaper to achieve a smooth finish.

To save time, you can use an orbital sander to sand down your bench. However, be sure to pay extra attention to the edges and corners to avoid over-sanding.

Painting and Finishing

Once you have sanded your bench, it’s time to paint or stain it. You can choose to paint your bench in a solid color or use a stain to highlight the natural beauty of the wood.

Before you start painting or staining, be sure to protect your work area with a tarp or drop cloth. Then, use a paintbrush or roller to apply the paint or stain evenly to the surface of your bench. Apply multiple coats as needed, allowing each coat to dry completely before applying the next.

To add an extra layer of protection to your bench, you can apply a clear coat of polyurethane or varnish. This will help protect your bench from the elements and keep it looking great for years to come.

With these finishing touches, your wooden patio bench is now complete and ready to enjoy.