Tag Archives: seek medical attention immediately

How to Clean Wood Cabinets with Murphy's Oil Soap: A Step-by-Step Guide

How to Clean Wood Cabinets with Murphy's Oil Soap: A Step-by-Step Guide

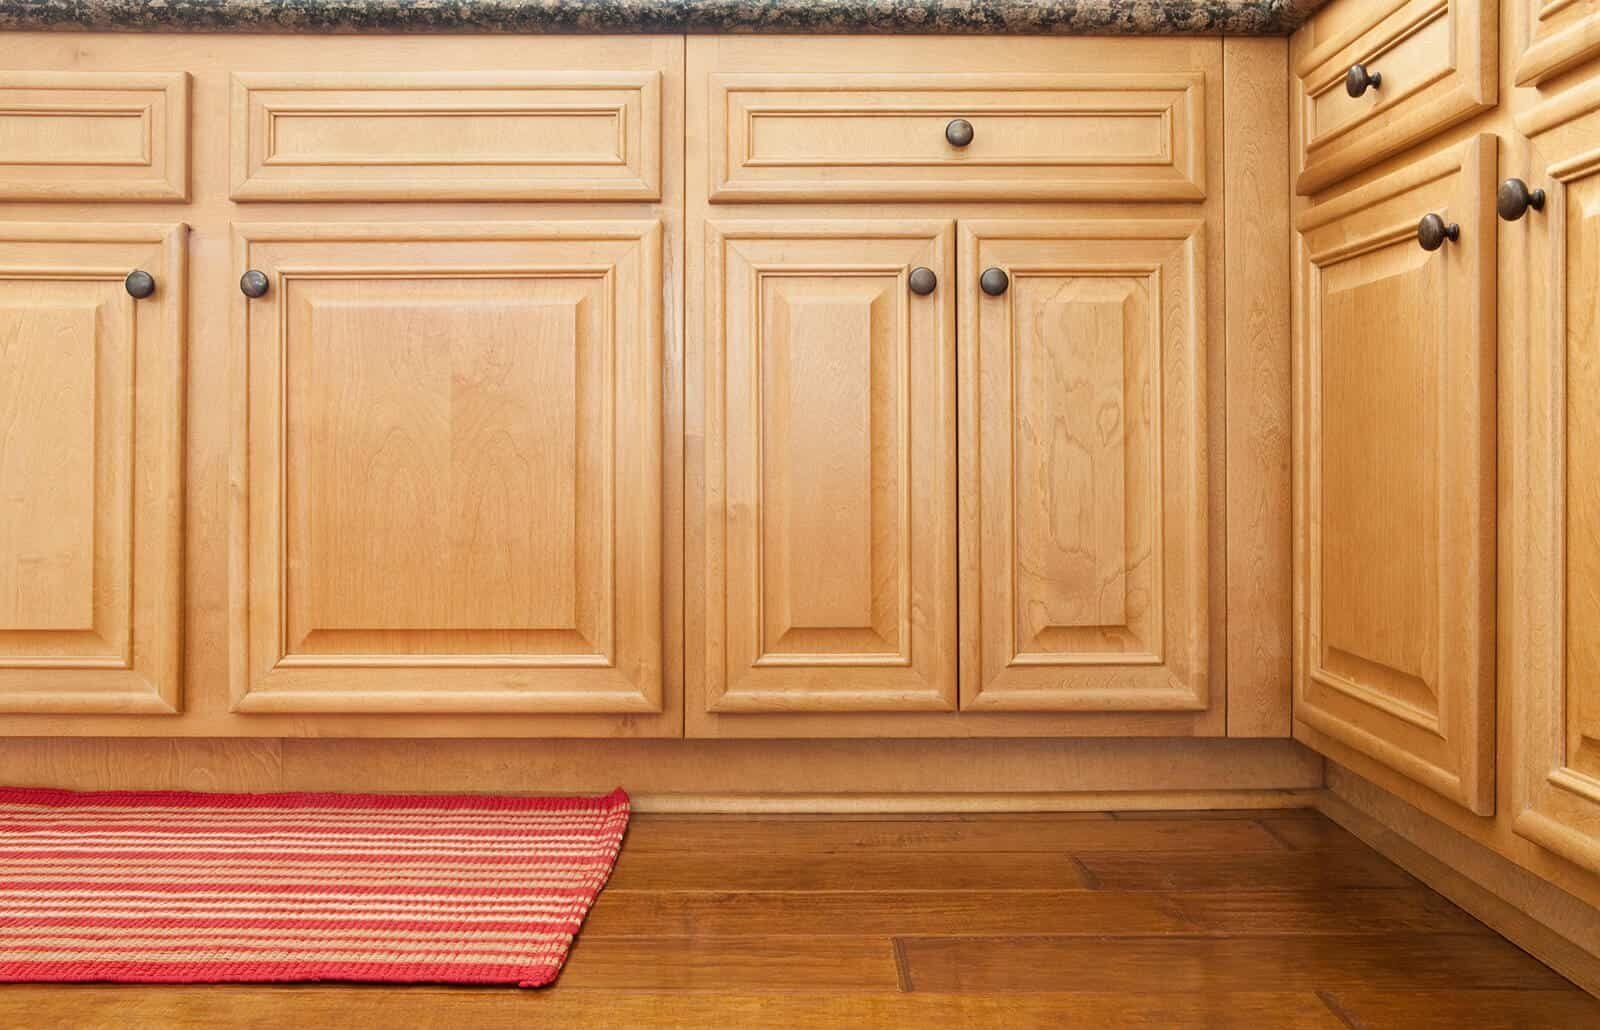
Cleaning wood cabinets is an essential part of maintaining their beauty and prolonging their life. However, with so many cleaning products available in the market, it can be difficult to know which one is best for your cabinets. One popular option is Murphy’s oil soap, a natural and effective cleaner that can remove grime, grease, dirt, and layers of food from your wood cabinets without damaging them.

If you’re wondering how to clean wood cabinets with Murphy’s oil soap, you’ve come to the right place. In this article, we’ll provide you with step-by-step instructions on how to use this product to restore your cabinets to their former glory. We’ll also share some helpful tips and tricks to make the process easier and more effective. Whether you’re a seasoned cleaner or a beginner, you’ll find everything you need to know about cleaning wood cabinets with Murphy’s oil soap in this article.

Understanding Murphy’s Oil Soap

understanding-murphys-oil-soap-scaled-1

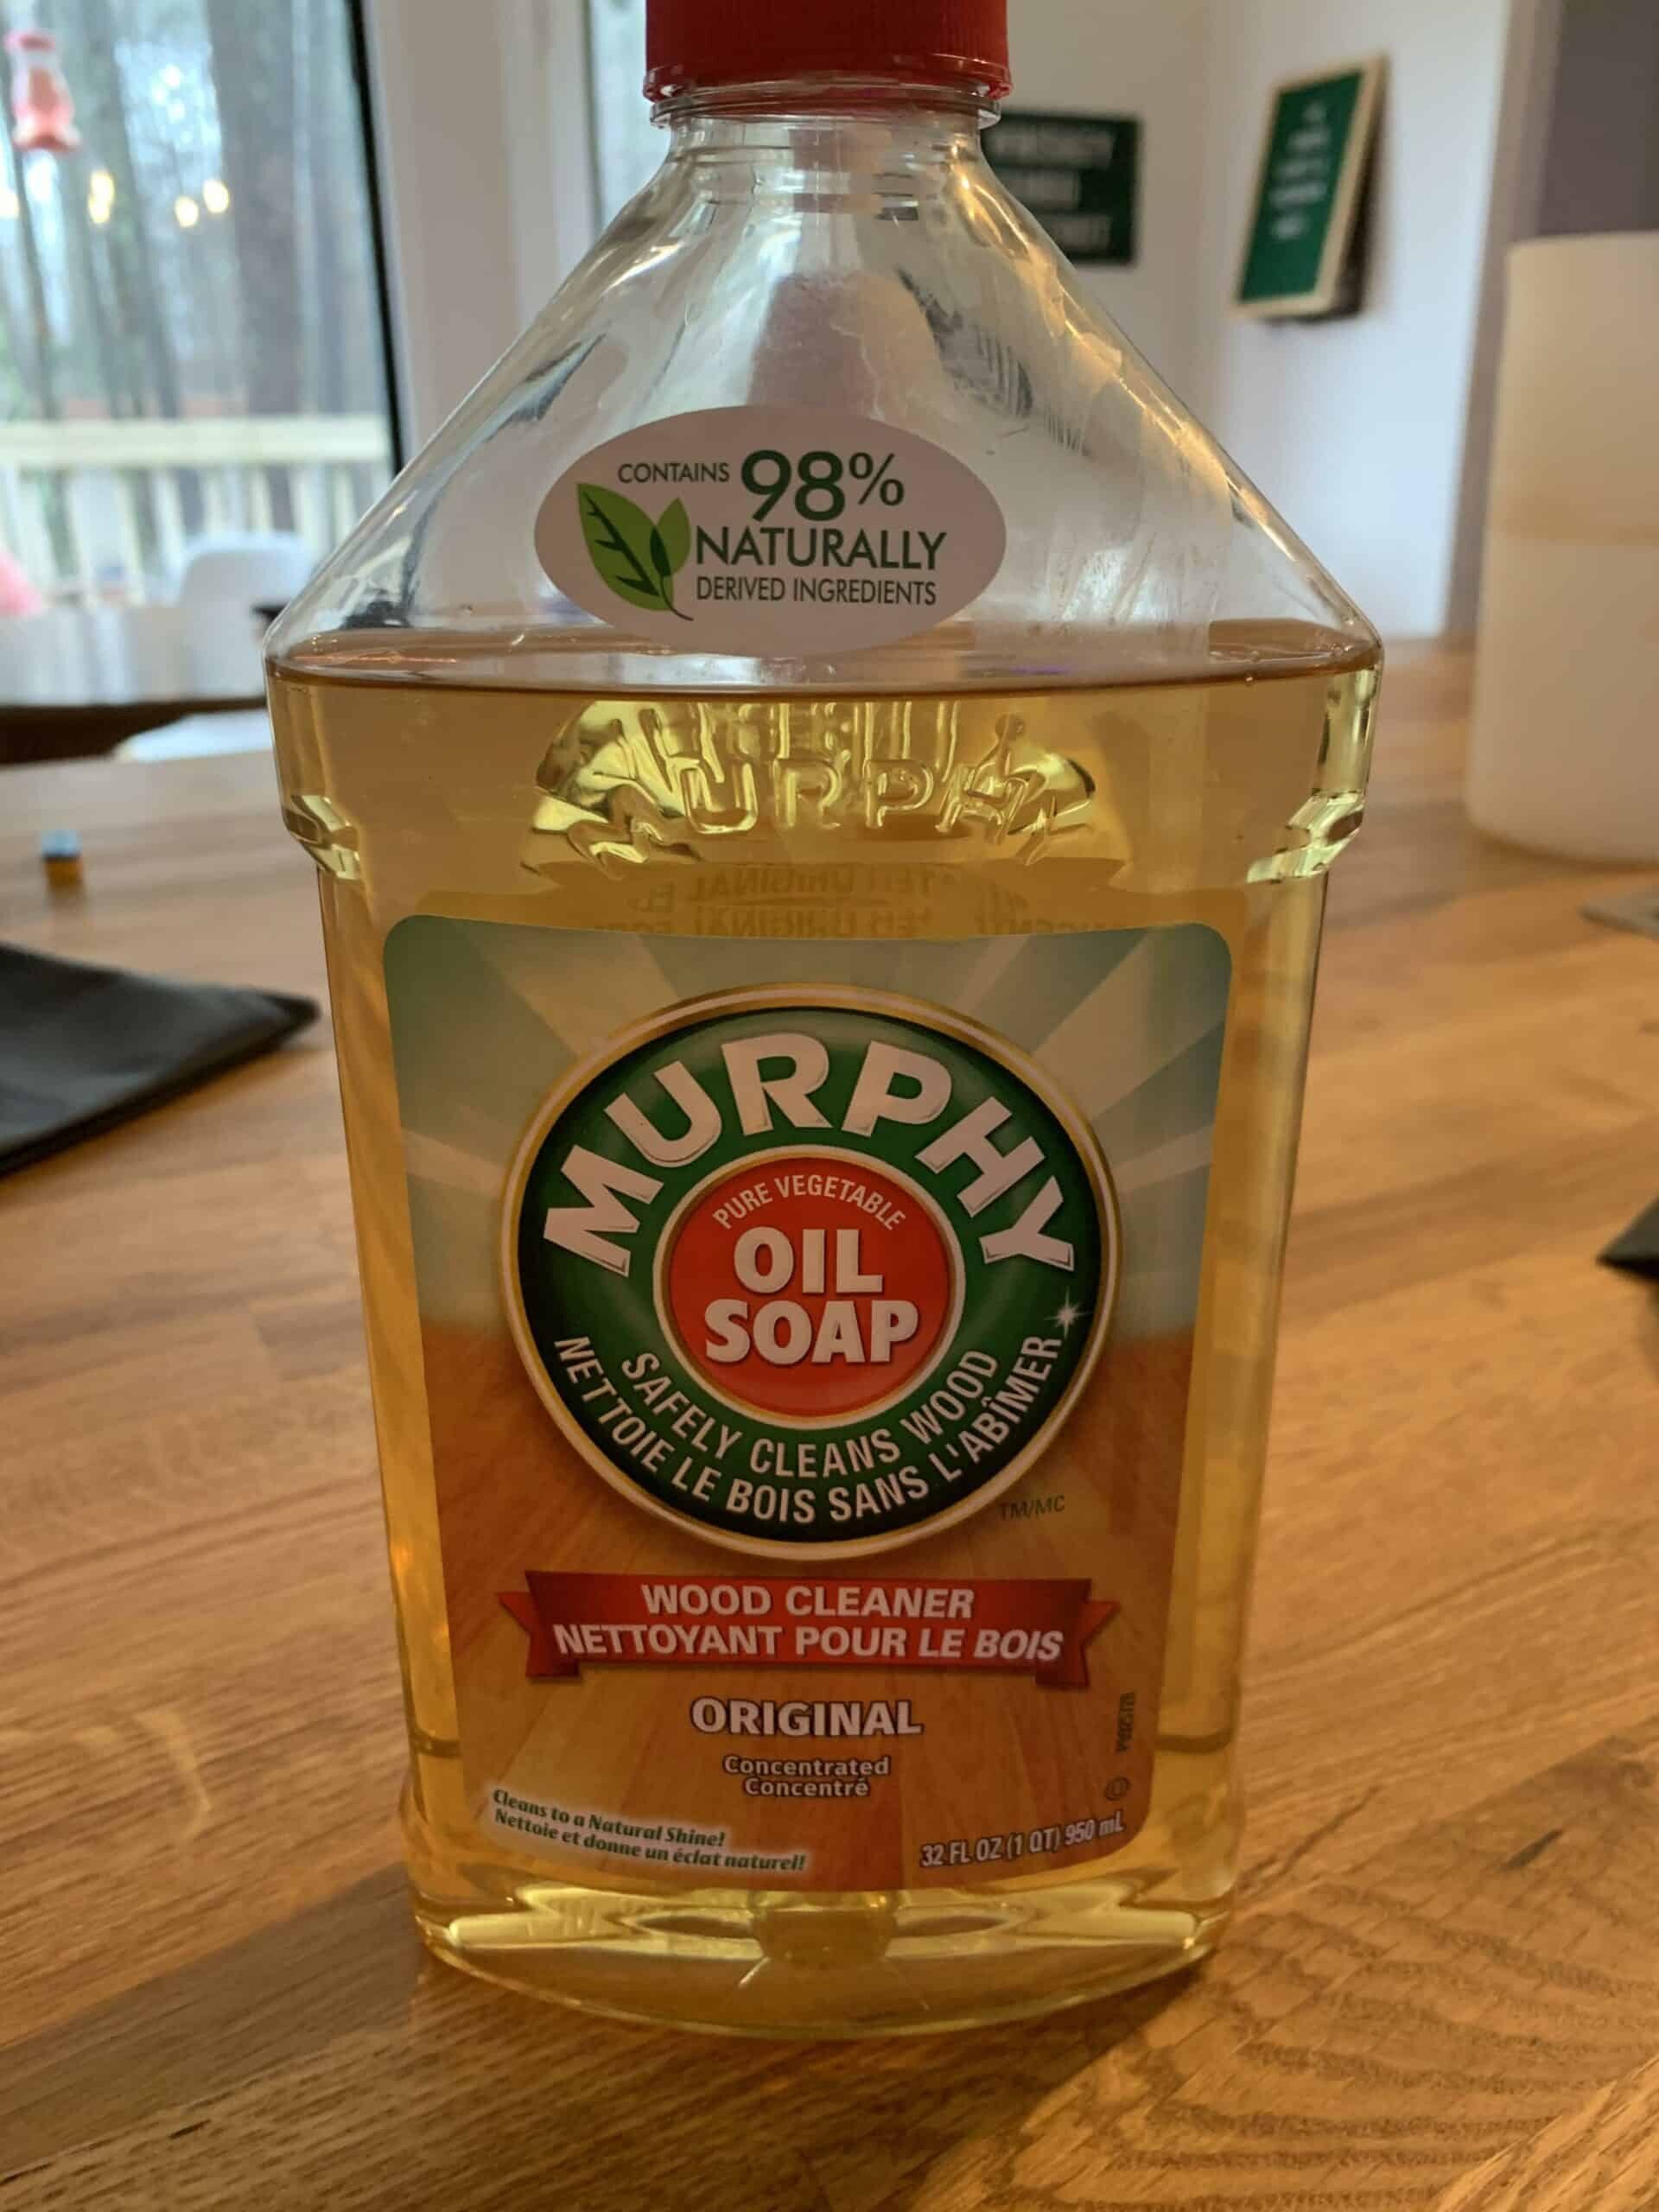
Murphy’s Oil Soap is a popular cleaning product for wood cabinets. It is a versatile cleaner that can be used on various surfaces, including wood, tile, and laminate. This soap is made from natural ingredients, such as vegetable oil and coconut oil. It is also free from harsh chemicals, making it a safe option for cleaning your cabinets.

When using Murphy’s Oil Soap, it is essential to follow the instructions carefully. Dilute the soap with water to the recommended ratio, usually 1/4 cup of soap to one gallon of water. Using too much soap can leave a residue on your cabinets, which can attract dust and dirt.

Before applying the soap, remove any loose dirt or debris from your cabinets. You can use a soft-bristled brush or a microfiber cloth to do this. Then, dip your cloth or sponge in the soapy water and wring it out to remove excess water. Gently wipe your cabinets with the cloth, making sure to cover all areas.

After cleaning, rinse your cabinets with clean water to remove any remaining soap residue. Dry your cabinets with a clean, dry cloth to prevent water stains.

Murphy’s Oil Soap is an excellent choice for cleaning your wood cabinets, but it is not suitable for all types of wood. Avoid using it on unfinished or waxed wood, as it can damage the surface. Always test a small, inconspicuous area before using the soap on your entire cabinet to ensure it does not cause any damage.

In summary, Murphy’s Oil Soap is a natural and safe option for cleaning your wood cabinets. Dilute the soap with water, remove loose dirt and debris, gently wipe your cabinets with the soapy water, rinse with clean water, and dry with a clean cloth. Remember to test a small area before using the soap on your entire cabinet.

Preparation Before Cleaning

Before you start cleaning your wood cabinets with Murphy’s Oil Soap, you need to prepare a few things. Here are some helpful tips to ensure that you have everything you need to get started:

  1. Gather Materials: You will need two large buckets, one for the soapy water and the other for clean water. You will also need a sponge or cloth to apply the soap and a dry cloth to wipe away excess water.
  2. Remove Items: Clear out all items from the cabinets to make sure you have easy access to all surfaces. This will also prevent any items from getting damaged or wet during the cleaning process.
  3. Test a Small Area: Before cleaning the entire cabinet, test a small area first. This will ensure that the soap does not damage the wood or finish.
  4. Follow Manufacturer’s Instructions: Be sure to read and follow the manufacturer’s instructions on the bottle of Murphy’s Oil Soap. This will help you determine the correct ratio of soap to water and ensure that you are using the product correctly.
  5. Protect Surrounding Areas: Cover any nearby surfaces or floors with a towel or drop cloth to protect them from any drips or spills during the cleaning process.

By following these simple steps, you will be ready to clean your wood cabinets with Murphy’s Oil Soap and restore their natural beauty.

Cleaning Wood Cabinets with Murphy’s Oil Soap

If you have wood cabinets in your home, you know how important it is to keep them clean and looking their best. Murphy’s Oil Soap is a great option for cleaning your wood cabinets, as it is gentle yet effective. Here’s how you can use Murphy’s Oil Soap to clean your wood cabinets.

Gathering Necessary Tools

Before you begin cleaning your wood cabinets with Murphy’s Oil Soap, you’ll need to gather a few necessary tools. Here’s what you’ll need:

  • Murphy’s Oil Soap
  • Warm water
  • Two buckets
  • A soft cloth or sponge
  • A dry towel

Applying the Soap

Once you have all your tools gathered, it’s time to apply the soap. Follow these steps:

  1. Fill one bucket with water and add Murphy’s Oil Soap. Check the instructions on the product to be sure of the ratio of water to soap.
  2. Use warm water because it will break up oil and help get rid of dirt.
  3. Fill your other bucket with clean, warm water.
  4. Dip your cloth or sponge into the bucket with the soap mixture, and wring it out so it’s not dripping wet.
  5. Begin wiping down your cabinets with the soapy cloth or sponge, making sure to get into all the nooks and crannies.
  6. Don’t forget to clean the handles and knobs of your cabinets too.

Wiping and Drying

After you’ve applied the soap, it’s time to wipe and dry your cabinets. Follow these steps:

  1. Dip your cloth or sponge into the bucket with clean, warm water, and wring it out so it’s not dripping wet.
  2. Wipe down your cabinets with the clean cloth or sponge to remove any soap residue.
  3. Dry your cabinets with a dry towel to prevent any water spots or damage to the wood.

And that’s it! With these simple steps, you can use Murphy’s Oil Soap to clean your wood cabinets and keep them looking their best.

Maintaining Wood Cabinets

maintaining-wood-cabinets

Once you’ve cleaned your wood cabinets with Murphy’s Oil Soap, it’s important to maintain them properly to keep them looking their best. Here are some tips to help you:

1. Avoid Harsh Chemicals

Avoid using harsh chemicals or abrasive cleaners on your wood cabinets, as they can damage the finish and cause discoloration. Instead, stick to gentle cleaners like Murphy’s Oil Soap or a mixture of warm water and vinegar.

2. Clean Up Spills Immediately

If you spill something on your wood cabinets, clean it up immediately to prevent staining and damage. Use a damp cloth and a mild cleaner to gently wipe away the spill.

3. Use Coasters and Placemats

To prevent scratches and water damage, use coasters and placemats on your wood cabinets. This will help protect the surface from heat, moisture, and scratches caused by dishes and glasses.

4. Dust Regularly

Dust your wood cabinets regularly to prevent the buildup of dirt and grime. Use a soft cloth or microfiber duster to gently wipe away dust and debris.

5. Polish Occasionally

To keep your wood cabinets looking shiny and new, polish them occasionally with a high-quality furniture polish. Be sure to follow the manufacturer’s instructions carefully and avoid using too much polish, as it can leave a sticky residue.

By following these simple tips, you can keep your wood cabinets looking beautiful for years to come.

Safety Precautions When Using Murphy’s Oil Soap

Cleaning your wood cabinets with Murphy’s Oil Soap is a great way to keep them looking clean and fresh. However, it’s important to use the product safely to avoid any accidents or damage to your cabinets. Here are some safety precautions you should keep in mind when using Murphy’s Oil Soap:

1. Read the Label

Before using Murphy’s Oil Soap, make sure to read the label carefully. The label will provide you with important information about how to use the product safely and effectively. Pay attention to any warnings or precautions listed on the label.

2. Wear Gloves

Murphy’s Oil Soap can be harsh on your skin, so it’s important to wear gloves when using it. Rubber gloves are the best option, as they will protect your hands from the soap and any dirt or grime you may be cleaning off your cabinets.

3. Test on a Small Area

Before using Murphy’s Oil Soap on your entire cabinet, test it on a small, inconspicuous area first. This will allow you to make sure that the soap is safe for your cabinets and won’t cause any damage or discoloration.

4. Don’t Use Too Much Water

When cleaning your cabinets with Murphy’s Oil Soap, be careful not to use too much water. Too much water can cause warping or damage to your cabinets. Instead, use a lightly damp cloth or sponge to apply the soap, and wring out any excess water before using it on your cabinets.

5. Keep Out of Reach of Children and Pets

Murphy’s Oil Soap should be kept out of reach of children and pets. Store the product in a safe, secure location where it cannot be accidentally ingested or spilled. If swallowed, seek medical attention immediately.

By following these safety precautions, you can safely and effectively clean your wood cabinets with Murphy’s Oil Soap, keeping them looking beautiful for years to come.

When to Seek Professional Help

Cleaning your wood cabinets with Murphy’s oil soap is a simple task that you can do on your own. However, there are some situations where it may be best to seek professional help. Here are some instances where you may want to consider hiring a professional:

The Cabinets Are Extremely Dirty or Stained

If your cabinets are extremely dirty or stained, it may be difficult for you to clean them effectively on your own. In some cases, you may even make the situation worse by using the wrong cleaning products or techniques. A professional cleaner will have the experience and knowledge to properly clean your cabinets and remove any stubborn stains.

The Cabinets Have Sustained Water Damage

Water damage can cause serious problems for wood cabinets. If your cabinets have sustained water damage, it is important to address the issue as soon as possible to prevent further damage. A professional cleaner will be able to assess the damage and determine the best course of action to repair or replace the affected cabinets.

You Are Not Comfortable Cleaning the Cabinets Yourself

If you are not comfortable cleaning your wood cabinets yourself, it may be best to hire a professional. This is especially true if you have expensive or antique cabinets that require special care. A professional cleaner will have the necessary skills and equipment to clean your cabinets safely and effectively.

In any of these situations, it is important to choose a reputable and experienced professional cleaner. Look for someone who specializes in cleaning wood cabinets and has positive reviews from previous customers. By hiring a professional, you can ensure that your cabinets are cleaned properly and maintain their beauty for years to come.

Frequently Asked Questions

What is the best way to clean wood cabinets?

The best way to clean wood cabinets is to use a gentle cleaner that is specifically designed for wood. Murphy’s Oil Soap is a great option because it is gentle and effective. To clean your wood cabinets, mix warm water with Murphy’s Oil Soap and use a soft cloth or sponge to gently wipe down the surfaces. Be sure to avoid using abrasive sponges or harsh chemicals, as these can damage the wood and its finish.

How do you make wood cabinets shine?

To make your wood cabinets shine, you can use a furniture polish or wax. However, it is important to choose a product that is specifically designed for wood and to avoid using products that contain silicone, which can leave a residue on the surface of the wood. Alternatively, you can use a mixture of warm water and vinegar to clean your wood cabinets, which can help to remove dirt and grime and leave the surface looking shiny and clean.

What type of oil is best for wood cabinets?

When it comes to oiling wood cabinets, it is important to choose an oil that is specifically designed for use on wood. Mineral oil is a great option because it is safe, natural, and effective. To oil your wood cabinets, simply apply a small amount of mineral oil to a soft cloth and rub it into the surface of the wood. Be sure to wipe away any excess oil with a clean cloth to avoid leaving a residue.

Is Murphy’s Oil Soap safe for painted cabinets?

Murphy’s Oil Soap is safe for painted cabinets, but it is important to use it correctly to avoid damaging the paint. To clean painted cabinets, mix warm water with Murphy’s Oil Soap and use a soft cloth or sponge to gently wipe down the surfaces. Be sure to avoid using abrasive sponges or harsh chemicals, as these can damage the paint. Additionally, be sure to rinse the cabinets thoroughly with clean water after cleaning to avoid leaving a soapy residue.

How do you clean sticky wood kitchen cabinets?

To clean sticky wood kitchen cabinets, mix warm water with Murphy’s Oil Soap and use a soft cloth or sponge to gently wipe down the surfaces. If the cabinets are particularly sticky, you can add a small amount of baking soda to the mixture to help break down the grime. Be sure to avoid using abrasive sponges or harsh chemicals, as these can damage the wood and its finish.

Do you need to rinse off Murphy’s Oil Soap after cleaning wood cabinets?

Yes, it is important to rinse off Murphy’s Oil Soap after cleaning wood cabinets to avoid leaving a soapy residue. After cleaning, rinse the cabinets thoroughly with clean water and then dry them with a clean cloth. This will help to ensure that your cabinets are clean and free from any residue that could attract dirt and grime.

Will Super Glue Work on Wood? A Comprehensive Guide to Using Super Glue on Different Types of Wood

Will Super Glue Work on Wood? A Comprehensive Guide to Using Super Glue on Different Types of Wood

Are you wondering if super glue will work on wood? The answer is yes, super glue can be used on wood for a variety of projects. However, it’s important to keep in mind that not all types of wood will bond well with super glue, and there are some best practices to follow to ensure a strong and lasting bond.

Super glue, also known as cyanoacrylate glue, is a fast-drying adhesive that can bond quickly and securely to a variety of materials, including wood. It’s a popular choice for DIY projects and small repairs because of its ease of use and ability to bond quickly. However, when using super glue on wood, it’s important to choose the right type of glue and to prepare the wood surface properly to ensure a strong bond.

Understanding Super Glue

Super glue, also known as cyanoacrylate glue, is a fast-drying adhesive that can be used on a variety of surfaces, including wood. It is a popular choice for DIY projects because it is easy to use and creates a strong bond quickly.

When using super glue on wood, it is important to understand how it works. Super glue works by creating a chemical reaction with moisture. This means that the glue will dry faster in humid environments. If you are working in a dry environment, you may need to add a small amount of water to the wood to help the glue bond properly.

Super glue is not recommended for use on large surfaces or load-bearing joints. It is best used for small projects or for attaching small pieces of wood together. For larger projects, it is recommended to use wood glue or another type of adhesive that is designed for use on wood.

It is important to note that super glue can be difficult to remove if it gets on your skin or other surfaces. To avoid this, it is recommended to wear gloves and work in a well-ventilated area.

Overall, super glue can be a useful tool for woodworking projects, but it is important to understand its limitations and use it appropriately.

Basics of Wood Material

basics-of-wood-material

When it comes to woodworking, understanding the basics of wood material is essential. Wood is a natural material that comes in different types, each with its unique characteristics. Here are some of the basics you need to know:

Types of Wood

There are two main types of wood: hardwood and softwood. Hardwood comes from deciduous trees like oak and maple, while softwood comes from coniferous trees like pine and spruce. Hardwood is generally more expensive than softwood, but it’s also more durable and has a more attractive appearance.

Wood Grain

The grain of wood refers to the pattern of lines and fibers on the surface of the wood. The grain can be straight, wavy, or curly, depending on the type of wood. Understanding the grain is important when cutting and shaping wood, as it affects the strength and appearance of the final product.

Moisture Content

The moisture content of wood refers to the amount of water in the wood. Wood that is too dry or too wet can cause problems when working with it. For example, wood that is too dry can split and crack, while wood that is too wet can shrink and warp.

Wood Density

The density of wood refers to how much it weighs per unit of volume. Dense woods like oak and maple are harder and more durable than less dense woods like pine and spruce. The density of wood also affects its ability to hold screws and nails.

By understanding the basics of wood material, you can choose the right type of wood for your project and work with it effectively.

Super Glue on Wood: Does it Work?

super-glue-on-wood-does-it-work

Super glue, also known as cyanoacrylate, is a fast-acting adhesive that can bond almost anything together. But does it work on wood? The answer is yes, super glue can be used on wood, but it’s important to understand its limitations.

When using super glue on wood, it’s important to note that it works best on small pieces of wood and not on large surfaces. It’s also not recommended for use on wood that will be exposed to water or other liquids, as the bond may weaken over time.

One of the benefits of using super glue on wood is that it dries quickly, making it ideal for small repairs or projects. It can also be mixed with sawdust to create a custom gap-filling paste for holes and grooves in wooden blocks or pieces of wood.

To ensure a strong bond, it’s important to prepare the surface of the wood before applying the super glue. The surface should be clean and dry, free of any dirt, dust, or debris. Sanding the surface can also help improve the bond.

In summary, super glue can be used on wood, but it’s important to keep in mind its limitations. It’s best used for small repairs or projects and should not be used on wood that will be exposed to water or other liquids. With proper preparation and application, super glue can be a useful tool in your woodworking arsenal.

Factors Influencing Super Glue Effectiveness

factors-influencing-super-glue-effectiveness

When it comes to bonding wood with super glue, there are several factors that can impact its effectiveness. Here are some of the key things to consider:

Surface Preparation

Before applying super glue to wood, it’s important to ensure that the surface is clean and dry. Any dirt, dust, or moisture on the surface can interfere with the bonding process and weaken the bond. You can use a clean cloth or paper towel to wipe down the surface and remove any debris. If the wood is particularly dirty or greasy, you may need to use a mild detergent to clean it.

Type of Wood

The type of wood you’re working with can also affect the effectiveness of super glue. Some woods, such as oak and maple, are very dense and can be difficult to bond with super glue. Other woods, like pine and cedar, are more porous and may absorb the glue more readily. In general, softer woods tend to bond better with super glue than harder woods.

Joint Design

The design of the joint you’re trying to create can also impact the effectiveness of super glue. Super glue works best when the joint is tight-fitting and there are no gaps between the pieces of wood. If there are gaps, the glue may not be able to penetrate the wood and create a strong bond. In some cases, you may need to use clamps or other tools to hold the pieces of wood together while the glue dries.

Temperature and Humidity

Temperature and humidity can also affect the bonding process. Super glue works best in warm, dry conditions. If the temperature is too cold or the humidity is too high, the glue may take longer to dry or may not bond as strongly. You may need to wait longer for the glue to dry or use a different adhesive if the conditions are not ideal.

By taking these factors into consideration, you can increase the effectiveness of super glue when bonding wood. Keep in mind that super glue is not always the best choice for every project, so be sure to consider the specific needs of your project before choosing an adhesive.

Ideal Conditions for Using Super Glue on Wood

ideal-conditions-for-using-super-glue-on-wood

When using super glue on wood, there are certain conditions that need to be met to ensure a strong bond. Here are some ideal conditions for using super glue on wood:

Clean and Dry Surface

Before applying super glue, make sure the surface of the wood is clean and dry. Any dirt, dust, or moisture can weaken the bond between the glue and the wood. Use a clean cloth to wipe the surface and let it dry completely before applying the glue.

Smooth Surface

Super glue works best on smooth surfaces. If the surface of the wood is rough or uneven, the glue may not adhere properly. Sand the surface of the wood to make it smooth before applying the glue.

Proper Amount of Glue

Using too little or too much glue can affect the strength of the bond. Apply a thin layer of glue to one surface and press the two surfaces together firmly. Avoid using too much pressure as it can cause the glue to spread out and weaken the bond.

Ideal Temperature and Humidity

Super glue works best at room temperature and in low humidity conditions. High humidity can cause the glue to cure too quickly, while low humidity can cause it to take longer to cure. Avoid using super glue in extreme temperatures or humidity levels.

Use with Caution

Super glue can be harmful if it comes in contact with skin or eyes. Use with caution and wear gloves to protect your skin. If the glue gets on your skin, wash it off immediately with soap and water. If it gets in your eyes, seek medical attention immediately.

By following these ideal conditions, you can ensure a strong bond between super glue and wood.

Alternatives to Super Glue for Wood

alternatives-to-super-glue-for-wood

While super glue can be a quick fix for bonding wood, it may not always be the best option. Here are some alternatives to consider:

Wood Glue

Wood glue is specifically designed for woodworking projects and is a great alternative to super glue. It creates a strong bond between two pieces of wood and dries clear, making it perfect for furniture repairs or other woodworking projects. Plus, it’s easy to sand and paint over once it’s dry.

Epoxy Glue

Epoxy glue is a two-part adhesive that creates a very strong and permanent bond. It’s perfect for bonding wood to other materials and can also be used for filling in gaps or cracks in wood. However, it takes longer to dry than super glue or wood glue, so be prepared to wait a bit before moving on to the next step of your project.

Construction Adhesive

Construction adhesive is a heavy-duty adhesive that can be used for bonding wood to other materials, such as metal or concrete. It creates a strong and permanent bond and is ideal for projects that require a lot of strength and durability. However, it’s not as easy to work with as wood glue or super glue, so make sure you have some experience working with adhesives before using it.

PVA Glue

PVA glue works similarly to wood glue and is great for bonding wood to wood. It’s easy to work with, dries clear, and can be sanded and painted over once it’s dry. However, it’s not as strong as some of the other alternatives listed above, so it may not be the best option for heavy-duty projects.

Overall, there are many alternatives to super glue for bonding wood. Consider the strength, drying time, and ease of use when choosing the right adhesive for your project.

Safety Measures When Using Super Glue on Wood

safety-measures-when-using-super-glue-on-wood

When using super glue on wood, it is important to take some safety measures to avoid accidents and ensure the best results. Here are some tips to help you use super glue safely on wood:

1. Wear Protective Gear

Super glue is a strong adhesive that can bond skin and other surfaces together. To avoid accidentally gluing your fingers or other body parts together, it is recommended to wear protective gear such as gloves and safety glasses.

2. Work in a Well-Ventilated Area

Super glue fumes can be harmful if inhaled. To avoid any respiratory problems, it is important to work in a well-ventilated area. Open windows or turn on a fan to circulate the air in the room.

3. Avoid Contact with Skin

If super glue comes in contact with your skin, it can cause irritation or even burn your skin. If this happens, do not try to pull the skin apart, as it can cause more damage. Instead, soak the affected area in warm soapy water and gently peel the skin apart.

4. Use the Right Amount of Glue

Using too much or too little glue can affect the bonding strength and the appearance of the final product. Use a small amount of glue and apply it evenly on the surface to be bonded.

5. Store Super Glue Properly

Super glue can dry out quickly if not stored properly. Keep the glue in a cool, dry place and tightly close the lid after each use.

By following these safety measures, you can use super glue on wood safely and achieve the best results.

Tips for Applying Super Glue on Wood

When applying super glue on wood, there are a few tips you should keep in mind to ensure a successful bond. Here are some tips to help you get the best results:

  • Clean the surface: Before applying the super glue, make sure the surfaces are clean and free of any dirt, dust, or debris. This will help the glue to bond better and create a stronger hold.
  • Apply the glue sparingly: Super glue is a very strong adhesive, and a little goes a long way. Apply the glue sparingly to avoid any excess glue that could drip or seep out of the joint.
  • Use clamps or weights: Super glue bonds quickly, but it takes a little time to fully cure. To ensure a strong bond, use clamps or weights to hold the joint in place until the glue is completely cured.
  • Avoid gaps: Super glue works best when the surfaces are in tight contact with each other. Avoid any gaps between the pieces you are attaching, as this could cause the joint to fail.
  • Mix with sawdust: If you need to fill gaps or holes in the wood, mix the super glue with sawdust to create a wood filler. This will help to fill in any gaps and create a stronger bond.

By following these tips, you can ensure that your super glue bonds to wood properly and creates a strong hold.

Frequently Asked Questions

Can I use super glue on wood trim?

Yes, you can use super glue on wood trim. Super glue is a great adhesive for small repairs on wood trim. However, if you need to bond large pieces of wood trim, you may want to consider a different type of adhesive.

What is the best glue for wood to wood?

The best glue for wood to wood depends on the project. For most woodworking projects, carpenter’s glue is the best choice. It has a strong bond and dries clear. However, if you need a fast-drying adhesive, super glue may be a better option.

How does Gorilla Wood Glue compare to super glue for wood?

Gorilla Wood Glue is a type of carpenter’s glue that is designed specifically for woodworking projects. It has a strong bond and dries clear. Super glue, on the other hand, is a fast-drying adhesive that can be used for small repairs on wood. While both adhesives are effective, Gorilla Wood Glue is a better choice for most woodworking projects.

What is the best super glue for wood?

The best super glue for wood is a cyanoacrylate-based adhesive. It is fast-drying and provides a strong bond. Look for a super glue that is specifically designed for wood, as these adhesives are formulated to bond with the unique properties of wood.

How long does super glue last on wood?

Super glue can last for years on wood if it is applied correctly. However, the exact lifespan of the adhesive will depend on a variety of factors, including the amount of glue used, the type of wood, and the conditions the wood is exposed to.

Is super glue permanent on wood?

Super glue is a permanent adhesive that forms a strong bond with wood. However, it is important to note that super glue is not a good choice for all woodworking projects. For large projects, carpenter’s glue or other types of adhesives may be a better choice.

What's Your Take on Restofinisher Wood Finish Restorer? Our Review

What's Your Take on Restofinisher Wood Finish Restorer? Our Review

Are you tired of seeing your wooden furniture looking dull and faded? Restofinisher claims to be the solution to this problem, restoring your wooden surfaces to their former glory. But does it really work? What are your reviews of the Restofinisher wood finish restorer?

According to some online reviews, Restofinisher can mask minor issues like abrasions, blemishes, and scratches on most wooden surfaces. It comes in a sprayer bottle, making it easy for anyone to work with. Some users claim that it has restored their cabinets, wooden floors, tables, and other wooden surfaces within a few minutes.

However, not all reviews are positive. Some users have reported inconsistencies and a lack of transparency from the company. The Federal Trade Commission has also warned about online shopping fraud and negative reviews being one of the most reported fraud categories. So, before you make a purchase, it’s important to do your research and read reviews from multiple sources.

About Restofinisher Wood Finish Restorer

Image Credit: citizenjournal

If you are looking to restore the original color of your wooden furniture, cabinets, flooring, and other surfaces, Restofinisher Wood Finish Restorer may be a product you want to consider. This product claims to be an ideal solution for bringing back the luster and color of your faded wooden surfaces. Here is what you need to know about Restofinisher Wood Finish Restorer.

Restofinisher is a wood finisher that penetrates wooden surfaces and works on three different finishes: old and faded lacquer, shellac, and varnish. According to the product’s claims, it can restore your wooden surfaces’ original color and luster. The product is also said to be easy to use, requiring only a few minutes of application and wiping off.

However, it is important to note that there are inconsistencies in the product’s claims. Some customers have testified that the product has nothing to do with restoring furniture. It is always advisable to read reviews and gather more information before making a purchase.

Restofinisher Wood Finish Restorer may be a great budget-friendly and time-saving choice if you are looking to restore your wooden surfaces. However, it is always important to do your research and make an informed decision before making a purchase.

Ingredients and Composition

ingredients-and-composition Image Credit: xivents

Restofinisher is a wood finish restorer that claims to work on lacquer, shellac, and most other finishes. According to the manufacturer, it is formulated with a blend of natural oils and other ingredients that penetrate deep into the wood, replenishing its moisture and restoring its natural beauty.

However, it is important to note that Restofinisher does not provide an ingredient list on the bottle. This lack of transparency has raised some concerns among consumers about the safety and effectiveness of the product.

Some users have reported experiencing eye irritation and feeling sick after using Restofinisher. Additionally, the product is inflammable, which means that it should be handled with care.

It is also worth mentioning that Restofinisher has been accused of copying the name of a similar product called “Restor-A-Finish,” which has been on the market for some time. This raises questions about the credibility of the brand and the legitimacy of its claims.

In summary, while Restofinisher claims to be a reliable wood finish restorer, the lack of transparency regarding its ingredients and the safety concerns raised by some users should be taken into consideration before using this product.

Application Process

application-process

Using Restofinisher to restore your wood furniture is a straightforward process that you can easily do at home. Here is a step-by-step guide to applying Restofinisher effectively:

  1. Clean the Surface: Before applying Restofinisher, ensure that the surface is clean and free of dirt, dust, and debris. You can use a soft cloth and a mild cleaner to wipe the surface clean.
  2. Shake the Bottle: Shake the Restofinisher bottle well to ensure that the product is well mixed.
  3. Apply Restofinisher: Apply Restofinisher to the surface using a soft cloth or a brush. Apply the product in a thin and even layer, working with the grain of the wood.
  4. Wait: Allow the Restofinisher to penetrate the wood surface for about 30 minutes. You can leave it for longer if the surface is heavily damaged.
  5. Wipe Off Excess: After allowing the Restofinisher to penetrate the wood surface, wipe off any excess using a clean cloth.
  6. Repeat: If necessary, repeat the application process until you achieve the desired results.

Note: Restofinisher may not work on all types of wood finishes. Test the product on a small, inconspicuous area before applying it to the entire surface.

Restofinisher is a safe and effective way to restore the original color and luster of your wood furniture. Follow the application process carefully, and you will be amazed at the results.

Performance and Results

performance-and-results

When it comes to restoring wooden furniture and surfaces, Restofinisher is a product that claims to do wonders. But does it actually work? Based on our experience, we can say that the performance and results of Restofinisher are mixed.

On the one hand, Restofinisher can indeed restore the color and luster of faded lacquer, shellac, and varnish finishes. It can also penetrate the surface of the wood to repair minor scratches and blemishes. In some cases, the results are impressive, especially if you follow the instructions carefully and apply the product evenly.

However, on the other hand, Restofinisher is not a miracle worker. It cannot fix deep cracks, gouges, or other major damage to the wood. It also cannot change the color of the wood itself, so if you don’t like the original color, Restofinisher won’t help you. Moreover, some customers have reported that Restofinisher did not work at all for them, or even made the problem worse.

In summary, Restofinisher can be a useful tool for restoring the appearance of wooden furniture and fixtures, but it is not a magic potion. You should use it with realistic expectations and test it on a small, inconspicuous area before applying it to the whole piece. If you have major damage or a different color in mind, you may need to consider other options, such as refinishing or painting.

Comparison with Similar Products

comparison-with-similar-products

When it comes to restoring wooden surfaces, there are several products available in the market. Restofinisher is one such product that claims to restore your faded wooden furniture and surfaces. Here is a comparison of Restofinisher with similar products:

Restor-A-Finish

Restor-A-Finish is another popular product that claims to restore the original finish of wooden surfaces. Unlike Restofinisher, it comes in a liquid form and requires a cloth for application. Restor-A-Finish is available in several colors, making it easier to match the color of your furniture. However, Restofinisher comes in a sprayer bottle, making it more convenient to use.

Howard Restor-A-Shine

Howard Restor-A-Shine is a product that is used to restore the shine of wooden surfaces. It is not as effective in masking scratches and blemishes as Restofinisher. However, it does an excellent job of bringing back the shine of dull wooden surfaces. Howard Restor-A-Shine comes in a liquid form and requires a cloth for application.

Minwax Wood Finish Stain Marker

Minwax Wood Finish Stain Marker is a product that is used to touch up scratches and blemishes on wooden surfaces. Unlike Restofinisher, it is not suitable for restoring the entire surface. Minwax Wood Finish Stain Marker comes in several colors, making it easier to match the color of your furniture. However, it requires more effort to use than Restofinisher.

In conclusion, Restofinisher is a unique product that can mask minor issues like abrasions, blemishes, and scratches. It is more convenient to use than other similar products like Restor-A-Finish and Howard Restor-A-Shine. However, if you need to touch up scratches and blemishes on wooden surfaces, Minwax Wood Finish Stain Marker might be a better option.

Safety Measures

When using Restofinisher, it is important to take proper safety measures to avoid any accidents or harm. Here are a few safety tips to keep in mind:

  • Always wear gloves and protective eyewear when using Restofinisher.
  • Work in a well-ventilated area to avoid inhaling any fumes.
  • Keep the product away from open flames or any sources of ignition, as it is flammable.
  • Do not use Restofinisher near children or pets.
  • If ingested, seek medical attention immediately.

It is important to note that Restofinisher is not non-toxic and may cause eye irritation or sickness. Therefore, it is crucial to handle the product with care and follow the instructions carefully.

In case of any accidents or mishaps, seek medical attention right away. It is always better to be safe than sorry when it comes to handling any chemical products.

By taking these safety measures, you can ensure a safe and successful experience with Restofinisher.

Environmental Impact

environmental-impact

When it comes to the environmental impact of Restofinisher, there are a few things to consider. First of all, the product is not advertised as being eco-friendly or sustainable. While it does not contain any VOCs (volatile organic compounds), it does contain some ingredients that can be harmful to the environment.

According to the Restofinisher website, the product is not non-toxic and can cause eye irritation and sickness. It is also flammable, which means it should be used with caution and kept away from heat sources.

While the environmental impact of using Restofinisher may not be ideal, it is worth noting that the product is designed to restore old furniture and surfaces, which can help reduce waste. By breathing new life into old pieces, you can avoid the need to purchase new furniture, which can have a much larger environmental impact.

If you are concerned about the environmental impact of using Restofinisher, there are a few things you can do to minimize your impact. First, make sure to follow the instructions carefully and use the product in a well-ventilated area. It is also important to dispose of any leftover product properly, according to local regulations.

Overall, while Restofinisher may not be the most eco-friendly product on the market, it can still be a useful tool for restoring old furniture and surfaces. By using it responsibly and taking steps to minimize your impact, you can help ensure that your furniture restoration projects are as sustainable as possible.

Customer Feedback

When it comes to buying a product, customer feedback is an essential aspect to consider. Restofinisher claims to restore the color and luster of wooden furniture and surfaces, but what do customers have to say about it?

After researching various sources, it appears that the customer feedback for Restofinisher is mixed. Some customers have reported positive experiences with the product, while others have had negative experiences.

Positive feedback includes customers who have used Restofinisher to restore the look of their wooden furniture and surfaces successfully. They have reported that the product is easy to use and has restored the color and shine of their furniture, making it look new again.

On the other hand, negative feedback includes customers who have reported that Restofinisher did not work as advertised. Some customers have reported that the product did not restore the color and luster of their furniture, and in some cases, it even made the furniture look worse.

Overall, it appears that the effectiveness of Restofinisher may vary depending on the type of furniture or surface being restored. While some customers have reported positive experiences, others have had negative experiences. If you decide to try Restofinisher, it may be a good idea to test it on a small, inconspicuous area first to see how it works on your particular furniture or surface.

Price and Availability

If you’re looking for an affordable and effective wood finish restorer, Restofinisher might be the perfect solution for you. Restofinisher is available for purchase online and in some physical stores. The price of Restofinisher varies depending on the size of the bottle and the seller. On average, a 16 oz. bottle of Restofinisher costs around $20 to $30.

Restofinisher is a great investment for those who want to restore the original beauty of their wooden furniture without spending a lot of money on professional services. It’s a cost-effective solution that can save you a lot of money in the long run. You can use Restofinisher to restore the finish of your wooden furniture, floors, and fixtures without having to replace them.

Restofinisher is a popular product, and you can find it on many online stores, such as Amazon, Home Depot, and Walmart. You can also find it in some physical stores, such as Lowe’s and Home Depot. If you’re not sure where to buy Restofinisher, you can check the official website for a list of authorized sellers.

In summary, Restofinisher is an affordable and effective wood finish restorer that can save you a lot of money in the long run. It’s widely available online and in some physical stores, and you can purchase it for around $20 to $30. If you’re looking for a cost-effective solution to restore the original beauty of your wooden furniture, Restofinisher might be the perfect product for you.

Frequently Asked Questions

Is the Restofinisher wood finish restorer effective?

Restofinisher is a wood finish restorer that has been proven effective in restoring the original color and luster of wooden surfaces. It can repair old and faded lacquer, shellac, and varnish finishes. Many users have reported positive results after using Restofinisher on their wooden furniture and fixtures.

Where can I buy Restofinisher for wood?

Restofinisher is available for purchase on various online platforms, including Amazon and the official Restofinisher website. You can also find it in some hardware stores and home improvement centers.

What are the benefits of using Restofinisher premium wood polish/restorer?

Restofinisher is a premium wood polish and restorer that offers several benefits. It can restore the original color and luster of wooden surfaces, repair scratches, and remove watermarks. It can also protect against heat and water damage, and it is safe to use on all types of wood.

Has anyone tried the Wood finish Restorer as seen on TV?

Many people have tried the Restofinisher wood finish restorer, including those who have seen it advertised on TV. The product has received positive reviews from many users who have reported significant improvements in the appearance of their wooden furniture and fixtures.

How do I use Restofinisher?

To use Restofinisher, first, clean the wooden surface with a damp cloth and let it dry completely. Apply Restofinisher to a clean cloth and rub it onto the wooden surface, following the grain. Allow it to penetrate for a few minutes, then wipe off any excess with a clean cloth. For best results, repeat the process as needed.

What is the price of Restofinisher?

The price of Restofinisher may vary depending on where you purchase it. On average, it costs around $20 to $30 for a 16-ounce bottle. However, it is important to note that the price may be higher or lower depending on the retailer and any promotions or discounts that may be available.